AWS Elastic Beanstalk - Deploy a Sample Java Application (using AWS Management Console)
- Details
- Written by Nam Ha Minh
- Last Updated on 28 October 2023 | Print Email
1. Create an AWS Account
2. Create an IAM User
3. Create New Application
4. Configure Service Access
5. Deploy the Application
6. Access Newly Deployed Application
7. Deploy a New Version
8. Check AWS Related Services
9. Terminate an environment
10. Undeploy the Application
1. Create an AWS Account
You must have an account on Amazon Web Services management portal to begin. Follow this video to create your own AWS account. Note that you must have a legal credit/debit card to sign up with AWS, and you will be charged a small amount (1-2 USD) as account verification. You’ll get this amount back later.Also note that this AWS account is your root user.
2. Create an IAM User
3. Create New Application
Head over to console.aws.amazon.com to sign in as an IAM user with administrative access.Firstly, you need to choose an AWS Region where you want to deploy the application. At the upper-right corner, choose a region, such as US East (Ohio) that has the code us-east-2, as shown below: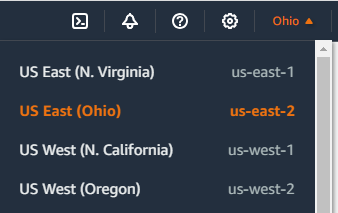 Then go to Elastic Beanstalk console via the menu Services > Compute > Elastic Beanstalk. Then click the Create application button:
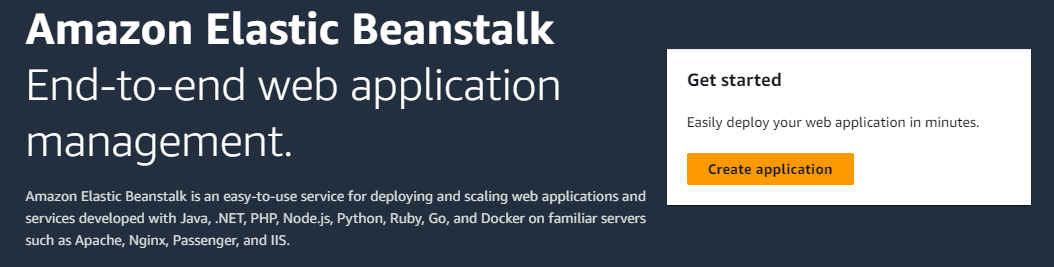 Then you will walk through the deployment process that consists of 6 steps as below:
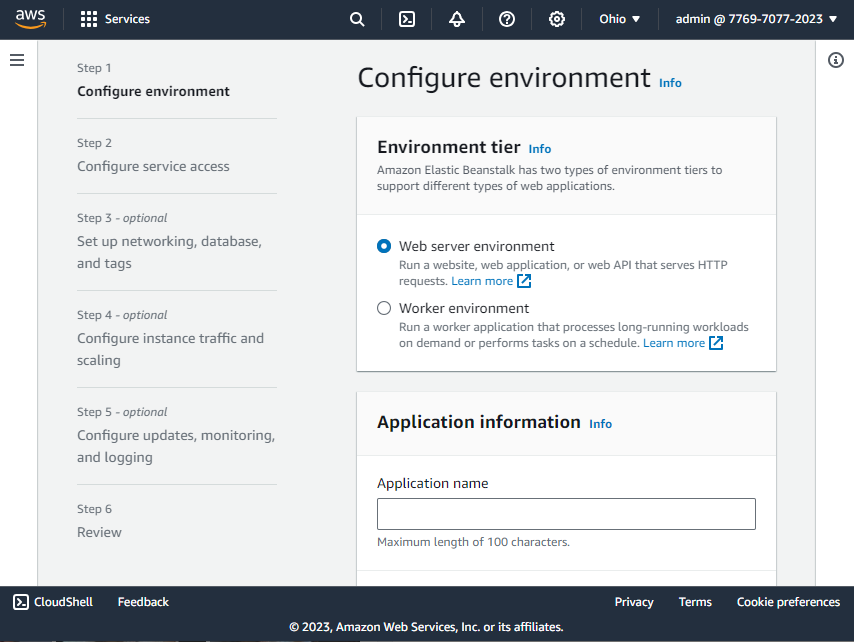 The first two steps are required and the last one is for review. So in the first step, choose Web server environment in the Environment tier section because the application we’re going to deploy is a web one. The Worker environment is for application that is running as a background process.In the Application information section, enter the application name as My Sample Java App.Then it will automatically suggest the environment name as MySampleJavaApp-env. You can enter a different name if you wish.Then in the domain text field, enter a subdomain for the application, e.g. my-sample-java-app. And click the Check availability button:
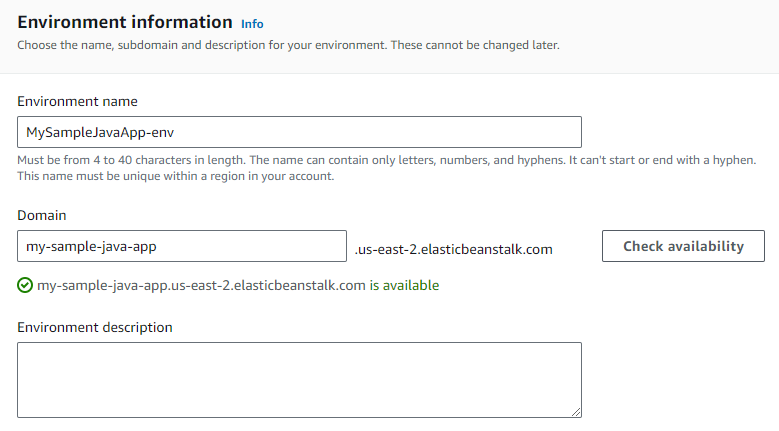 Enter the sub domain name until it says the domain is available.Then in the Platform section, the default platform type is Managed platform. Then choose platform Java, it will automatically select Platform branch and Platform version as below:
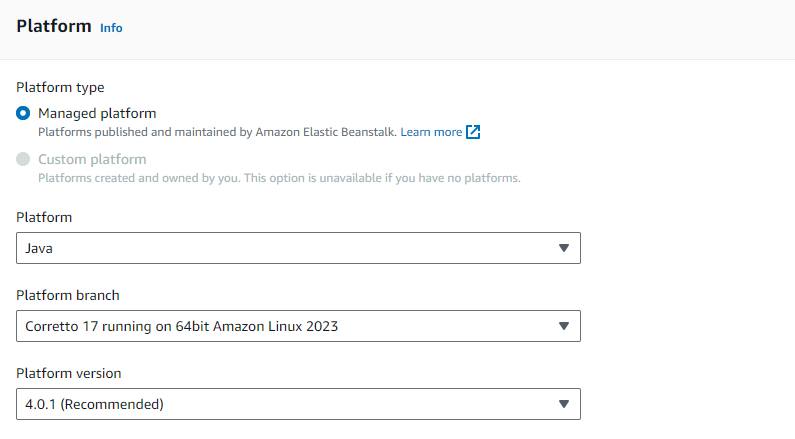 Then in the Application code section, leave the default Sample application option selected. And in the Presets section, leave the Single instance option selected:
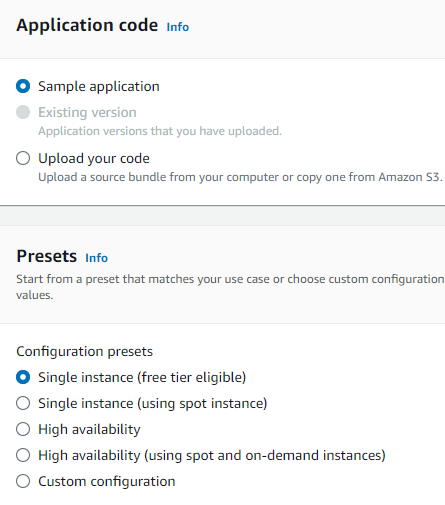 The Single instance option means the application will be running on a single virtual machine (EC2 instance), which is suitable for demo purpose or small application that has low workload.Click Next button to go to the next step.
4. Configure Service Access
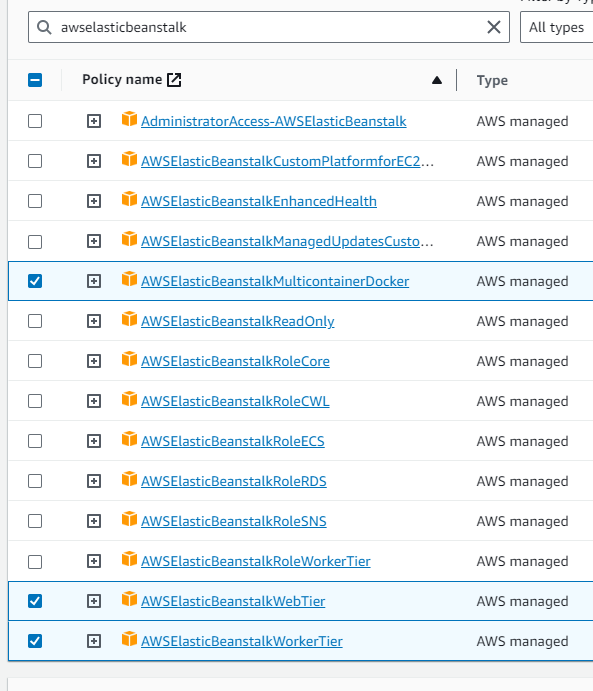
This is an important step that decides whether the deployment successful or not. For the Service role, you can choose Create and use new service role, but for the EC2 instance profile you must manually create one using AWS IAM (Identity and Access Management) console.Open a new tab in your web browser, sign in to AWS management console, then go to Services > Security, Identity, & Compliance > IAM. In the IAM management console, click Roles on the left menu. Then click Create role button.Then on the next page (Selected trusted entity), choose AWS service as Trusted entity type and choose EC2 under the dropdown list Service or use case: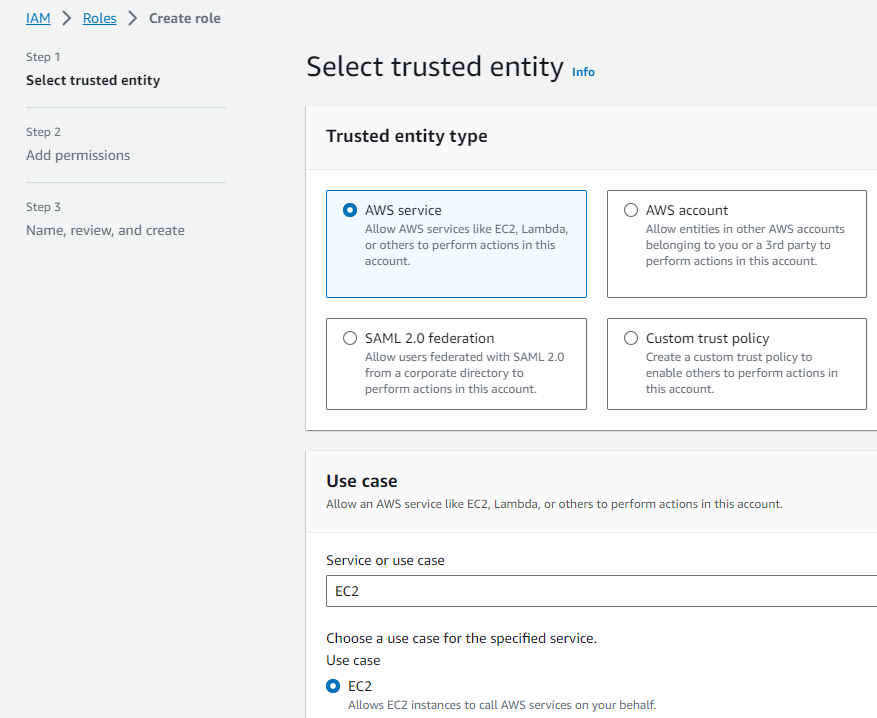 Click Next. Then on the Add permissions page, type awselasticbeanstalk into the search box. Then select 3 policies:
- AWSElasticBeanstalkWebTier
- AWSElasticBeanstalkWorkerTier
- AWSElasticBeanstalkMulticontainerDocker
 Click Next, then enter the role name as aws-elasticbeanstalk-ec2-role on the next page. Click Create role button. It will create the new role as shown below:
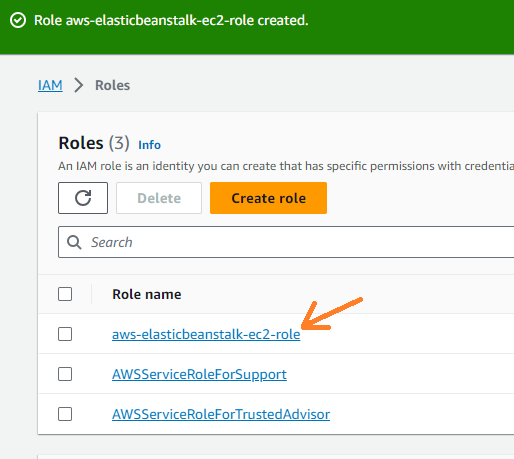 Now, switch to the browser tab that displays the Configure service access page, click the refresh button in the EC2 instance profile section. You will see it selects the newly created role as follows:
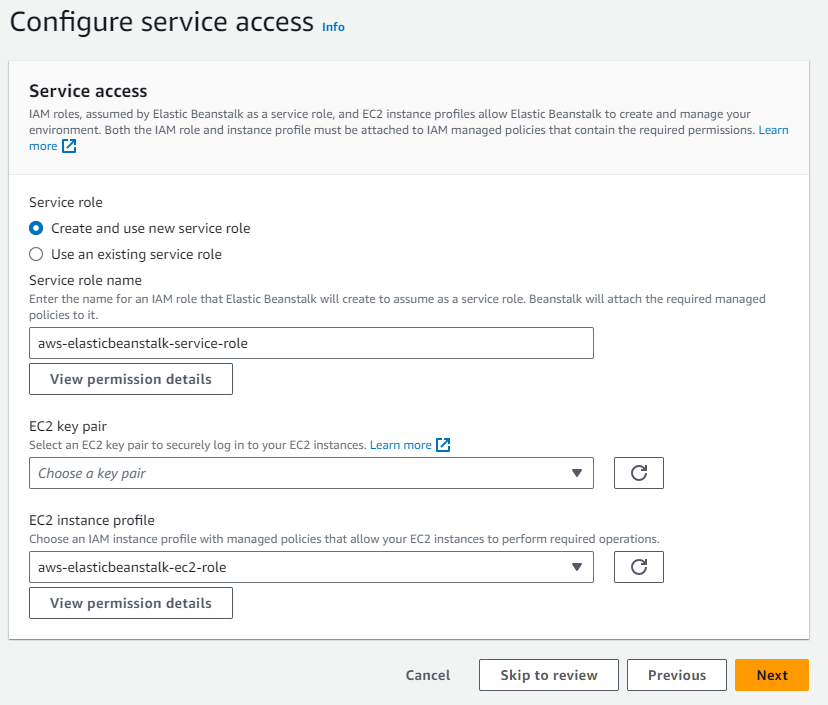 Then you can click Skip to review button because the next 3 steps are optional.
5. Deploy the Application
On the Review page, check all the information. Then click Submit button to start the deployment process. It will take you to the environment page where you see the deployment progress and status: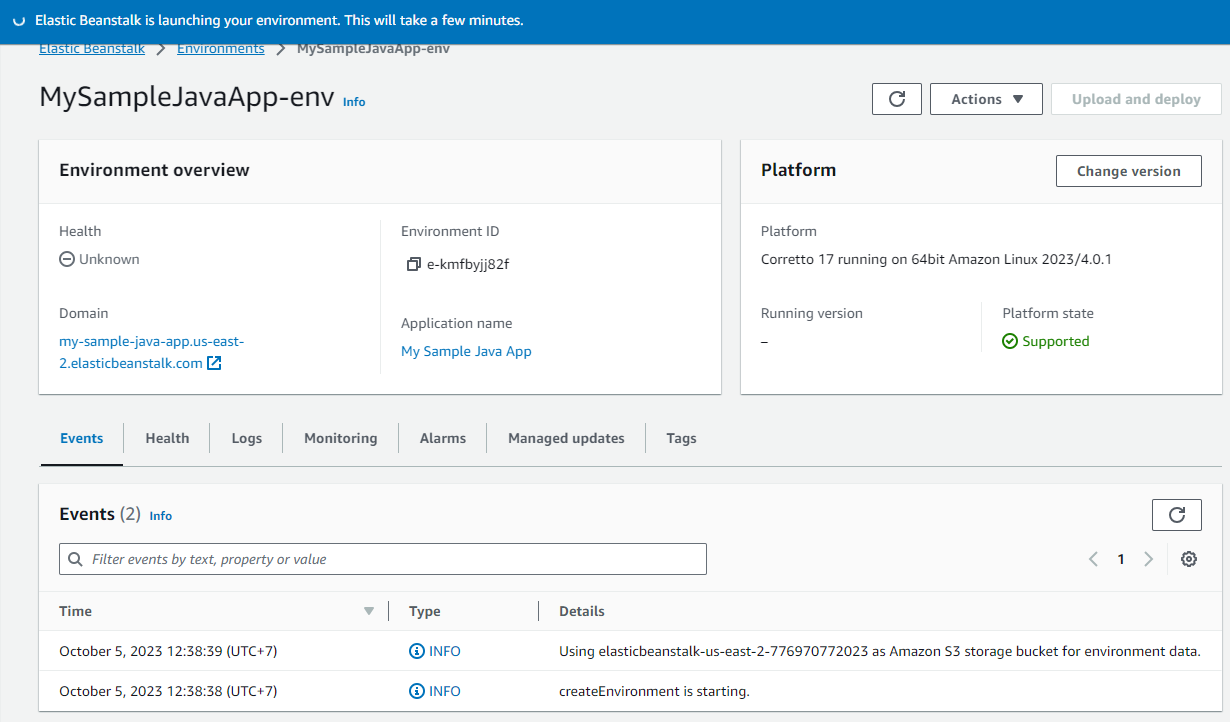 It will take a few minutes for the deployment to complete, and you can see all the details in the Events tab. The events are continuously updated, until you see the message “Environment successfully launched” and the health status is “Ok”, as shown below:
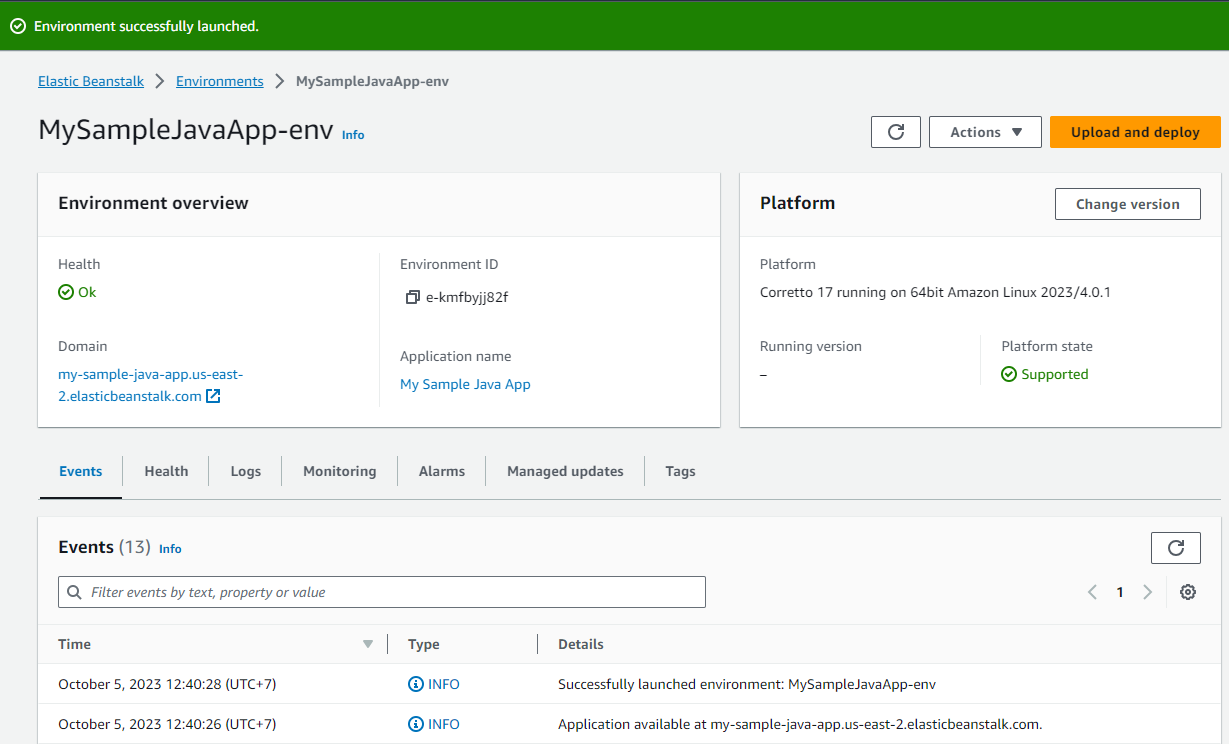 Congratulations! You have deployed your first application on Elastic Beanstalk successfully!
6. Access Newly Deployed Application
On the environment page, under Environment overview section, click the link appears under Domain to open the newly deployed application in a new browser tab: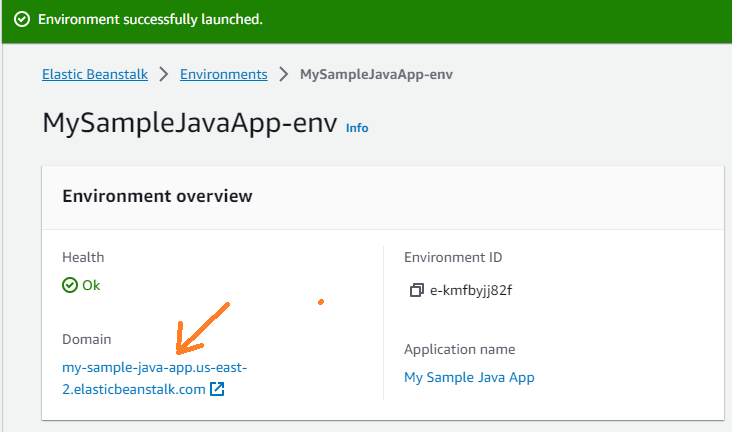 Then you will see the following page appears:
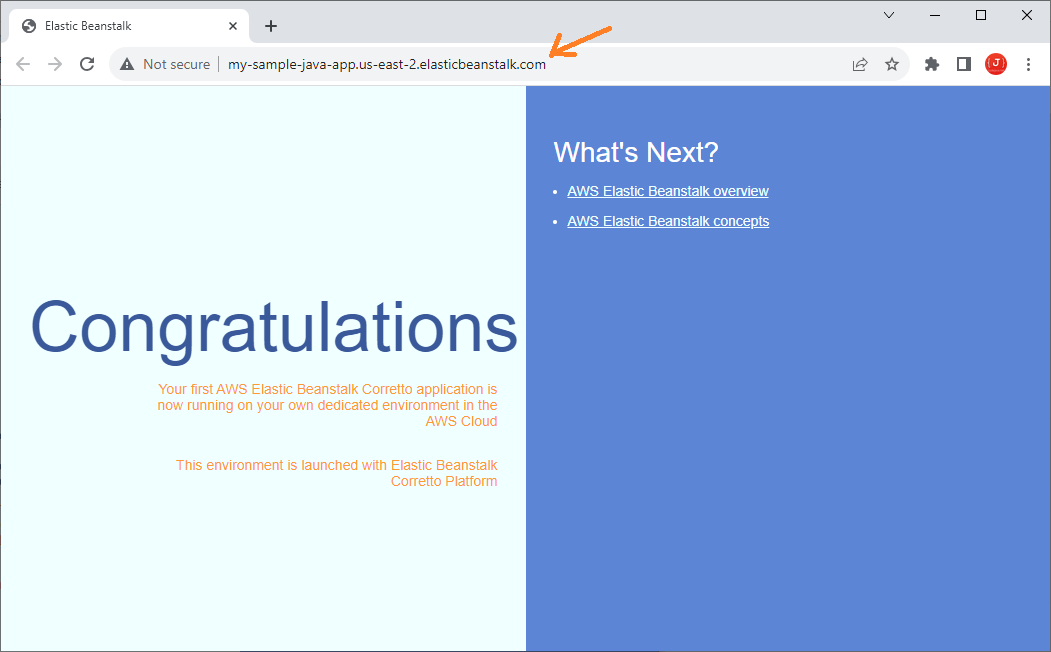 This is just a simple HTML page with a couple of links referring to AWS docs, but it proves that “Your first AWS Elastic Beanstalk Corretto application is now running on your own dedicated environment in the AWS Cloud”.Notice the URL in the address bar, it includes the subdomain which you specified previously.
7. Deploy a New Version
You can have multiple versions of an application, and each version is run in a separate environment. And an environment can run only one version at a time.To deploy a new version of the application, click the Upload and deploy button on the environment page: Then choose the deployment file, which can be JAR or WAR - depending on the platform type you choose (Java or Tomcat). Also enter a version label:
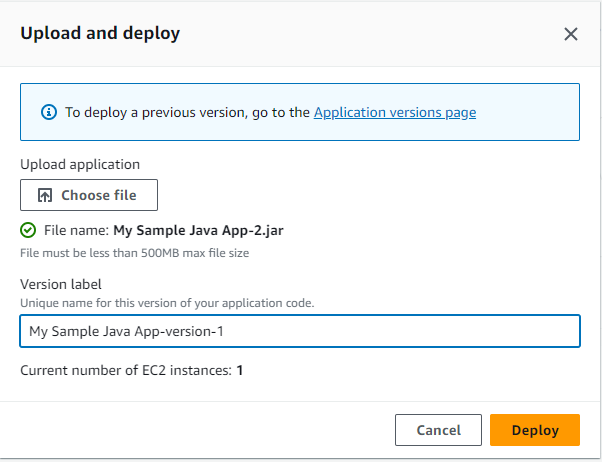 It also suggests the version label automatically. Then click the Deploy button. Elastic Beanstalk will deploy the new version in the same environment and when successful, the version label appears under Running version line on the environment page.
8. Check AWS Related Services
Elastic Beanstalk uses several AWS services to deploy an application. The minimum required services are EC2, IAM and S3.- EC2 (Elastic Compute Cloud): this service creates instances of virtual server to host your application. You can check details of the server instances at Services > Compute > EC2.
- IAM (Identity and Access Management): this service will create some roles required by Elastic Beanstalk to deploy the application, such as the aws-elasticbeanstalk-service-role role. Go to Services > Security, Identity & Compliance > IAM to check the details.
- S3 (Simple Storage Service): Elastic Beanstalk will create a bucket on S3 to store your application’s deployment files. Go to Services > Storage > S3 to check the details.
9. Terminate an environment
If you have multiple versions of an application running simultaneously, you can undeploy a version by terminating the environment running that version.In Elastic Beanstalk console, go to Environments. Check the environment associated with the version you want to stop, then click the menu Actions > Terminate environment: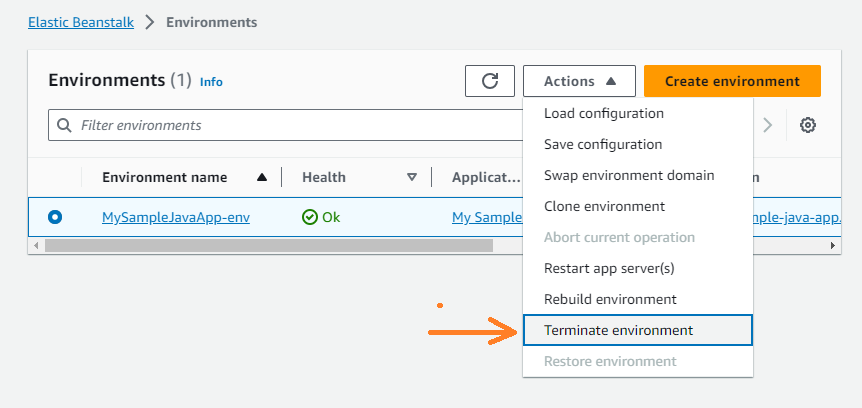 Elastic Beanstalk will unprovision all resources and services for that environment. And you can restore a terminated environment.
10. Undeploy the Application
When an application is no longer needed, you can delete it from AWS. In Elastic Beanstalk console, go to Applications, then check the application you want to remove: Then click the menu Actions > Delete application. Note that all the associated environments will be terminated and deleted.I hope you found this tutorial helpful, which you can follow to deploy your first Java application on AWS using Elastic Beanstalk web console. You can also watch the following video to see the deployment steps in action: References:
About the Author:
 Nam Ha Minh is certified Java programmer (SCJP and SCWCD). He began programming with Java back in the days of Java 1.4 and has been passionate about it ever since. You can connect with him on Facebook and watch his Java videos on YouTube.