How to sign a Java applet
- Details
- Written by Nam Ha Minh
- Last Updated on 09 August 2019 | Print Email
1. Why need to sign Java applet?
When running inside web browser, Java applets are living in a restricted environment so called “sandbox” – which prevents the applets from accessing system resources and devices such as files, network connections, printers, cameras, microphones, etc – without user-granted permission. This tight security is designed to make users safe from malicious code which always tries to execute automatically without user’s intervention.The following picture illustrates how such restriction is applied for unsigned applet and signed applet within the sandbox: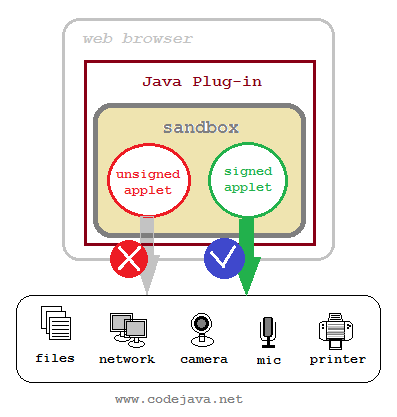 To access system resources and devices, the applet must be signed with a digital certificate which is issued by a trusted Certificate Authority (CA). Thus the user can trust this applet and grant permission.For example, you are developing applets that read/write files system, capture video from camera, or record audio from microphone… then you must sign your applets, definitely.Though there is another way to grant permission for applets through the usage of .java.policy file, but this method is for development only. It’s not suitable for deploying applets on production environment because it requires the user manually put the .java.policy file on their computer. Thus signing the applet is the convenient way.
 2. A Sample applet for signing
package net.codejava.applet;
import java.awt.*;
import java.awt.event.*;
import javax.swing.*;
public class FileBrowseApplet extends JApplet {
private JButton button = new JButton("Browse");
public void init() {
getContentPane().setLayout(new FlowLayout());
getContentPane().add(button);
button.addActionListener(new ActionListener() {
public void actionPerformed(ActionEvent evt) {
JFileChooser fileChooser = new JFileChooser();
fileChooser.showOpenDialog(FileBrowseApplet.this);
}
});
}
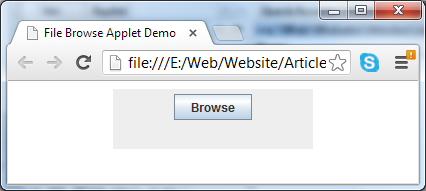
} And here is the HTML page that shows the applet:<html> <head><title>File Browse Applet Demo</title></head> <body> <center> <applet id="FileApplet" code = "net.codejava.applet.FileBrowseApplet.class" archive="FileApplet.jar" width="200" height="60"> </applet> </center> </body> </html>Opening the FileApplet.html will show up the applet as following screenshot:
 When hitting the Browse button, an exception of type java.security.AccessControlException is thrown:
 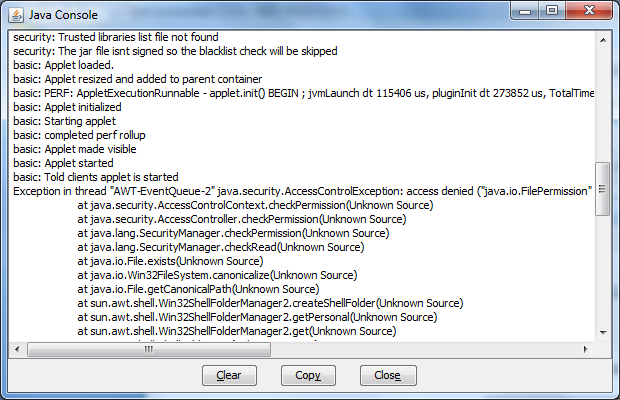 It is because the open dialog needs permission to access file system resources, but an unsigned applet is denied this permission by default. So, to overcome this, the applet must be signed.
 3. Requirement to sign Java applet
Before signing an applet, it requires packaging all applet classes into a single jar file. This can be done by using jar tool which comes with JDK. For example:jar cfv FileApplet.jar net
That will add all classes under package net.codejava into FileApplet.jar file.And two programs are required:- keytool.exe: A key and certificate management tool. We use this tool for generating a RSA public/private key pair associates with a certificate - called self-signed certificate, or reading a trusted certificate.
- jarsigner.exe: A signing tool that creates a digital signature of a jar file using a provided certificate.
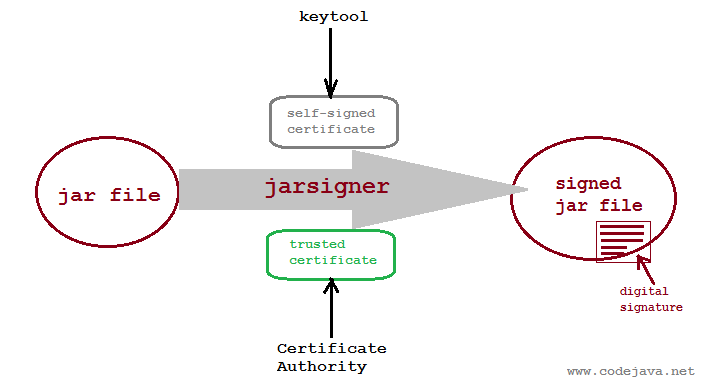 Now, let’s dive into the signing process using two types of certificate: self-signed certificate and trusted certificate.
 4. Sign a Java applet using self-signed certificate
A certificate which is created and signed by a same entity is called self-signed certificate. This self-signing method is simple and quick because we can use our own certificate which is generated by the keytool program; don’t have to spend time on requesting and obtaining certificate from a certificate authority; and it does not cost any bucks. However, its drawback is that the user may not accept the certificate since it is not trusted by any public authority. So this method is suitable for development and testing purpose only.Syntax of the command to generate a self-signed certificate is as follows:keytool -genkey -alias <alias> -keystore <filename> -keypass <keypass> -dname <dname> -storepass <storepass> -validity <days>Where:- <alias>: a unique identifier of the certificate. Note that alias is case-insensitive.
- <filename>: name of the file which stores the certificate.
- <keypass>: password to protects the key pair.
- <dname>: distinguished name of the certificate.
- <storepass>: password of the certificate store.
- <days>: number of days after which the certificate will expire.
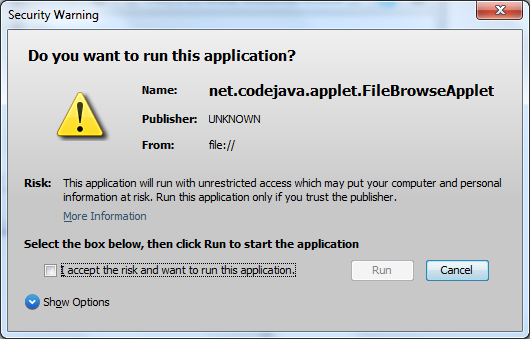 Note that the Publisher field is set to UNKNOWN because this certificate is self-signed.Click More Information, then Certificate Details… to see information about the certificate, like the following screenshot:
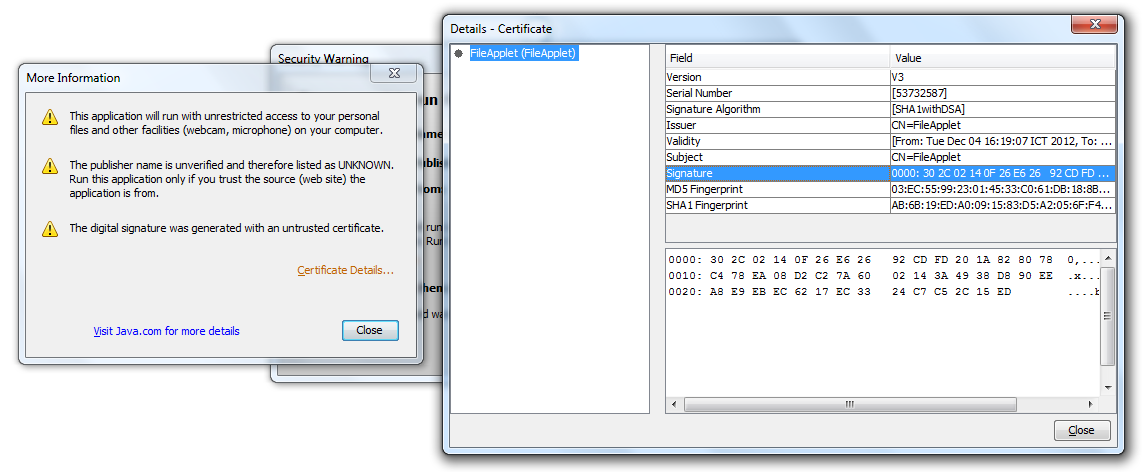 To grant permission for the applet, check the option “I accept the risk and want to run this application” in the Security Warning dialog, then click Run.Now click the Browse button in the applet again, the Open dialog is now displayed:
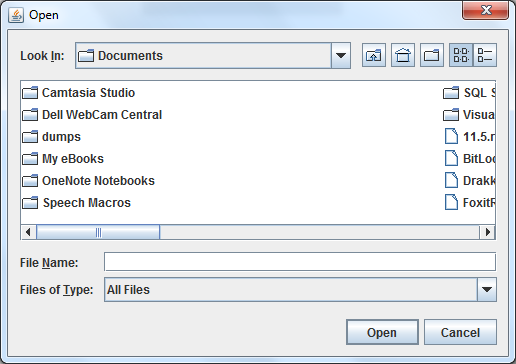 That’s the process of signing a Java applet using a self-signed certificate. Let’s switch to second approach.
 5. Sign aJava applet using trusted certificate
A trusted certificate is one which is signed by a public trusted certificate authority, such as Verisign, Thawte, Entrust…This process is similar to self-signing, except that we don’t create our own certificate using the keytool tool. Instead, we have to purchase and obtain a certificate issued by the certificate authority – which takes more time and cost. However, this method increases degree of trust to our application, because no one can fake a trusted certificate.Suppose we have our trusted certificate stored in a .pfx file format, CompanyCert.pfx and we know the password to access the certificate. Use the following command syntax to obtain alias name of the certificate:keytool -list -storetype pkcs12 -keystore <filename> -storepass <password>
For example:keytool -list -storetype pkcs12 -keystore CompanyCert.pfx -storepass myStorePass
We got the output like the following screenshot: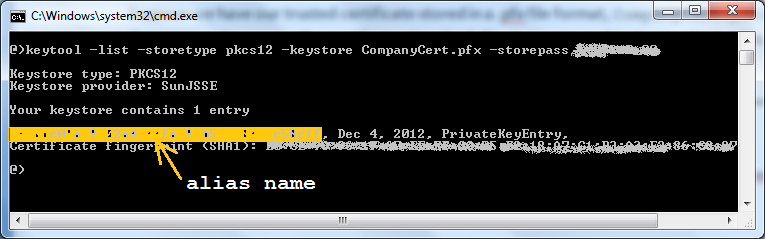 The alias name is shown in the yellow-marked section (for security purpose, other information is blurred in this screenshot). Copy the alias name, and using the following command to sign the applet’s jar file:
jarsigner -storetype pkcs12 -keystore CompanyCert.pfx -storepass myStorePass FileApplet.jar myAlias
Replace the “myStorePass” and “myAlias” by real value correspond to your certificate.Now run the applet again, a warning dialog appears as following screenshot: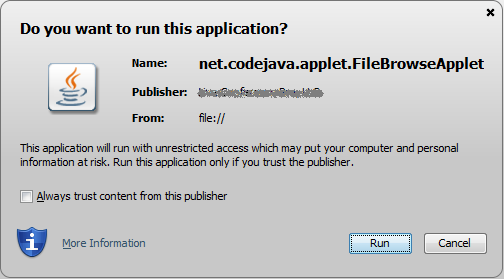 We can notice that, this time, the warning dialog is slightly different than the one for a self-signed certificate. Obviously the publisher name has a specific value rather than UNKNOWN. Check “Always trust content from this publisher” then click Run. We have granted permission for an applet signed by a trusted certificate.NOTES:
- If the applet requires external libraries, we should sign all the required jar files as well.
- You can find a list of trusted certificates for all Java applets in the Java Plug-in control panel, under Security tab.
- You can use the command jarsigner –verify <jar_file> to verify if a jar file is signed or not.
Other Java Applet Tutorials:
- Java Applet Tutorial for beginners
- How to show Java applet in HTML page
- How to call Javascript function from Java applet
- How to call Java applet's methods and variables from Javascript
- How to resize Java applet to fit browser's window
- How to submitt HTML form in Java applet
- LiveConnect - The API for communication between Java applet and Javascript
About the Author:
 Nam Ha Minh is certified Java programmer (SCJP and SCWCD). He started programming with Java in the time of Java 1.4 and has been falling in love with Java since then. Make friend with him on Facebook and watch his Java videos you YouTube.
| [Sample applet with self-signing script] | 2 kB |