- Details
- Written by Nam Ha Minh
- Last Updated on 10 August 2019 | Print Email
Piccolo2D is a structured 2D graphics framework that allows programmers create robust, full-featured graphical applications in Java without writing code from scratch and worrying about the low level details. One of Piccolo2D’s interesting features is supporting the development of
Zoomable User Interfaces (ZUIs). That means you can build graphical programs that let the user zooms in to see details and zooms out to see an overview. In addition, the user can use the pan feature to move the graphical objects around inside a virtual canvas.In this tutorial, we provide some introductory examples to get you started with Piccolo2D easily.
1. How to use Piccolo2D framework in your Java projects
Piccolo2D is an open source framework, thus you can download its binary and source from the following link:
Download Piccolo2D
Suppose that you downloaded the binary in zip format (
piccolo2d-VERSION-bin.zip), extract the zip file then you need to put at least two following JAR files to your project’s classpath:
- piccolo2d-core-VERSION.jar
- piccolo2d-extras-VERSION.jar
These JAR files are for working with Java Swing. For SWT, use the
piccolo2d-swt-VERSION.jar instead. The core classes are declared in the
edu.umd.cs.piccolo package and the extra classes are declared in the
edu.umd.cs.piccolox package.
2. Zoomable text example
Here is a very simple Swing program that extends the Piccolo2D framework. It places a simple text node on the default canvas:
package net.codejava.graphics.zui;

import javax.swing.SwingUtilities;

import edu.umd.cs.piccolo.PNode;
import edu.umd.cs.piccolo.nodes.PText;
import edu.umd.cs.piccolox.PFrame;

/**
 * This program demonstrates how to create zoomable text component
 * using Piccolo2D framework.
 * @author www.codejava.net
 *
 */
public class ZoomableTextDemo extends PFrame {

	public ZoomableTextDemo() {
		super("Zoomable Text Demo", false, null);
		setSize(480, 320);
		setLocationRelativeTo(null);
	}

	public void initialize() {
		PNode textNode = new PText("Hello CodeJava!");
		getCanvas().getLayer().addChild(textNode);
	}

	public static void main(String[] args) {
		SwingUtilities.invokeLater(new Runnable() {

			@Override
			public void run() {
				new ZoomableTextDemo().setVisible(true);
			}
		});
	}
}
Basically, we extend the
PFrame class in order to create a frame window that contains a canvas (
PCanvas) on which we can put our graphical components (nodes). In Piccolo2D,
PNode is the base class of all nodes, such as the
PText node used in this program. We override the
initialize() method from the
PFrame class to put our initialization code there, i.e. create a text node and place it on the layer of the canvas:
public void initialize() {
	PNode textNode = new PText("Hello CodeJava!");
	getCanvas().getLayer().addChild(textNode);
}
Run this program, the following window gets displayed:
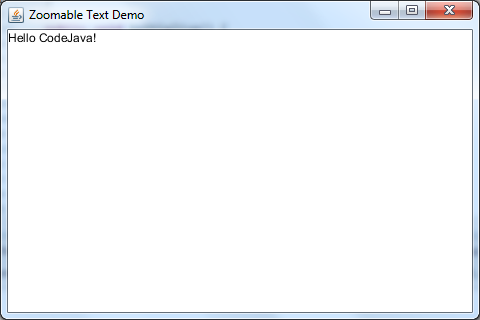
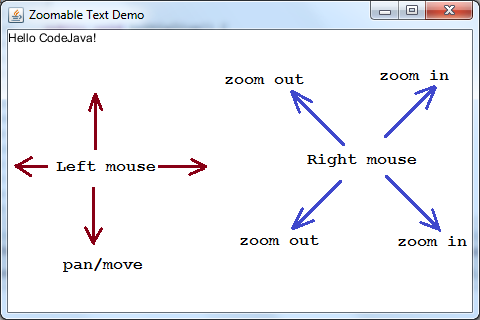
The text node is displayed on the upper left corner. Use left mouse button to pan and right mouse button to zoom the text node. The following picture illustrates the supported mouse gestures:
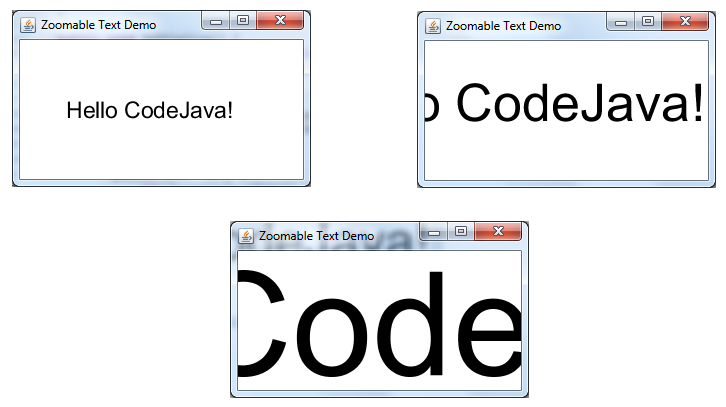
The following screenshots illustrate the result of zooming and panning effects:
3. Zoomable image example
Similar to the zoomable text example, we use the
PImage class to create a zoomable image node. For example:
String imageFilePath = "f:/Design/Images/earth.jpg";
PImage imageNode = new PImage(imageFilePath);

getCanvas().getLayer().addChild(imageNode);
That creates an image node for the specified image file. And the following source code is for a complete program:
package net.codejava.graphics.zui;

import javax.swing.SwingUtilities;

import edu.umd.cs.piccolo.nodes.PImage;
import edu.umd.cs.piccolox.PFrame;

/**
 * This program demonstrates how to create zoomable image component
 * using Piccolo2D framework.
 * @author www.codejava.net
 *
 */
public class ZoomableImageDemo extends PFrame {

	public ZoomableImageDemo() {
		super("Zoomable Image Demo", false, null);
		setSize(480, 320);
		setLocationRelativeTo(null);
	}

	public void initialize() {
		String imageFilePath = "f:/Design/Images/earth.jpg";
		PImage imageNode = new PImage(imageFilePath);

		getCanvas().getLayer().addChild(imageNode);

	}

	public static void main(String[] args) {
		SwingUtilities.invokeLater(new Runnable() {

			@Override
			public void run() {
				new ZoomableImageDemo().setVisible(true);
			}
		});
	}
}
Here are some screenshots:

4. Zoomable Java swing component example (Swing wrapper)
One great feature of the Piccolo2D framework is that it can wrap a Swing component inside its Swing-wrapper node. That means we can re-use existing Swing components and provide them zoomable user interfaces by using the Piccolo2D’s APIs.Suppose that we have a
LoginPanel which is a login form built using Swing components. The following code wraps that panel inside a
PSwing component which is then placed on a
PSwingCanvas:
JPanel panel = new LoginPanel();
PSwing swingWrapper = new PSwing(panel);

PSwingCanvas canvas = new PSwingCanvas();
canvas.getLayer().addChild(swingWrapper);
Here is the source code of a complete program:
package net.codejava.graphics.zui;
import java.awt.BorderLayout;
import javax.swing.JFrame;
import javax.swing.JPanel;
import javax.swing.SwingUtilities;
import edu.umd.cs.piccolox.pswing.PSwing;
import edu.umd.cs.piccolox.pswing.PSwingCanvas;
/**
* This program demonstrates how to wrap a Swing component
* to provide zoomable user interfaces using Piccolo2D framework.
* @author www.codejava.net
*
*/
public class ZoomableSwingGUIDemo extends JFrame {
public ZoomableSwingGUIDemo() {
super("Zoomable Swing GUI Demo - Swing Wrapper");
JPanel panel = new LoginPanel();
PSwing swingWrapper = new PSwing(panel);
PSwingCanvas canvas = new PSwingCanvas();
canvas.getLayer().addChild(swingWrapper);
add(canvas, BorderLayout.CENTER);
setSize(400, 300);
setDefaultCloseOperation(JFrame.EXIT_ON_CLOSE);
setLocationRelativeTo(null);
}
public static void main(String[] args) {
SwingUtilities.invokeLater(new Runnable() {
@Override
public void run() {
new ZoomableSwingGUIDemo().setVisible(true);
}
});
}
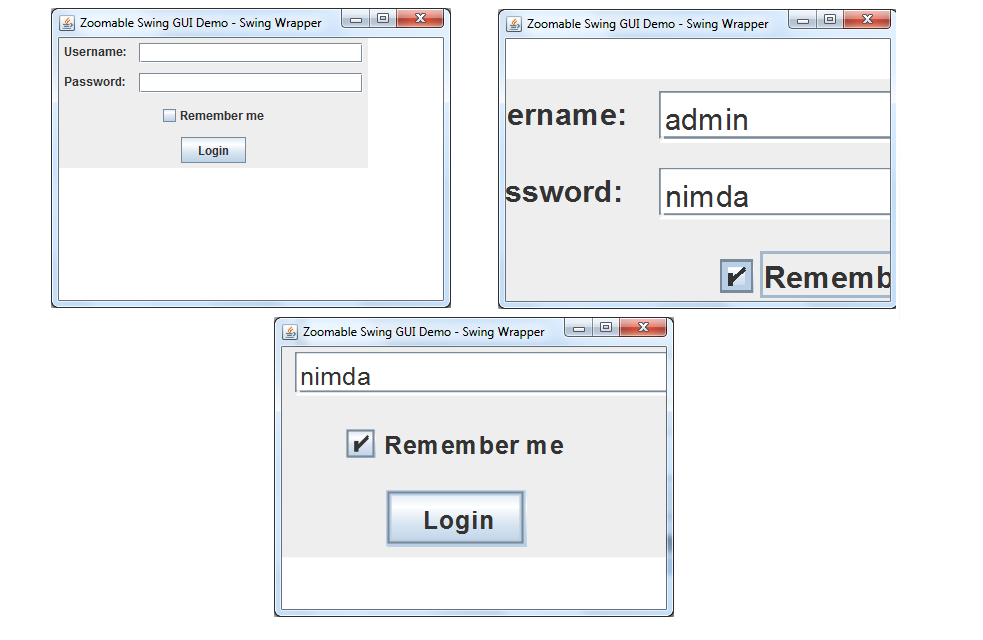
}You can see source code of the
LoginPanel in the attachments section. Here are some screenshots taken when running the program:
5. Disabling pan and zoom
In case we don’t want the user to zoom and pan the user interfaces, just removing the zoom event handler and pan event handler from the canvas as follows:
// disable zoomming:
canvas.removeInputEventListener(canvas.getZoomEventHandler());

// disable panning
canvas.removeInputEventListener(canvas.getPanEventHandler());
6. How to pan and zoom programmatically
Each canvas’ layer is associated with a default camera. By accessing this camera, we can perform the zoom and pan features programmatically. The following statement obtains the default camera of the canvas’ layer:
PCamera camera = canvas.getLayer().getCamera(0);
To simulate panning, the following statement moves the layer off the upper left corner by 50 pixels on the X axis and 50 pixels on the Y axis:
camera.translate(50, 50);
To simulate zooming, the following statement doubles the view’s scale (zoom 2x):
camera.scaleView(2.0);
API References:
Other Java Graphics Tutorials:About the Author:
 Nam Ha Minh
 is certified Java programmer (SCJP and SCWCD). He started programming with Java in the time of Java 1.4 and has been falling in love with Java since then. Make friend with him on
Facebook and watch
his Java videos you YouTube.