How to manage JRE installations in Eclipse
- Details
- Written by Nam Ha Minh
- Last Updated on 07 August 2019 | Print Email
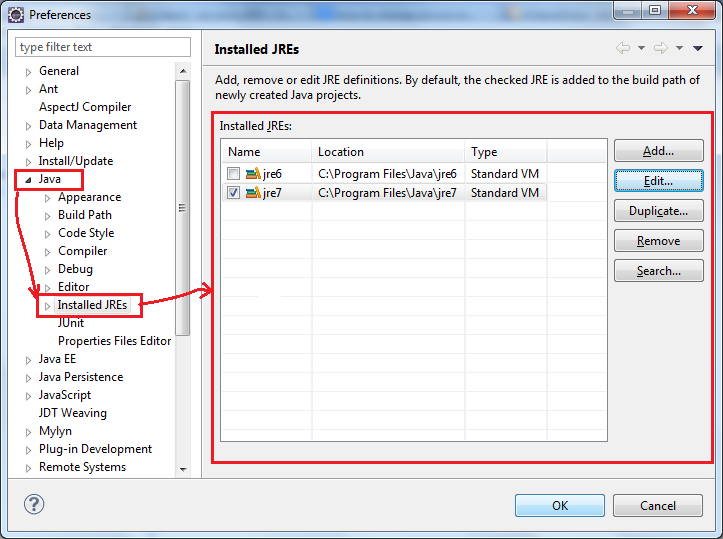 As we see, Eclipse lists all JREs in the Installed JREs table with the default one checked. Note that Eclipse does not scan all installed JREs automatically (except the default one that runs Eclipse itself), so we have to add/remove other JRE versions manually here.To add an installed JRE version to the table, click Add button. The Add JRE dialog appears:
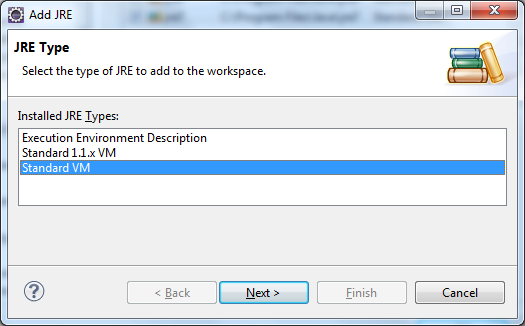 Select Standard VM (default selected), then click Next. In the next screen, JRE Definition, click Directory button to locate installation directory of the desired JRE:
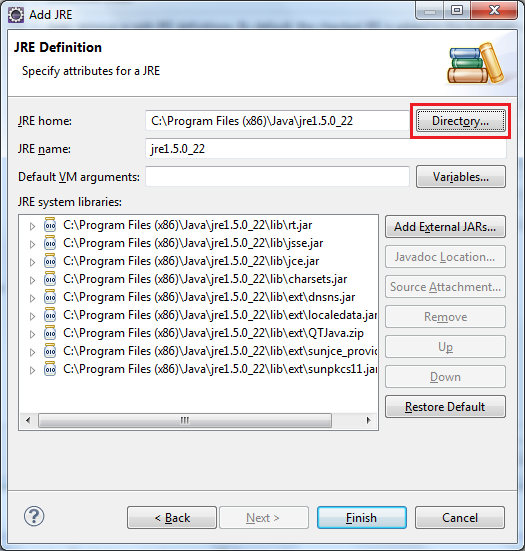 Wait a few seconds for Eclipse loading JRE system libraries jar files, and then click Finish. The newly added JRE is shown in the table:
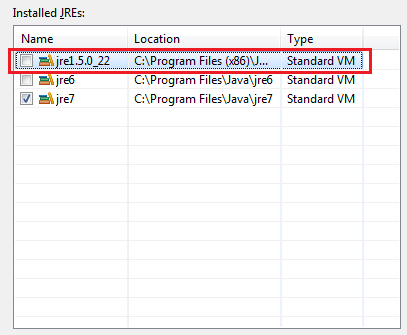 If you want to use the newly added JRE as the default, select the appropriate checkbox.To edit or remove a JRE, click the corresponding button Edit or Remove. NOTES:
- You can pick a JDK installation directory instead of a JRE one, as Eclipse can load the JRE inside a JDK installation.
- When you change the default JRE, it does not affect the existing projects in workspace. The change will apply for the new projects only.
- The installed JREs configuration is per workspace. That means different workspaces may have different set of installed JREs.
Other Eclipse Tutorials:
- How to import existing projects into Eclipse workspace
- How to use Eclipse IDE for Java EE Developers
- How to create, build and run a Java Hello World program with Eclipse
- How to create, deploy and run Java Servlet in Eclipse
- How to generate JAR file in Eclipse
- How to create WAR file for Java web application in Eclipse
- How to create Ant build file for existing Java project in Eclipse
- How to generate Javadoc in Eclipse
- How to create Java web project with Maven in Eclipse
- 25 Eclipse Shortcut Keys for Code Editing
- How to Add Copyright License Header for Java Source Files in Eclipse
About the Author:
 Nam Ha Minh is certified Java programmer (SCJP and SCWCD). He began programming with Java back in the days of Java 1.4 and has been passionate about it ever since. You can connect with him on Facebook and watch his Java videos on YouTube.