Download and Install Oracle JDK 20 on Windows
- Details
- Written by Nam Ha Minh
- Last Updated on 04 May 2023 | Print Email
1. Download Windows Installer for Oracle JDK 20
For Windows, Oracle JDK 20 is distributed in both compressed archive file (.zip) and installer (MSI and EXE), and I recommend you use EXE installer as it’s easy and convenient: the installer does update the PATH environment variable automatically.So head over to the official download page of Oracle JDK, you should see the following page: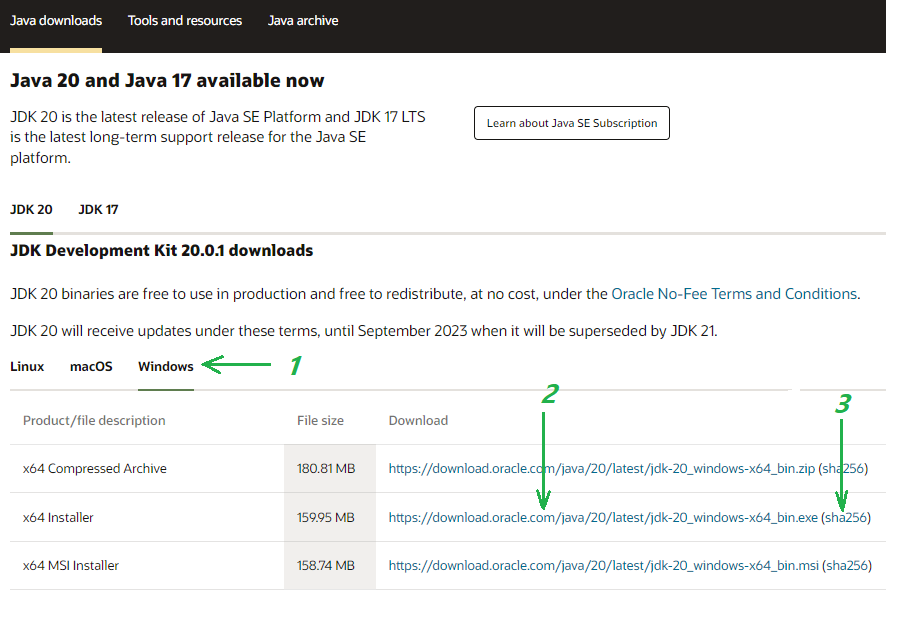 Click Windows tab (1) to see the available downloads for Windows operating system. Then click the download link next to x64 Installer (2). It will download the EXE installer for Oracle JDK 20 (file name: jdk-20_windows-x64_bin.exe).Next, you should verify integrity of the downloaded file to make sure it is not tampered with during the download process. Open a new Command prompt and change the current directory to where the file is, then use the following command:
certutil -hashfile jdk-20_windows-x64_bin.exe sha256
Then compare the SHA256 checksum value printed by this command against the value published on the download page (click link 3 as shown in the above screenshot). If both values are identical, you can proceed next.
2. Install Oracle JDK 20 on Windows
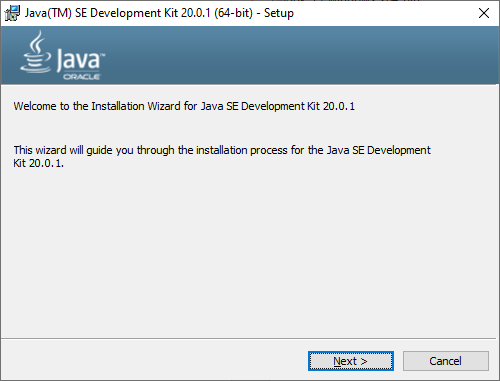 Click Next two times to perform the setup with default installation directory at C:\Program Files\Java\jdk-20. And the setup program will update the system environment variable PATH automatically, i.e. putting the entry C:\Program Files\Common Files\Oracle\Java\javapath at the beginning of the PATH variable.To verify, open another Command Prompt and type java -version and javac -version. You should see the following output:
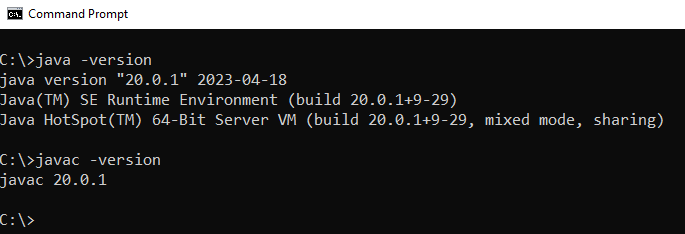 Congratulations! You have installed Oracle JDK 20 successfully on Windows. You can now begin developing Java applications.NOTE: If the setup program did not update the PATH environment variable, then you should update it manually - refer to this guide. You can also watch the following video to see the steps in action:
 Learn more:
- How to check Java version
- Java SE versions history
- How to set JAVA_HOME environment variable on Windows 10
- How to set environment variables for Java using command line
- How to write, compile and run a hello world Java program for beginners
- What are JVM, JRE and JDK
About the Author:
 Nam Ha Minh is certified Java programmer (SCJP and SCWCD). He began programming with Java back in the days of Java 1.4 and has been passionate about it ever since. You can connect with him on Facebook and watch his Java videos on YouTube.