AWS Elastic Beanstalk - Deploy Spring Boot Application with MySQL Database
- Details
- Written by Nam Ha Minh
- Last Updated on 27 February 2024 | Print Email
Table of content:
1. Prepare & Package Spring Boot Application2. Upload Application Code (JAR file)
3. Configure Database Service (RDS)
4. Add Environment Property for Server port
5. Deploy the Application
6. Check Database Server Instance
7. Add Environment Properties for Data Source
8. Test Newly Deployed Spring Application
1. Prepare & Package Spring Boot Application
Suppose you already have a Java Spring Boot project working well on localhost with MySQL database, and now it’s ready for deployment on AWS. If not, you can download a sample project in this tutorial of mine. It is a quite simple web application that allows users to manage a list of products which look like the following: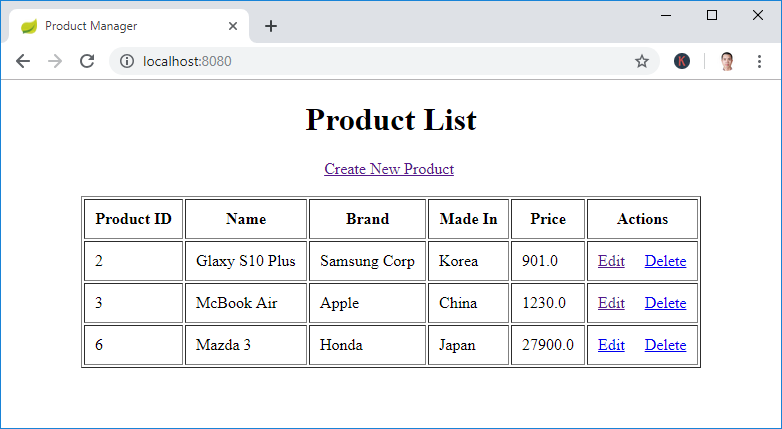 This application stores product information in MySQL database using Spring Data JPA and Hibernate framework, with Java entity classes map to tables in database via Hibernate forward engineering.NOTES: to let the application create tables in database upon deployment, check the application configuration file (application.properties) to ensure that it includes the following property:
spring.jpa.hibernate.ddl-auto=update
You can always override this property via environment property setup of an environment’s configuration. And make sure the packaging type of the project is jar as specified in the Maven project (pom.xml) file:<packaging>jar</packaging>
Before deployment, you need to package the project into an executable JAR file using Maven in either command line or IDE:- in command line or terminal, type mvn package at the project’s root directory
- in IDE such as Eclipse, right click on the project > Run As > Maven build… and specify the goal name is package.
2. Upload Application Code (JAR file)
In the first step of deployment (Configure environment), under Application code section, choose Upload your code, enter version label as Version 1, choose Local file and browse the application JAR file. The following screenshot depicts that: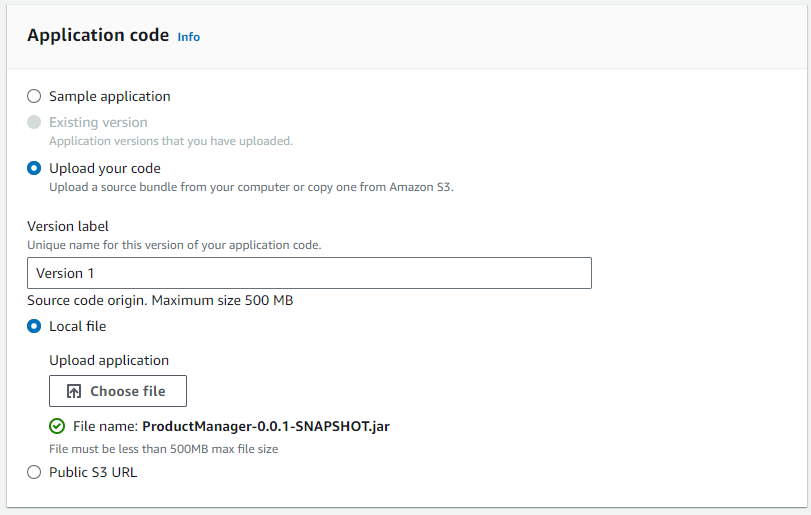 The next step (Configure service access) is as same as described in this guide.
3. Configure Database Service (RDS)
To deploy a Spring Boot application with MySQL database on AWS with Elastic Beanstalk, we use AWS Relational Database Service (RDS).In the third step (Set up networking, database and tags), click Enable database under Database section. Then MySQL is selected as the default: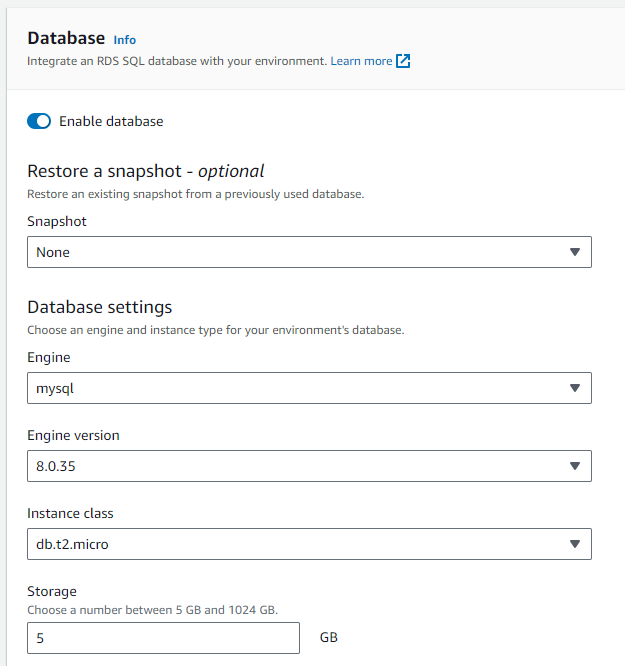 Depending on your need, you can change Engine version, Instance class and Storage size as shown above. And specify the username and password which your Spring Boot application will use to connect to a MySQL server instance, as shown below:
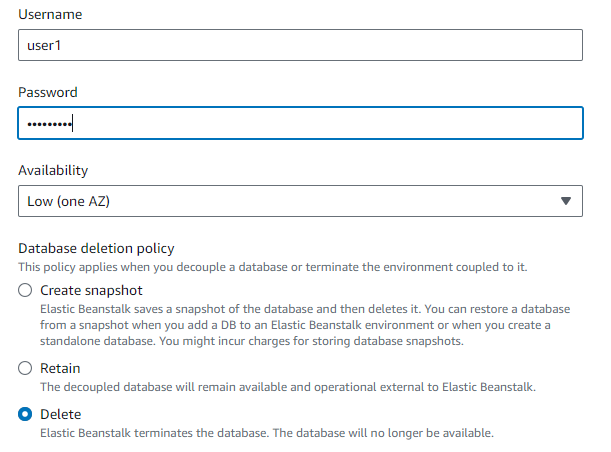 NOTES: Keep the username and password temporarily as you will need to use them in the environment property configuration step.And choose the Database deletion policy that is suitable for your need. I think it explains each option very well. The default one is Delete - meaning that when the environment is terminated or application is deleted, the database will be also deleted.Click Next and skip the step 4 (Configure instance traffic and scaling). Then click Next to move forward to the step 5 described below.
4. Add Environment Property for Server port
In the step 5 (Configure updates, monitoring, and logging), we need to add a new environment property named SERVER_PORT and value 5000 under the Environment properties section, as illustrated below: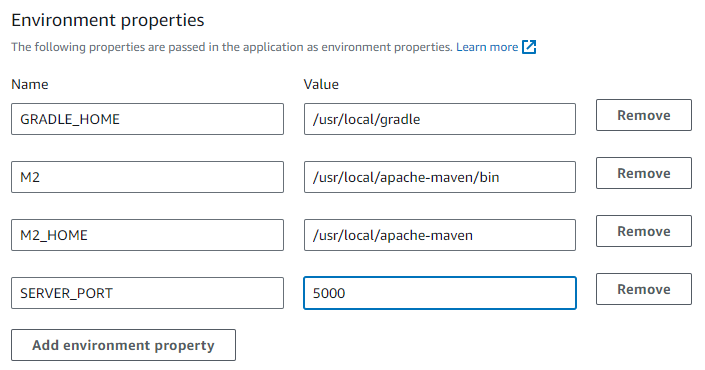 It’s because Elastic Beanstalk assumes that the server application listening on port number 5000, whereas the default port number of Tomcat server embedded with the application is 8080. So we need to add this environment property to override that default port number.NOTES: we don’t specify environment properties for data source right now until the application is launched and a MySQL server instance is available.
5. Deploy the Application
In step 5, click Next to go to Step 6 which is for reviewing all configuration. Click Submit to start deploying the application. It will bring up the environment page updating events periodically so you can see what is going on. This will take a few minutes.So wait until it says “Environment successfully launched” with Health status is Ok - as shown below: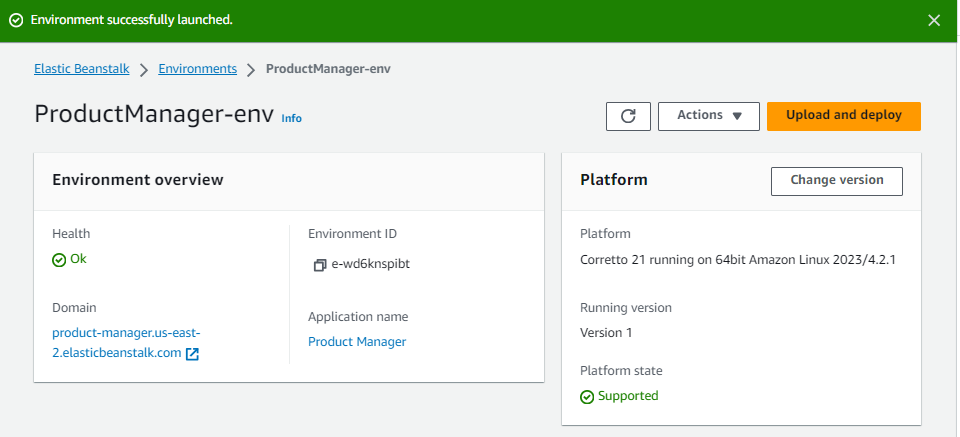 And under the Events tab, you should see it says “Created RDS database named…”:
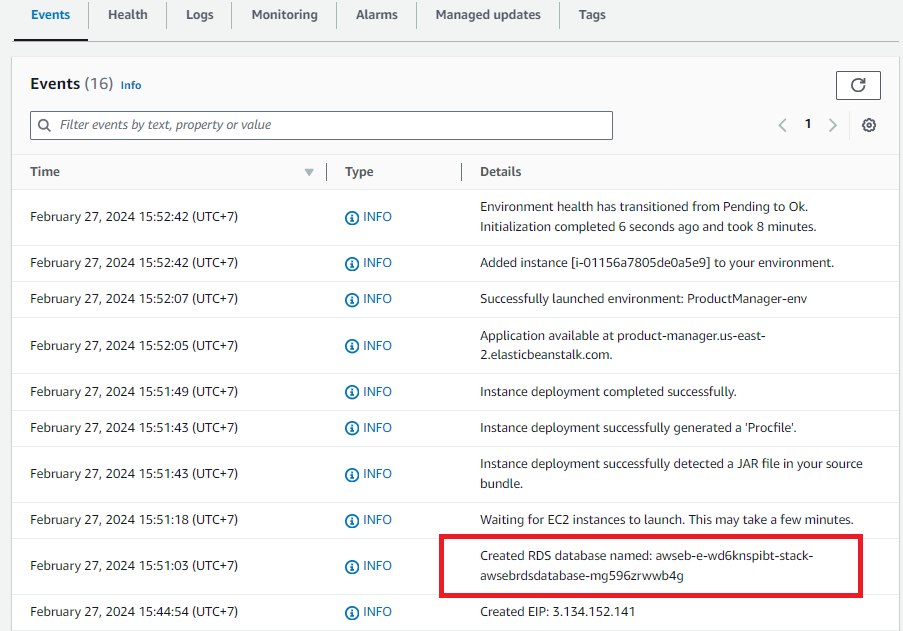 If you click the application domain link, you will get 502 Bad Gateway error because the application couldn’t connect to MySQL database due to data source properties have not been updated.
6. Check Database Server Instance
To get the correct data source connection information, we need to consult AWS RDS. So go to Services > Database > RDS. Then in the Amazon RDS management console, click DB Instances. There should be one database instance available as the result of deployment: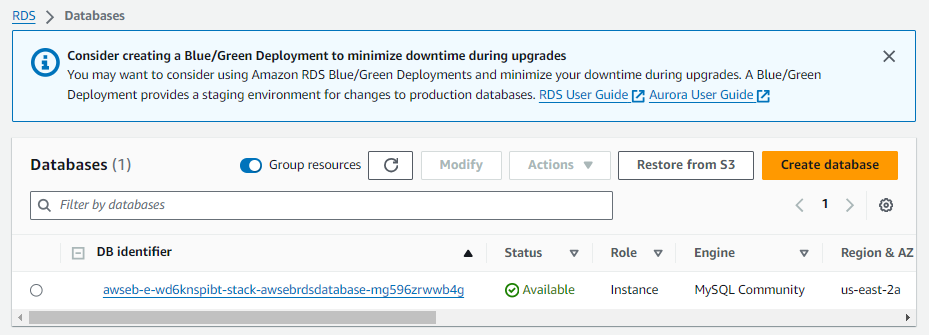 Click the DB identifier name to see the full configuration details. And note the endpoint and port number under Connectivity & security tab:
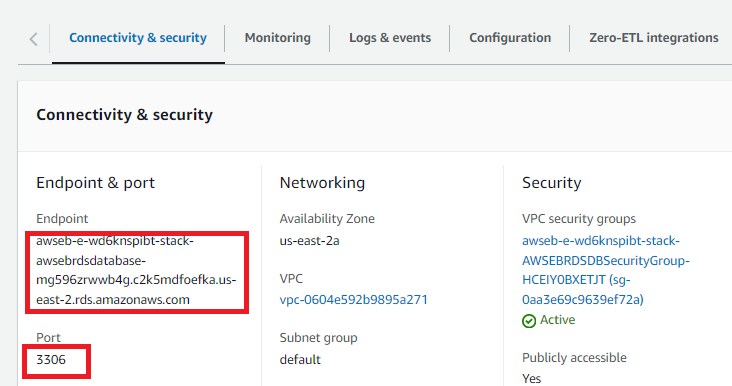 Here, endpoint refers to the hostname of MySQL server and port number is default port number used by MySQL. And click the Configuration tab to see the default DB name, as shown below:
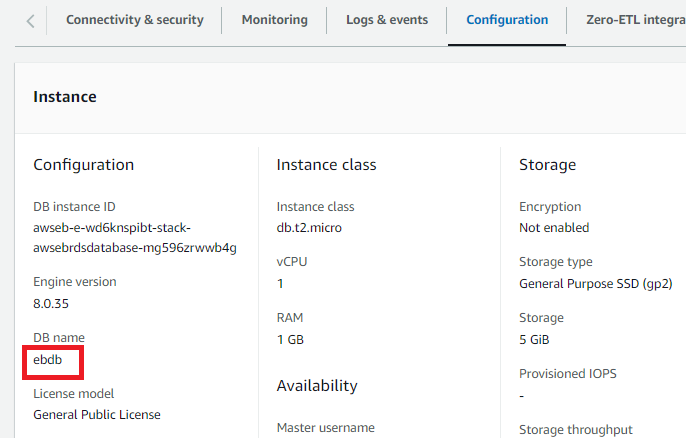 Here, the name ebdb is the schema name which we should include in the JDBC URL connection string.
7. Add Environment Properties for Data Source
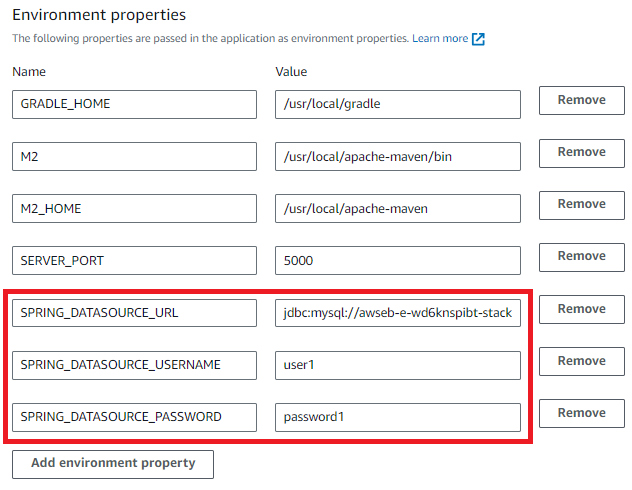
Now, back to the environment page. In the left menu, click Configuration to edit environment configuration. Click Edit button in the Updates, monitoring and logging section. Then add 3 new environment properties with the following names and values:- SPRING_DATASOURCE_URL: jdbc:mysql://endpoint:3306/ebdb
- SPRING_DATASOURCE_USERNAME: is the username you specified in Configure database service step.
- SPRING_DATASOURCE_PASSWORD: is the password you specified in Configure database service step.
 Click Apply. Elastic Beanstalk will update the environment. Wait until it says “Environment update successfully completed” and health status is Ok.
8. Test Newly Deployed Spring Application
Click the domain link under Environment overview to access the newly deployed application: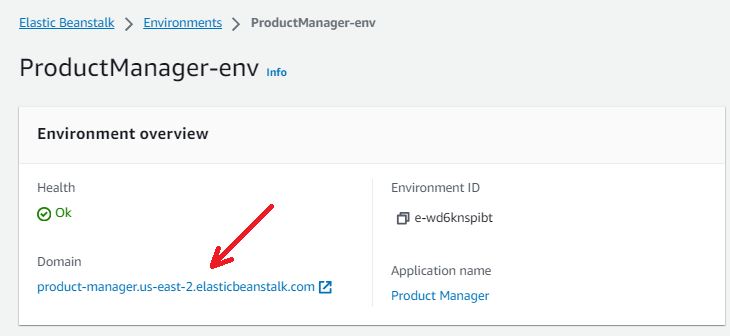 And test CRUD functions to see the information is stored in the database:
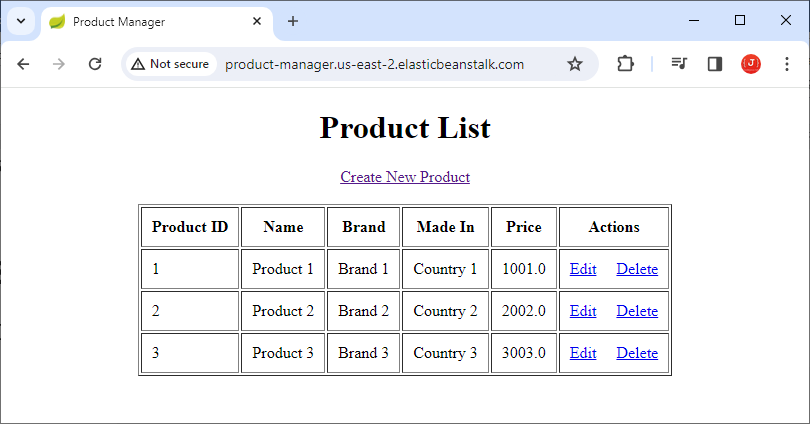 Congratulations! You have deployed a Spring Boot application with MySQL database successfully on AWS using Elastic Beanstalk web management console. To see the deployment in action, watch the following video: Related Elastic Beanstalk Guides:
Elastic Beanstalk - Deploy a Sample Java Application
Elastic Beanstalk - Deploy a Simple Spring Boot Application
Elastic Beanstalk - Deploy Java Web App on Tomcat
References:AWS Elastic Beanstalk Documentation
About the Author:
 Nam Ha Minh is certified Java programmer (SCJP and SCWCD). He began programming with Java back in the days of Java 1.4 and has been passionate about it ever since. You can connect with him on Facebook and watch his Java videos on YouTube.