How to deploy a Java web application on Tomcat
- Details
- Written by Nam Ha Minh
- Last Updated on 06 August 2019 | Print Email
- Copying web application archive file (.war).
- Copying unpacked web application directory.
- Using Tomcat’s manager application.
What you need to know before begin
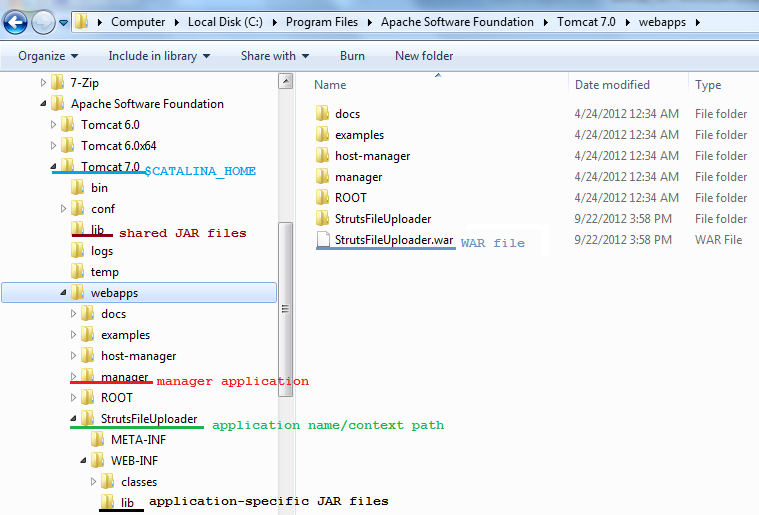
While working with deployment of Java web applications on Tomcat, you should prepare yourself with a strong grasp about the following stuff:- $CATALINA_HOME: is an environment variable points to the directory where you installed Tomcat. For example, c:\Program Files\Apache Software Foundation\Tomcat 7.0 on Windows.
- $CATALINA_BASE: is an environment variable points to the directory of a particular instance of Tomcat (if you configure multiple instances of Tomcat). If this variable is not set explicitly, then it will be assigned the same value as $CATALINA_HOME.
- Web applications are put under $CATALINA_HOME\webapps directory.
- Document root: is the top-level directory of a web application, where all the resources (JSP pages, HTLM pages, Java classes, images…) that constitute that application are placed.
- Context path: is the name which is relative to the server’s address (i.e http://localhost) and represents the name of the web application. For example, if your web application is put under $CATALINA_HOME\webapps\MyWeb directory, it will be accessed by the URL http://localhost/MyWeb, and its context path is /MyWeb.
- WAR: is extension of a file that packs a web application directory hierarchy in zip format. WAR stands for Web ARchive. Java web applications are usually packed in WAR files for deployment. WAR files can be created by command line or an IDE like Eclipse.
- You must have a strong understanding of how a Java web application is organized in terms of directory layout and hierarchy structure.
- JAR libraries which are shared among web applications are put under $CATALINA_HOME\lib directory.
- Application-specific JAR libraries are put under web application’s WEB-INF\libdirectory.
The following picture depicts what we have said so far:
Deploy method #1: copying Java web application archive file (.war)
In this method, the web application is packed as a WAR file. You may generate the WAR file using a tool or IDE like Eclipse, or someone just sent you the file.- Copy the WAR file into $CATALINA_HOME\webapps directory.
- Restart the server. Whenever Tomcat is started, it will unpack the WAR file it found in the webapps directory and launch the application in that manner.
Deploy method #2: copying unpacked Java web application directory
In this method, you have the web application in its unpacked form.- Copy the application’s directory from its location into $CATALINA_HOME\webapps directory.
- Restart the server, the application is deployed with the context path is name of the directory you copied.
Deploy method #3: using Tomcat’s manager application
In this method, you can deploy the web application remotely via a web interface provided by Tomcat’s manager application. You must have user name and password to access this application. The manager application is installed by default, but not always. So be sure that it is installed with your version of Tomcat.Using the manager application, you can:- View a list of applications deployed on the server and their status.
- Start, stop and restart an individual application.
- Deploy a new web application either by uploading a WAR file or supplying a directory on the server.
- Undeploy an individual application.
http://localhost:8080/manager
After supplying correct user name and password, you get into the following screen: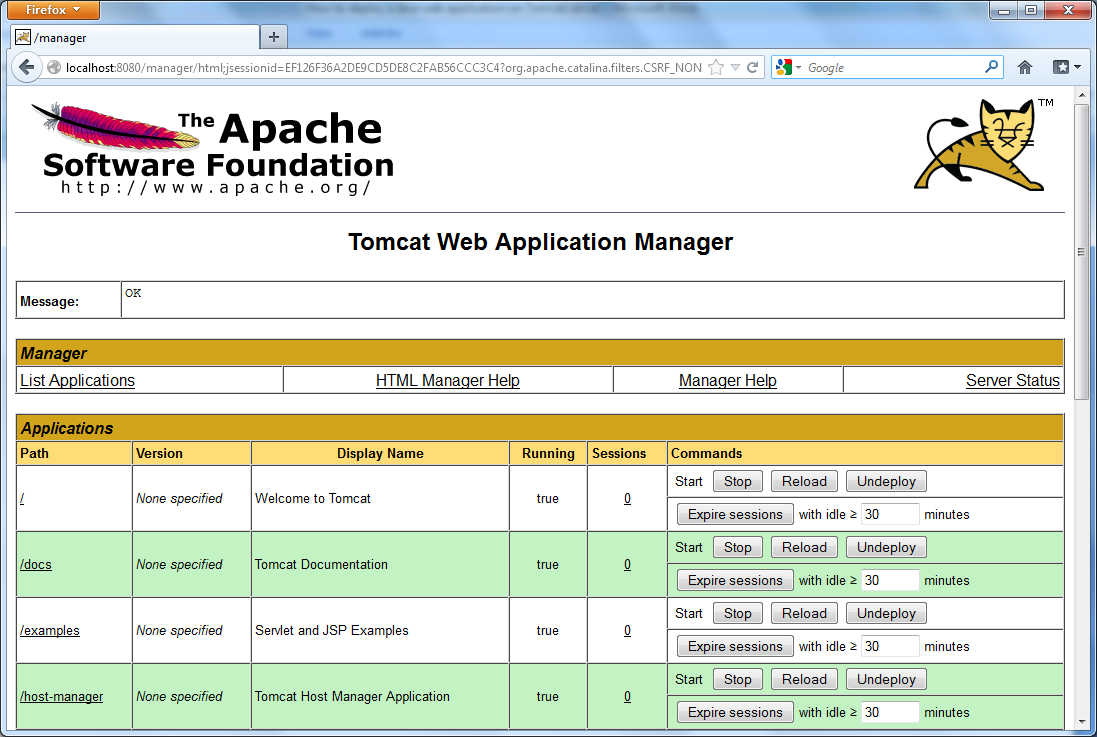 The list of deployed applications is shown at the top, scroll down a little bit to see the deployment section:
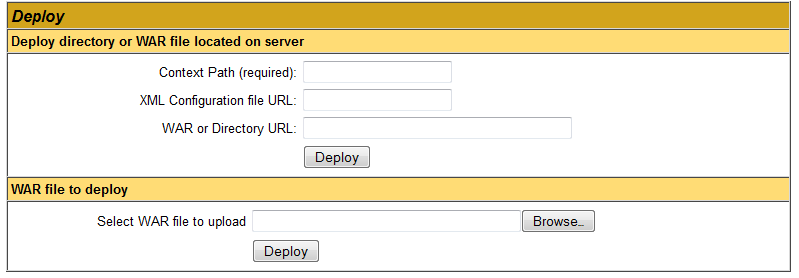 As we can see, there are two ways for deploying a web application using the manager:
- Deploy directory or WAR file located on server.
- WAR file to deploy.
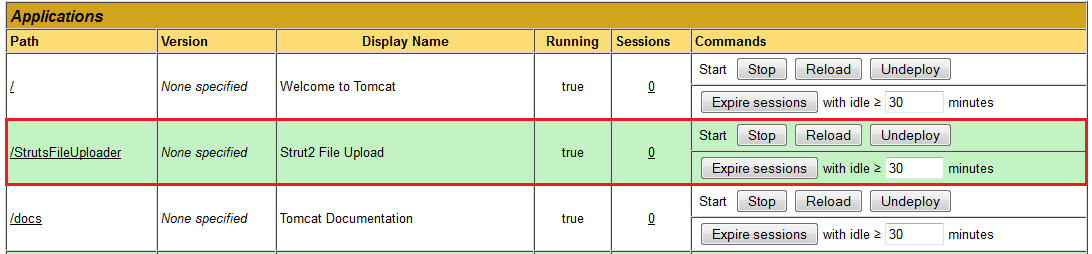 The newly deployed application – StrutsFileUploader, is up and running, without the need of restarting the server.
 Access the deployed Java web application
Typically, a web application can be accessed by typing its context path follows the server’s IP/domain (including port number if any). For example, the StrutsFileUploader application above can be accessed in web browser by typing:http://localhost:8080/StrutsFileUploader
Or we can access an individual application from the manager application by click on the context path (first column in the list of applications).References:
http://tomcat.apache.org/tomcat-7.0-doc/appdev/deployment.html Other Tomcat Tutorials:- How to Embed Tomcat Server into Java Web Applications
- How to Use Virtual Hosts in Tomcat
- How to set web application context path as server root in Tomcat
- How to configure JNDI DataSource for Database Connection Pooling in Tomcat
- How to configure session timeout in Tomcat
- How to change Tomcat port number
- How to add Tomcat server in Eclipse
- How to change server location and deploy path for Tomcat in Eclipse
About the Author:
 Nam Ha Minh is certified Java programmer (SCJP and SCWCD). He began programming with Java back in the days of Java 1.4 and has been passionate about it ever since. You can connect with him on Facebook and watch his Java videos on YouTube.
Comments
You can follow this guide: codejava.net/.../...
Can you help me with this.
Thanks for such tutorial.