How to set JAVA_HOME environment variable on Windows 10
- Details
- Written by Nam Ha Minh
- Last Updated on 27 April 2019 | Print Email
JAVA_HOME = c:\Program Files\Java\jdk1.8.0_201Why is JAVA_HOME needed?To develop Java applications, you need to update the PATH environment variable of the operating system so development tools like Eclipse, NetBeans, Tomcat… can be executed because these programs need JDK/JRE to function. So the PATH environment variable should include JAVA_HOME:
PATH = Other Paths + JAVA_HOMEOther paths are set by various programs installed in the operating system. If the PATH environment variable doesn’t contain a path to JRE/JDK, a Java-based program might not be able to run. For example, typing java in the command prompt showing this error:
'java' is not recognized as an internal or external command, operable program or batch file.
 Or Eclipse will fail to launch:
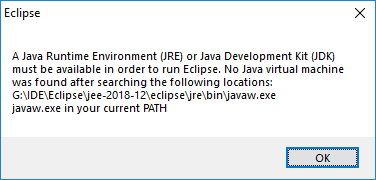 How to set JAVA_HOME on Windows 10Here are the visual steps to properly set value for the JAVA_HOME and update the PATH environment variables in order to setup Java development environment on your computer:1. Firstly, you need to identify the Java home directory, which is typically under C:\Program Files\Java directory. Open My Computer and navigate to this directory, you will see:
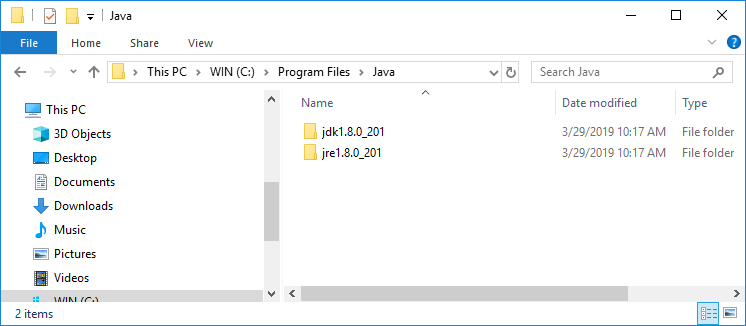
Here, the home of JDK is under C:\Program Files\Java\jdk1.80_201. The version number may vary, depending on the JDK you installed.
2. Open the System Environment Variables dialog by typing environment in the search area on Start menu. Click the suggested item Edit the system environment variables: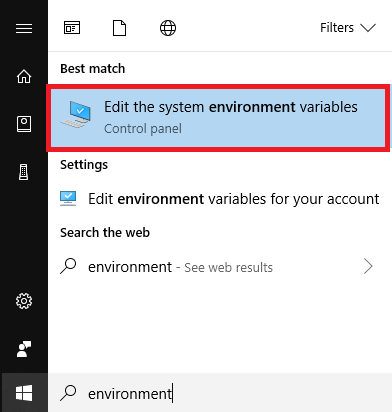
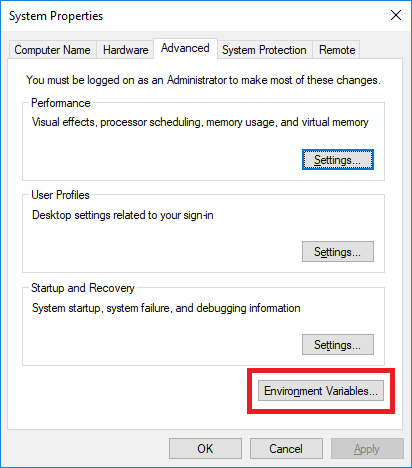
The System Properties dialog appears, click the button Environment Variables.
Then you will see this dialog:

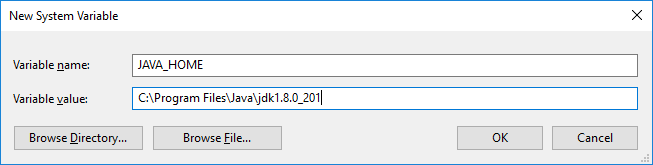 Click OK, and you will see the JAVA_HOME variable is added to the list. 4.Update the PATH system variable. In the Environment Variables dialog, select the Path variable and click Edit:
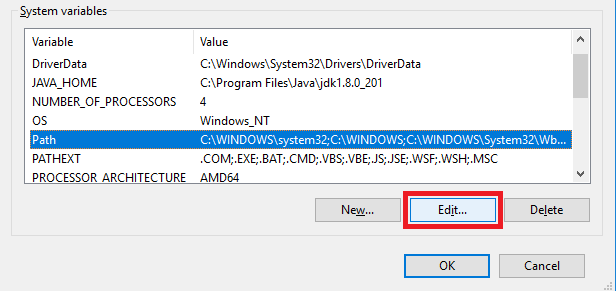 Then in the Edit environment variable dialog, double click on the empty row just below the last text line, and enter %JAVA_HOME%\bin as follows:
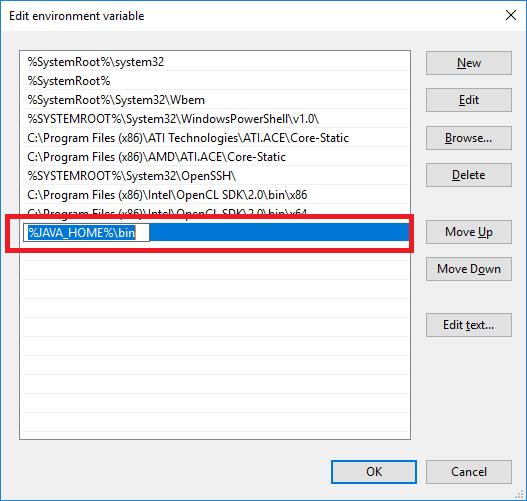 The percent signs tell Windows that it refers to a variable – JAVA_HOME, and the \bin specifies the location of java.exe and javac.exe programs which are used to run and compile Java programs, as well as other tools in the JDK.Click OK button to close all the dialogs, and you’re all set. Now you can open Eclipse or NetBeans to verify. Or open a command prompt and type in javac –version, you should see:
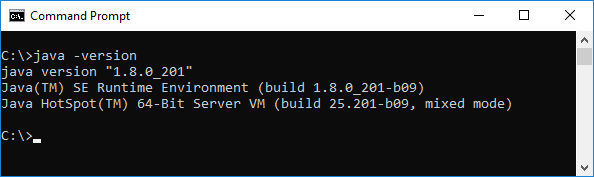 NOTES:You can add the path to the bin directory of Java home directly into the PATH variable. But it’s strongly recommend to follow the above steps to setup a JAVA_HOME variable because many Java programs depend on it.When you installed a JDK, you might not need to update the system variable because the installer already did it for you. Learn more:
- How to set environment variables for Java using command line
- How to write, compile and run a hello world Java program for beginners
- What are JVM, JRE and JDK
- How to check Java version
About the Author:
 Nam Ha Minh is certified Java programmer (SCJP and SCWCD). He began programming with Java back in the days of Java 1.4 and has been passionate about it ever since. You can connect with him on Facebook and watch his Java videos on YouTube.