How to write, compile and run a hello world Java program for beginners
- Details
- Written by Nam Ha Minh
- Last Updated on 11 March 2020 | Print Email
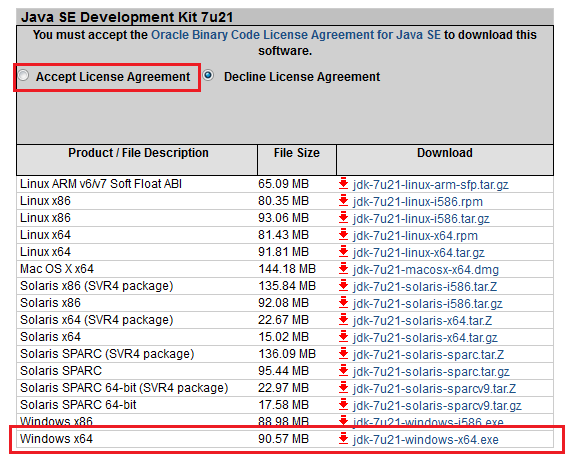
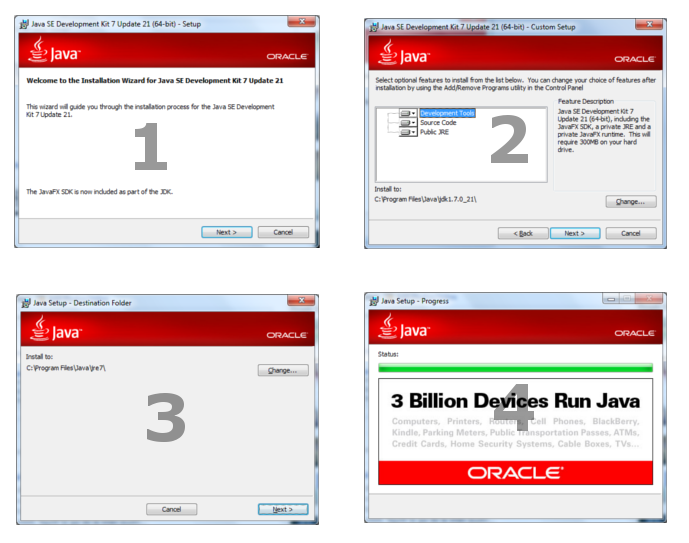
1. Download and install Java Development Kit
In order to write and run a Java program, you need to install a software program called Java SE Development Kit (or JDK for short, and SE means Standard Edition). Basically, a JDK contains:- JRE(Java Runtime Environment): is the core of the Java platform that enables running Java programs on your computer. The JRE includes JVM (Java Virtual Machine) that runs Java programs by translating from bytecode to platform-dependent code and executes them (Java programs are compiled into an intermediate form called bytecode), and other core libraries such as collections, File I/O, networking, etc.
- Tools and libraries that support Java development.
- javac.exe: is Java compiler that translates programs written in Java code into bytecode form.
- java.exe: is the Java Virtual Machine launcher that executes bytecode.
 You would see the JDK is installed in the following directory, for example: C:\Program Files\Java\jdk1.7.0_21. The following screenshot describes the JDK’s directory structure:
 Now let’s test if Java runtime is installed correctly. Open a command prompt window and type:
java -version
You would see the following result: That shows version of the JRE, e.g. “1.7.0_21” - Congratulations! Your computer is now capable of running Java programs.Now try to type the following command:
javac -version
You would see the following error: That’s because Windows could not find the javac program, so we need to set some environment variables which tell the location of javac.exe.
 2. Set up environment variables
Now we’re going to set environment variables so that the javac.exe program can be accessed anywhere from command line. On Windows 7, go to My Computer and click System Properties: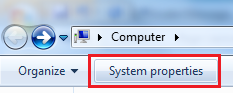 Then click Advanced system settings:
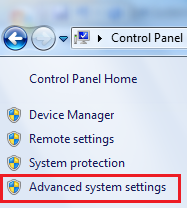 The System Properties dialog appears, select Advanced tab and click Environment Variables...:
 The Environment Variable dialog appears, click on the New… button under the System variables section.
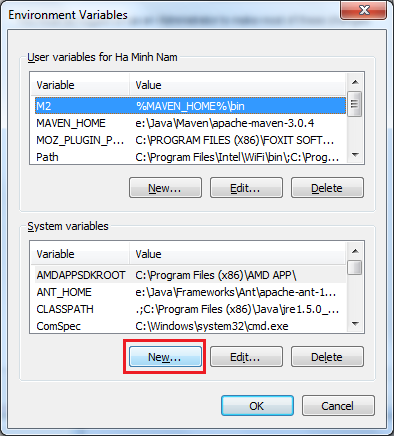 That opens up the New System Variable dialog. Type the following information:
 The field Variable name must be JAVA_HOME, and the field Variable value must point to JDK’s installation directory on your computer. Here it is set to c:\Program Files\Java\jdk1.7.0_21. Click OK to close this dialog.Now back to the Environment Variables dialog, look for a variable called Path under the System Variables list, and click Edit…:
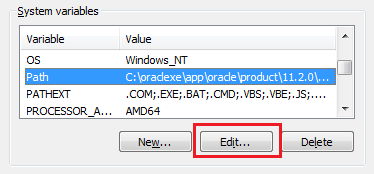 In the Edit System Variable dialog, append the following to the end of the field Variable value:
;%JAVA_HOME%\bin
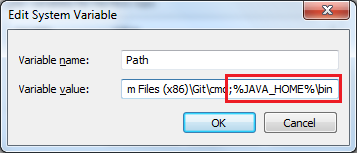 Note that there is a semicolon at the beginning to separate this value from other ones. Click OK three times to close all the dialogs.Now we have to quit the current command prompt and open a new one to see the changes takes effect. Type the following command again in the re-opened command prompt window:
javac -version
You would see the following output: Congratulations! You have completed the setup for essential Java development environment on your computer. It’s now ready to write your first Java program.
 3. Code a Java hello world program
Open a simple text editor program such as Notepad and type the following content:public class HelloWorld {
public static void main(String[] args) {
System.out.println("Hello world!");
}
}Save the file as HelloWorld.java (note that the extension is .java) under a directory, let’s say, C:\Java.Don’t worry if you don’t understand everything in this simple Java code. The following picture explains it nicely: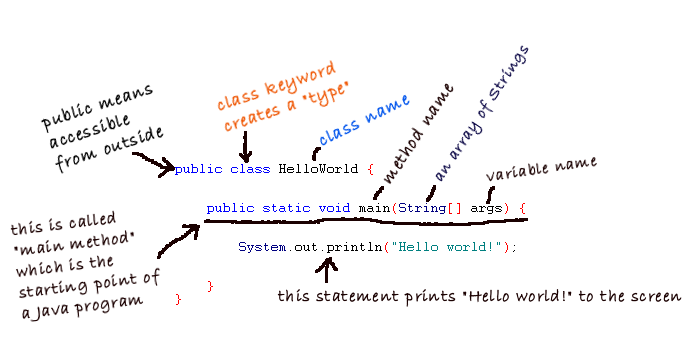 Every Java program starts from the main()method. This program simply prints “Hello world” to screen.
 4. Compile your first Java program
Now let’s compile our first program in the HelloWorld.java file using javac tool. Type the following command to change the current directory to the one where the source file is stored:cd C:\Java
And type the following command:javac HelloWorld.java
That invokes the Java compiler to compile code in the HelloWorld.java file into bytecode. Note that the file name ends with .java extension. You would see the following output: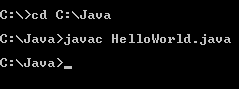 If everything is fine (e.g. no error), the Java compiler quits silently, no fuss. After compiling, it generates the HelloWorld.class file which is bytecode form of the HelloWorld.java file. Now try to type dir in the command line, we’ll see the .class file:
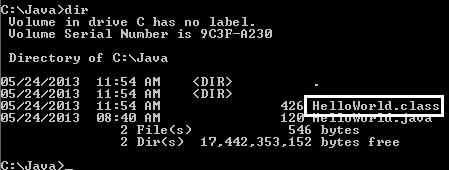 So remember a Java program will be compiled into bytecode form (.class file).
 5. Run your first Java program
It’s now ready to run our first Java program. Type the following command:java HelloWorld
That invokes the Java Virtual Machine to run the program called HelloWorld (note that there is no .java or .class extension). You would see the following output: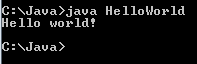 It just prints out “Hello world!” to the screen and quits. Congratulations! You have successfully run your first Java program!
 6. What we have learnt so far
Throughout this tutorial you have learnt the following things:- JDK is the Java SE Development Kit that contains tools and libraries for Java development.
- JRE is the Java Runtime Environment that enables running Java programs on your computer.
- JVM is the Java Virtual Machine that actually executes Java programs. With JVM, programs written in Java can run on multi-platforms (thus Java is called cross-platform language).
- How to install JDK and configure environment variables.
- javac is the Java compiler. It translates Java source code into bytecode.
- java is the JVM launcher which we use to run our program.
- Every Java program starts from the main() method.
- When compiling, the compiler generates a .class file from a.java file.
Related Java Hello World Tutorials:
- How to compile, package and run a Java program using command-line tools (javac, jar and java)
- Java Hello World for Beginner with NetBeans IDE
- How to create, build and run a Java Hello World program with Eclipse
- How to Compile and Run a Java Program with TextPad
- How to compile and run a Java program with Sublime Text 3
About the Author:
 Nam Ha Minh is certified Java programmer (SCJP and SCWCD). He began programming with Java back in the days of Java 1.4 and has been passionate about it ever since. You can connect with him on Facebook and watch his Java videos on YouTube.
Comments
MANY THANKS FOR THIS.
I was just about to uninstall java, because it didn't worked in spite of following several tutorials available online. Then! I tumbled upon your tutorial and everything changed. Thanks Again Nam Ha!