- Details
- Written by Nam Ha Minh
- Last Updated on 10 August 2019 | Print Email
In Java, to draw a rectangle (outlines) onto the current graphics context, we can use the following methods provided by the
Graphics/
Graphics2D class:
- drawRect(int x, int y, int width, int height)
- draw3DRect(int x, int y, int width, int height, boolean raised)
- draw(Rectangle2D)
- drawRoundRect(int x, int y, int width, int height, int arcWidth, int arcHeight)
With:
- (x, y) is the upper left corner of the rectangle.
- width and height: specify dimension of the rectangle.
- raised: specifies whether the rectangle edges are raised or sunk when drawing a 3D rectangle.
- Rectangle2D is the base class of Rectangle (for integer coordinates) Rectangle2D.Double (for double coordinates) and Rectangle2D.Float (for float coordinates).
- arcWidth and arcHeight: specify the horizontal and vertical diameters of the arcs at the four corners when drawing a rectangle with rounded corners.
To demonstrate the examples, we create the following Swing program:
/**
 * This program demonstrates how to rectangles using Graphics2D object.
 * @author www.codejava.net
 *
 */
public class RectanglesDrawingExample extends JFrame {

	public RectanglesDrawingExample() {
		super("Rectangles Drawing Demo");

		getContentPane().setBackground(Color.WHITE);
		setSize(480, 200);
		setDefaultCloseOperation(JFrame.EXIT_ON_CLOSE);
		setLocationRelativeTo(null);
	}

	void drawRectangles(Graphics g) {
		Graphics2D g2d = (Graphics2D) g;

		// code to draw rectangles goes here...

	}

	public void paint(Graphics g) {
		super.paint(g);
		drawRectangles(g);
	}

	public static void main(String[] args) throws Exception {

		SwingUtilities.invokeLater(new Runnable() {
			@Override
			public void run() {
				new RectanglesDrawingExample().setVisible(true);
			}
		});
	}
}
The code examples will go into the
drawRectangles() method which obtains graphics context of the
JFrame window:
void drawRectangles(Graphics g) {
	Graphics2D g2d = (Graphics2D) g;

	// code to draw rectangles goes here...

}
Now, let’s see the examples in details.
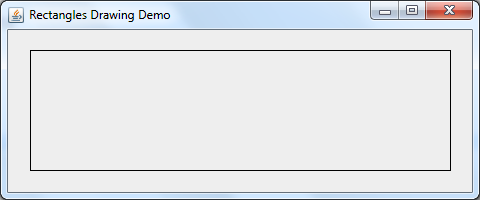
1. Drawing Rectangles in integer coordinates
Using the
drawRect() method:
g2d.drawRect(30, 50, 420, 120);
Using the
draw(Rectangle) method:
g2d.draw(new Rectangle(30, 50, 420, 120));
Result:
2. Drawing Rectangles in double coordinates
To draw a rectangle in double coordinates, create a new instance of the
Rectangle2D.Double class. For example:
double x = 29.5d;
double y = 48.8d;
double width = 413.2d;
double height = 118.6d;

Rectangle2D.Double rect = new Rectangle2D.Double(x, y, width, height);
g2d.draw(rect);
Or like this for short:
g2d.draw(new Rectangle2D.Double(29.5d, 48.8d, 413.2d, 118.6d));
3. Drawing Rectangles in float coordinates
Similar to double coordinates, we use the
Rectangle2D.Float class to draw rectangles in float coordinates. For example:
float x = 29.5f;
float y = 48.8f;
float width = 413.2f;
float height = 118.6f;

Rectangle2D.Float rect = new Rectangle2D.Float(x, y, width, height);
g2d.draw(rect);
Or like this for short:
g2d.draw(new Rectangle2D.Float(29.5f, 48.8f, 413.2f, 118.6f));
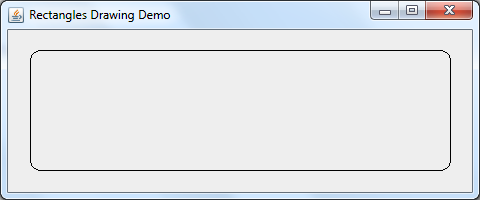
4. Drawing Rectangles with Rounded-Corners
To draw a rectangle with four rounded corners, use the
drawRoundRect() method and pass values for the horizontal diameter (
arcWidth) and vertical diameter (
arcHeight) of the corners. Here’s an example:
int x = 30;
int y = 50;
int width = 420;
int height = 120;
int arcWidth = 20;
int arcHeight = 20;

g2d.drawRoundRect(x, y, width, height, arcWidth, arcHeight);
Result:
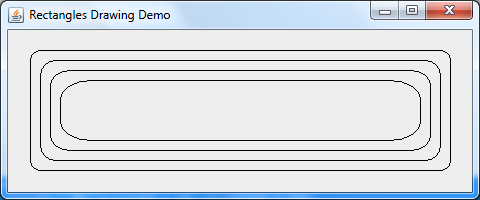
The following example plays around with various values for the
arcWidth and
arcHeight:
g2d.drawRoundRect(x, y, width, height, arcWidth, arcHeight);
g2d.drawRoundRect(x + 10, y + 10, width - 20, height - 20, arcWidth + 10, arcHeight + 10);
g2d.drawRoundRect(x + 20, y + 20, width - 40, height - 40, arcWidth + 20, arcHeight + 10);
g2d.drawRoundRect(x + 30, y + 30, width - 60, height - 60, arcWidth + 40, arcHeight + 20);
Result:
5. Drawing 3D Rectangles
The
draw3DRect() method draws a rectangle with edges appear to be raised or sunk, specified by the
raised boolean flag. Here’s an example:
int x = 30;
int y = 50;
int width = 420;
int height = 120;
boolean raised = true;

g2d.setColor(Color.LIGHT_GRAY);

g2d.draw3DRect(x, y, width, height, raised);
Result (a really simple 3D effect):
The following example draws two rectangles - one with raised edges and one with sunk edges:
g2d.setColor(Color.LIGHT_GRAY);
g2d.draw3DRect(30, 50, 200, 120, true);
g2d.draw3DRect(250, 50, 200, 120, false);
Result: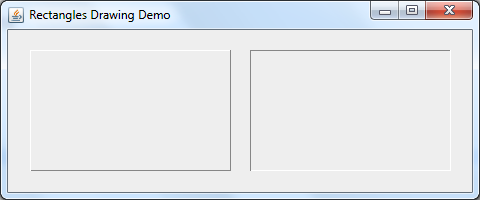 NOTE:
NOTE: The
draw3DRect() method uses only the current color and ignores the current paint, such as line strokes.
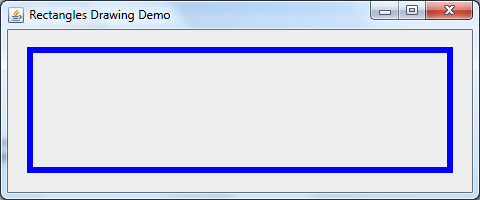
6. Drawing Rectangles with Custom Strokes
Rather than using the default style (thin and solid line, black color), we can make some attractive decorations for the outlines of the rectangles using
Strokes. For example:
Stroke stroke1 = new BasicStroke(6f);

g2d.setColor(Color.BLACK);
g2d.setStroke(stroke1);

g2d.drawRect(30, 50, 420, 120);
That draws a rectangle with outlines in blue color and thickness of 6 pixels width. Here’s the result:
To understand more about using strokes, see the tutorial:
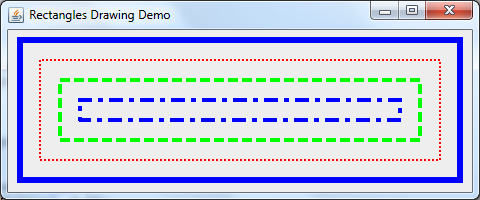
Drawing lines examples with Graphics2D. The following code snippet plays around with various strokes:
int x = 20;
int y = 40;
int width = 440;
int height = 140;

Stroke stroke1 = new BasicStroke(6f);

g2d.setColor(Color.BLUE);
g2d.setStroke(stroke1);
g2d.drawRect(x, y, width, height);

float[] dashingPattern1 = {2f, 2f};
Stroke stroke2 = new BasicStroke(2f, BasicStroke.CAP_BUTT,
		BasicStroke.JOIN_MITER, 1.0f, dashingPattern1, 2.0f);

g2d.setColor(Color.RED);
g2d.setStroke(stroke2);
g2d.drawRect(x + 20, y + 20, width - 40, height - 40);

float[] dashingPattern2 = {10f, 4f};
Stroke stroke3 = new BasicStroke(4f, BasicStroke.CAP_BUTT,
		BasicStroke.JOIN_MITER, 1.0f, dashingPattern2, 0.0f);

g2d.setColor(Color.GREEN);
g2d.setStroke(stroke3);
g2d.drawRect(x + 40, y + 40, width - 80, height - 80);


float[] dashingPattern3 = {10f, 10f, 1f, 10f};
Stroke stroke4 = new BasicStroke(4f, BasicStroke.CAP_SQUARE,
		BasicStroke.JOIN_MITER, 1.0f, dashingPattern3, 0.0f);

g2d.setColor(Color.BLUE);
g2d.setStroke(stroke4);
g2d.drawRect(x + 60, y + 60, width - 120, height - 120);
Result:
API References:
Other Java Graphics Tutorials:About the Author:
 Nam Ha Minh
 is certified Java programmer (SCJP and SCWCD). He started programming with Java in the time of Java 1.4 and has been falling in love with Java since then. Make friend with him on
Facebook and watch
his Java videos you YouTube.