Download and Install Tomcat 10 on macOS
- Details
- Written by Nam Ha Minh
- Last Updated on 15 November 2023 | Print Email
1. Download binary distribution of Tomcat 10
You need to download the archive file (zip or tar.gz) for macOS because no Tomcat installer provided for Mac. Click this link to visit Tomcat 10’s official download page. Find the download link for zip archive under the Binary Distributions section: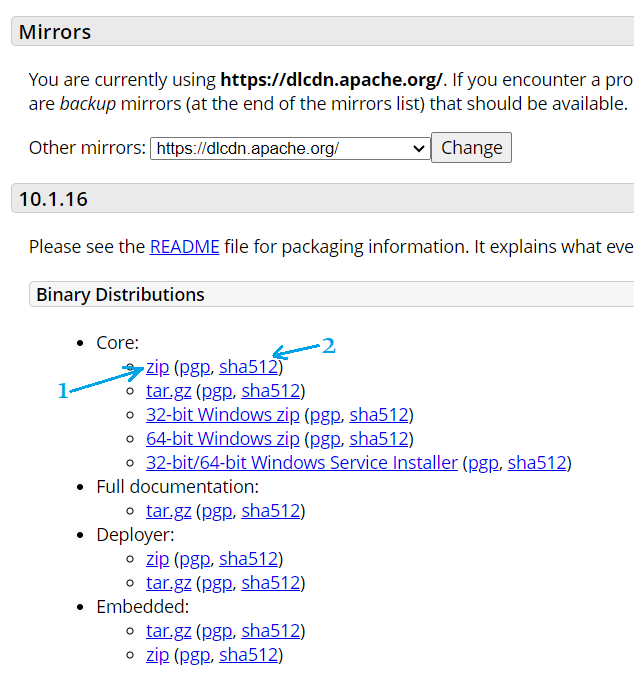
2. Install Tomcat 10 on macOS
Before extracting the zip file, you should verify its integrity by checking SHA512 value of the file. In Terminal window, change the current directory to where the zip file is downloaded. And type the following command:shasum -a 512 apache-tomcat-10.1.15.zip
It will hash the file to calculate SHA512 checksum value, as shown below: Compare this value against the one published on the download page (see link 2). If both are identical, that means the zip file is not tampered and safe to use.To install, extract the zip file into a specific folder, e.g. user home directory, using the following command:
tar -xf apache-tomcat-10.1.15.zip -C $HOME
Then you can explore the files using some cd and ls commands, as shown below: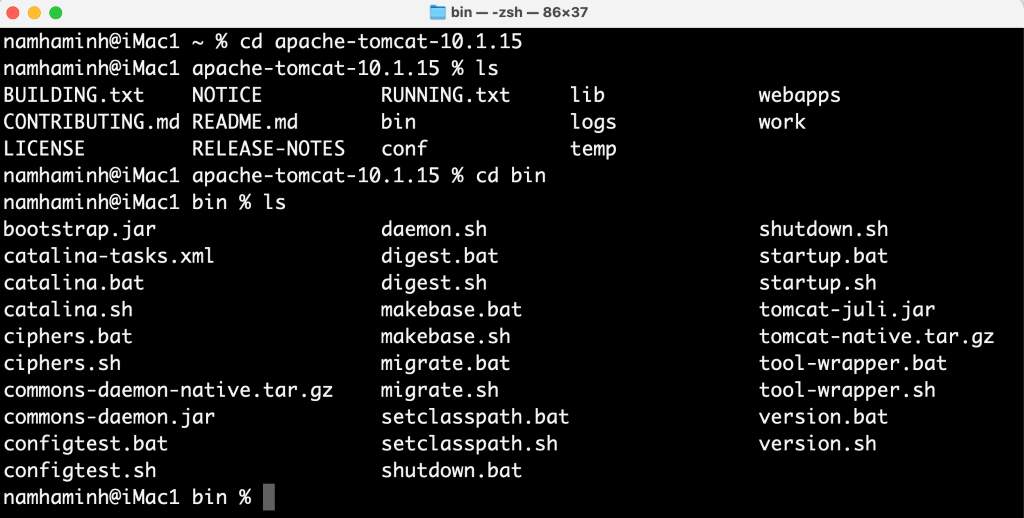 You know, Tomcat provides some shell script (.sh files) which can be found in the bin directory. These scripts can be used to control the server (start, stop, debug…). The primary scripts are:
- catalina.sh: this is the general purpose script that can be used to check version, start, stop, debug the server…
- version.sh: a shortcut to see version of the server, OS, JVM
- startup.sh: a shortcut to start the server
- shutdown.sh: a shortcut to stop the server
3. Start Tomcat server
In Terminal, change the current directory to bin, and execute one of the scripts above to start the server. For example:./startup.sh
This will start a background thread that runs the server process. It will print something like this: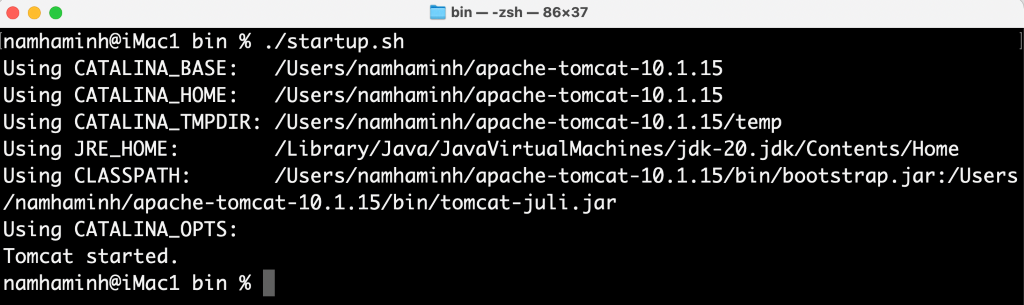 This proves Tomcat has started. The server is listening on port 8080 (default port number of Tomcat) and is ready to serve requests from clients.Now, open your web browser, and enter http://localhost:8080 into the address bar, you’ll see the server’s home page as shown below:
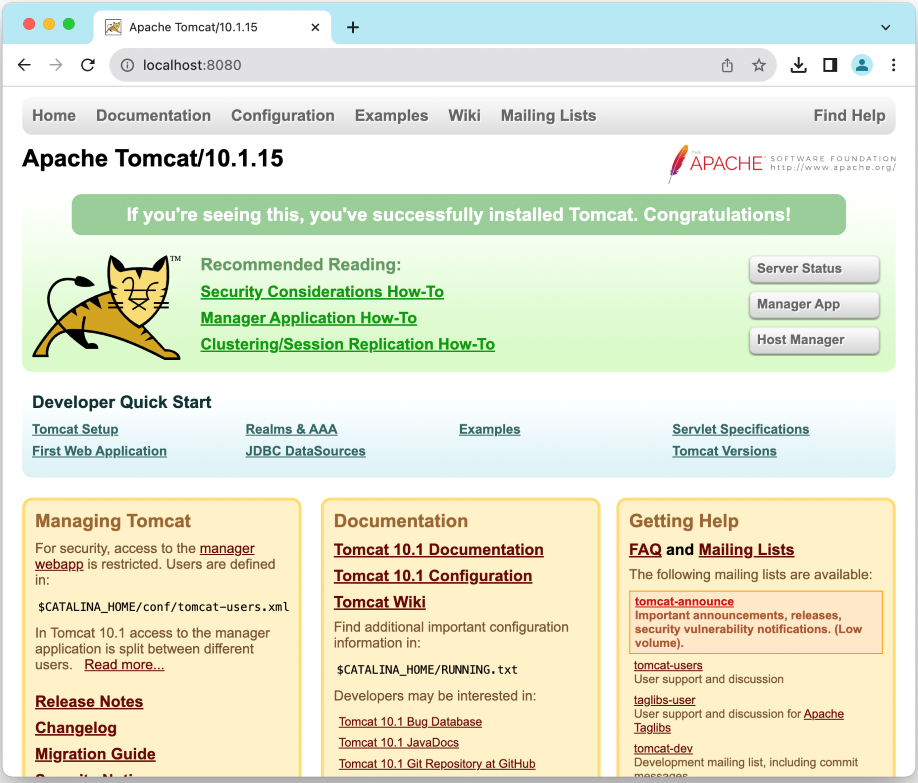 Congratulations! You have installed Tomcat 10 successfully on your macOS. You can use this web interface you to deploy, manage, monitor Java web applications running on the server. Learn more: How to deploy a Java web application on Tomcat. NOTES: You can also use the following commands in Terminal to start Tomcat:
- sh catalina.sh start
- ./catalina.sh start
- sh startup.sh
chmod u+x startup.sh
4. Stop Tomcat server
To shut down the running server, you can run the following command:./shutdown.sh
The server process will be terminated, as shown below: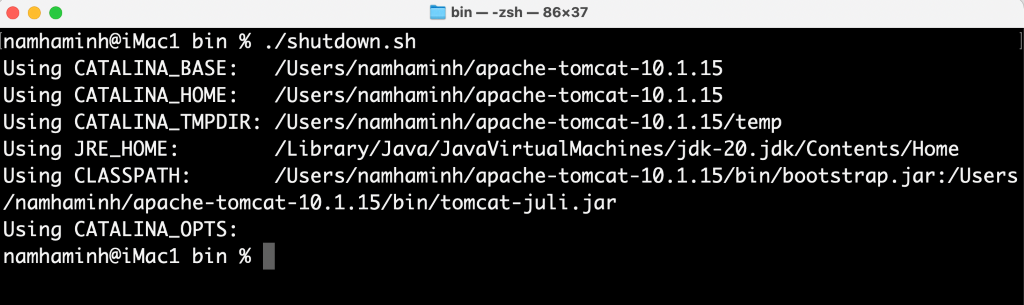 NOTES: You can also use the following commands in Terminal to start Tomcat:
- sh catalina.sh stop
- ./catalina.sh stop
- sh shutdown.sh
chmod u+x shutdown.sh
5. Configure access to Tomcat Web Application Manager
Developers can use the Tomcat Web Application Manager to deploy and manage Java web applications. It can be accessed by clicking the Manager App button on the localhost page. To sign in, you must enter correct username and password: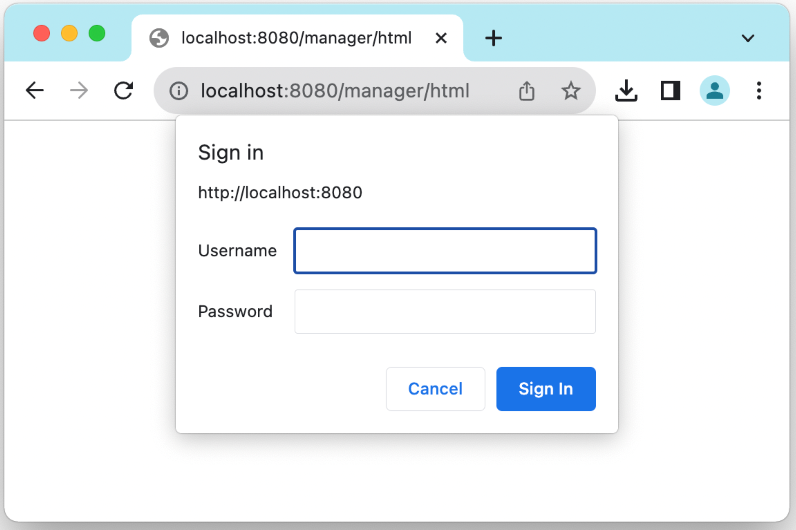 But we have not configured any users yet, right? So click Cancel button. You will see 401 Unauthorized error page as shown below:
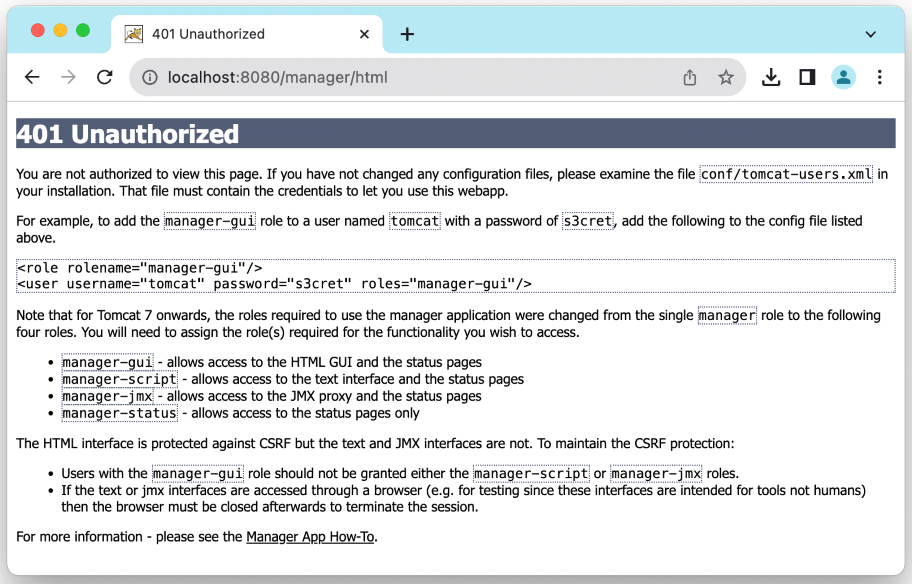 This page tells us how to update the tomcat-users.xml file, in order to get access to the Tomcat web application manager. Change the current directory to conf and edit the file using the following commands:
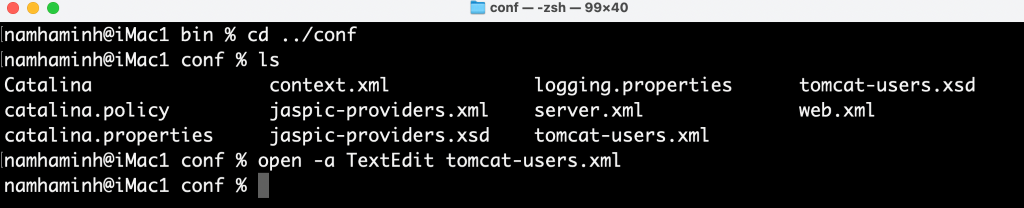
cd ../conf
open -a TextEdit tomcat-users.xml
 This will open the TextEdit program that loads the tomcat-users.xml file. Remove the XML comments around <user> tags and keep only one username admin with your own password, as shown below:
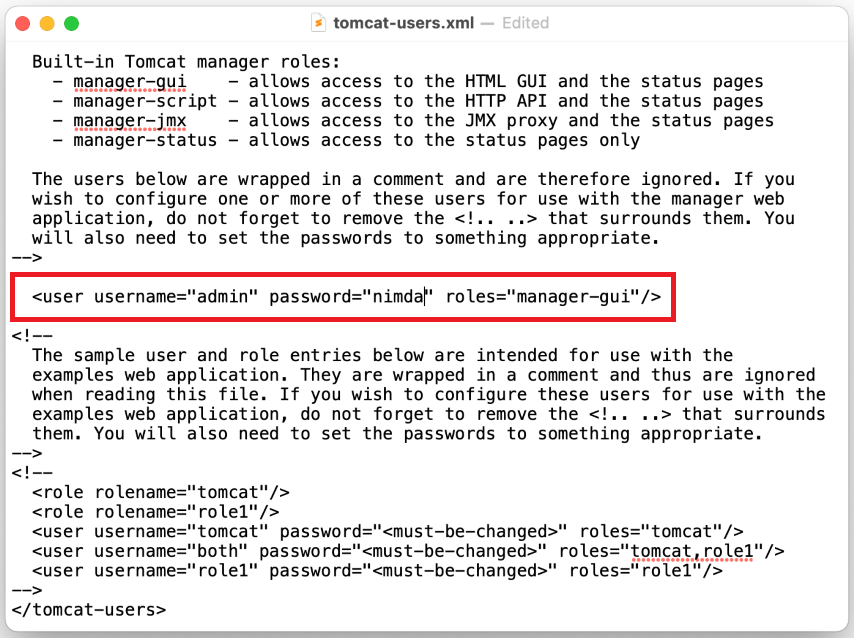 Save the change and quit TextEdit. You must stop and start the server for the change to take effect. Then you will be able to access the Tomcat Web Application Manager using the specified username and password:
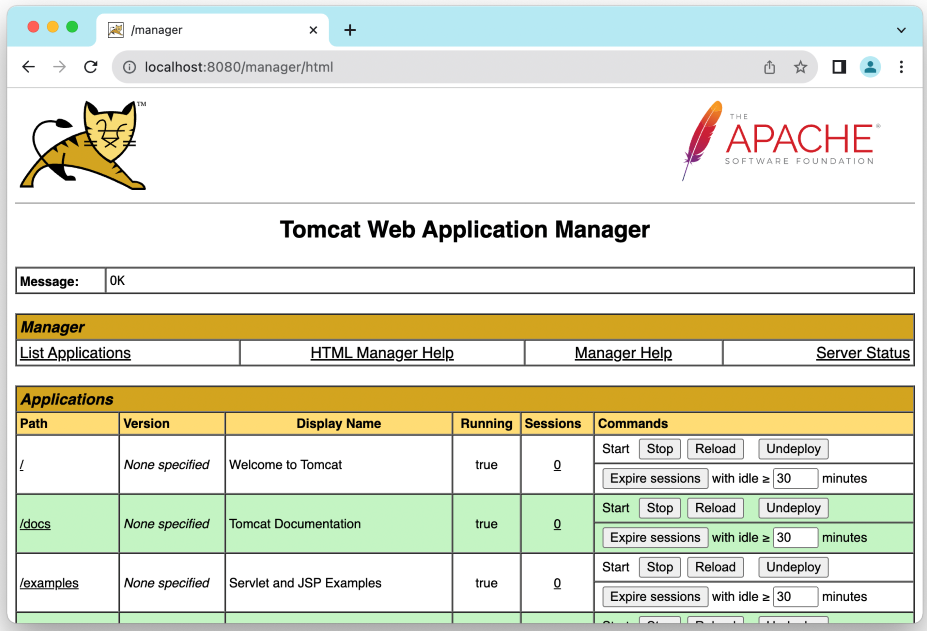 You can use this Tomcat Web Application Manager to deploy and manage Java applications running on the server. Check this article to learn about Java applications deployment on Tomcat.Watch the following video to see how to download, install, configure and run Tomcat 10 on macOS in action:
 Other Tomcat Tutorials:
- How to deploy a Java web application on Tomcat
- How to Embed Tomcat Server into Java Web Applications
- How to Use Virtual Hosts in Tomcat
- How to configure JNDI DataSource for Database Connection Pooling in Tomcat
- How to configure session timeout in Tomcat
- How to change Tomcat port number
- How to add Tomcat server in Eclipse
- How to change server location and deploy path for Tomcat in Eclipse
About the Author:
 Nam Ha Minh is certified Java programmer (SCJP and SCWCD). He began programming with Java back in the days of Java 1.4 and has been passionate about it ever since. You can connect with him on Facebook and watch his Java videos on YouTube.
Comments