Download and Install Maven on macOS
- Details
- Written by Nam Ha Minh
- Last Updated on 01 August 2022 | Print Email
1. Download and Install Apache Maven on macOS
Apache Maven is distributed as a binary archive so you need to download a zip file from its official home page here. Click the link next to Binary zip archive, as shown below: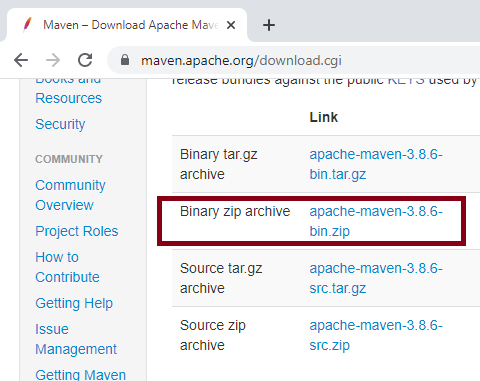 It will download apache-maven-xxx-bin.zip file into your Downloads directory. You will install it in your user home directory, so open a new Terminal window, and type the following command: mv Downloads/apache-maven-xxx-bin.zip $HOMEThis command moves the zip file into your user home directory. And type the following command to unzip it:
unzip apache-maven-xxx-bin.zip
cat > .zshrc
export MAVEN_HOME=$HOME/apache-maven-xxx
export PATH=$MAVEN_HOME/bin:$PATH
Hit Enter and press Ctrl + D to save the file. The following screenshot illustrates the above steps: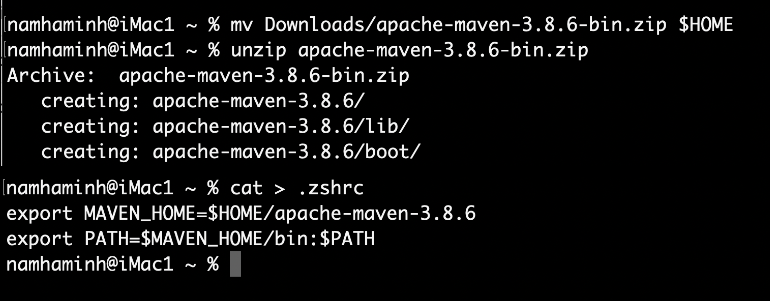 Then quit the terminal and open a new one for the change to system environment variables take effect. In the new terminal, type mvn -v to check version of Maven:
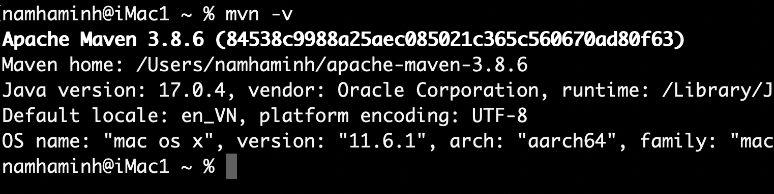 If you see this screen, that means you have successfully installed Maven on macOS. You see, the command prints version information of Maven, Java and operating system.
2. Use Maven to Create and Build a Simple Java Project on macOS
Next, I’ll show you how to use Maven command line tool to create a simple Java project, then compile and build it. Type the following command:mvn archetype:generate -DarchetypeArtifactId=maven-archetype-quickstart -DarchetypeVersion=1.4This command will generate a Java project with the Maven archetype quickstart and archetype version 1.4. You’ll be asked to provide information about the project as shown below: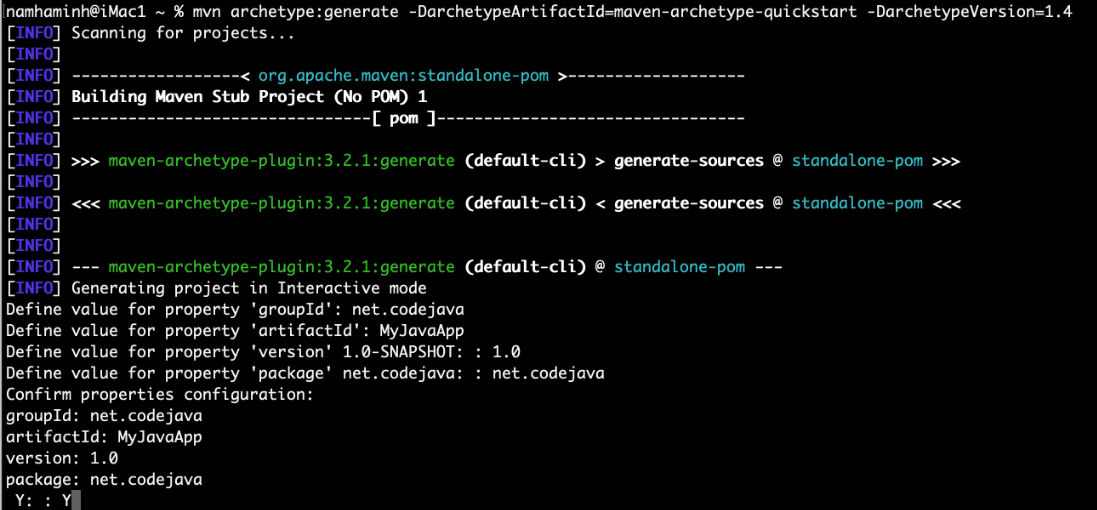 Enter groupId, artifactId, version and package as shown above, then type Y to confirm. Then you should see the BUILD SUCCESS message like this:
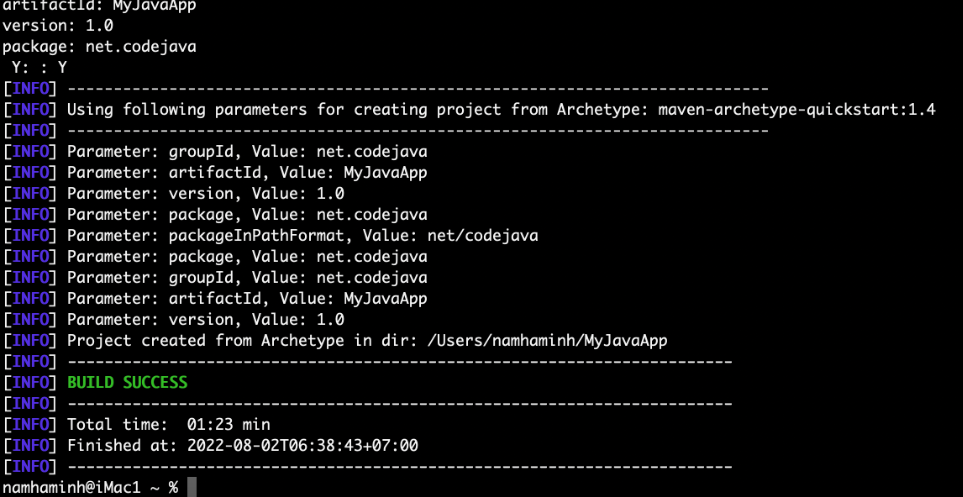 Explore the generated project under MyJavaApp directory. You should see the Maven project file (pom.xml), the main class (App.java) and the test class (AppTest.java).Next, let’s compile and build the project into a Java Archive (JAR) file. Type the following commands:
cd MyJavaApp
mvn package
You’ll see the following output: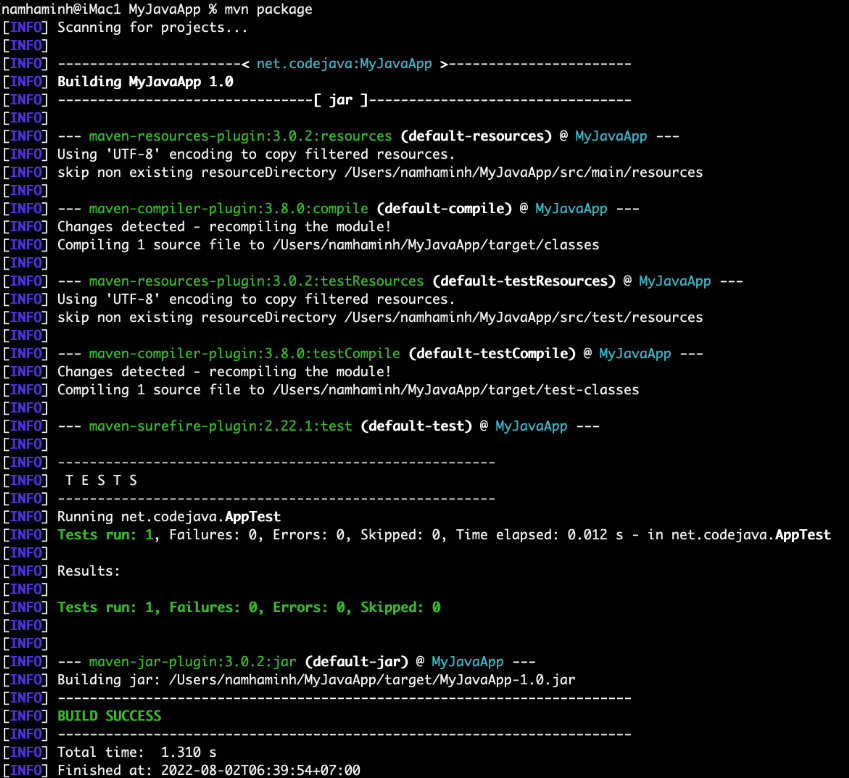 The result is a JAR file name MyJavaApp-1.0.jar created under target directory. To run this Java program, type the following command: java -cp target\MyJavaApp-1.0.jar net.codejava.AppYou can see it print “Hello World!” message.That’s my tutorial about download, install Apache Maven on macOS. You also learned how to create a simple Java project using Maven command line tool, and how to build and run it.To see the steps in action, watch the following video:
 Other Maven Articles:
- Maven - how to exclude tests from build
- How to change Java version for Maven project
- Fix Maven Build Error invalid target release
About the Author:
 Nam Ha Minh is certified Java programmer (SCJP and SCWCD). He began programming with Java back in the days of Java 1.4 and has been passionate about it ever since. You can connect with him on Facebook and watch his Java videos on YouTube.
Comments
I have been trying to follow your steps. However, I keep encoutnering build failure and are not sure what to do. Also whenever I try to create a new JavaFx project with maven I am not allowed to. I am not sure what to do at this point. I have been struggling a lot these days. I hope you can help me
best regards
Joyce