How to add custom Ant build script to Java project in Eclipse
- Details
- Written by Nam Ha Minh
- Last Updated on 07 August 2019 | Print Email
Create an Ant build script in Eclipse:
First off, we need to create our own Ant build file. Right click on the project, select New > Other… from context menu. In the New dialog, select XML > XML File: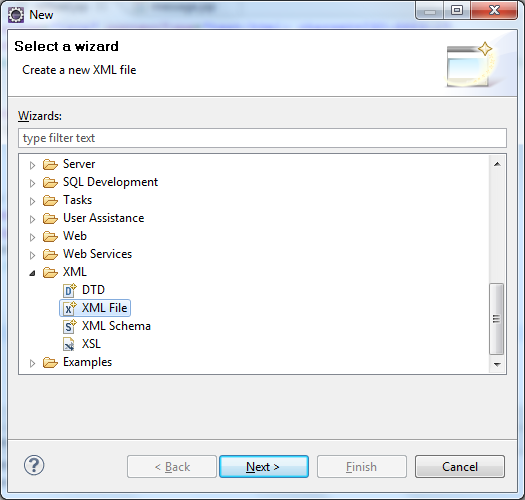 Click Next. In the New XML File dialog, type antbuild.xmlinto File name field:
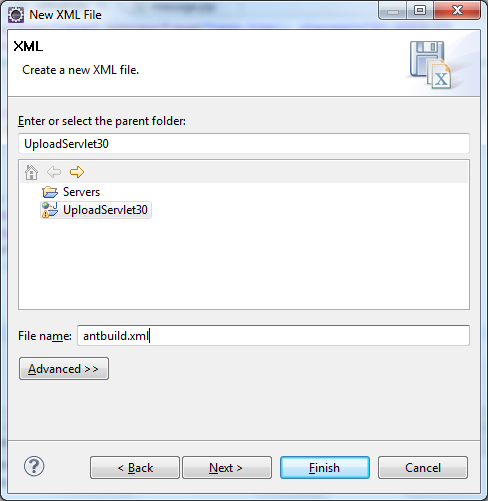 Click Finish, the empty antbuild.xml file is created under project’s root directory. Write content for this file as follows:
 <?xml version="1.0" encoding="UTF-8"?>
<project name="project">
<description>
This is a custom Ant build file which contains a target that
package the web application as a deployable WAR file.
</description>
<target name="makeWAR" description="Bundles the application as a WAR file">
<war destfile="UploadServlet30.war"
basedir="WebContent"
needxmlfile="false">
</war>
</target>
</project> Add Ant build to project’s builders
Next, we need to make some configurations to tell Eclipse executing our custom Ant build after every project build.Open project’s properties dialog by right click on the project and select Properties (or from main menu Project > Properties). In the properties dialog, select Builders, you will see a screen like this: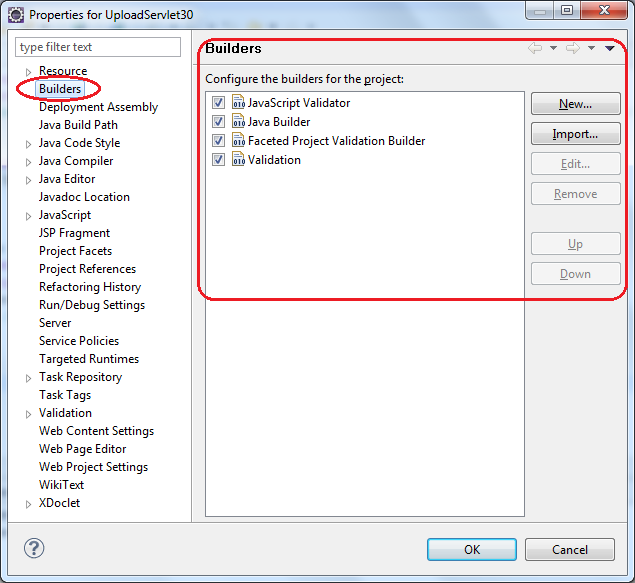 This screen shows a list of builders which are used by Eclipse when building the project. The order of builders does matter: the top most is called first, then to the second one, and so on.To add a new Ant build to the list, click the New… button. In the dialog Choose configuration type, select Ant builder and click OK:
  In the Edit Configuration dialog, under Main tab:
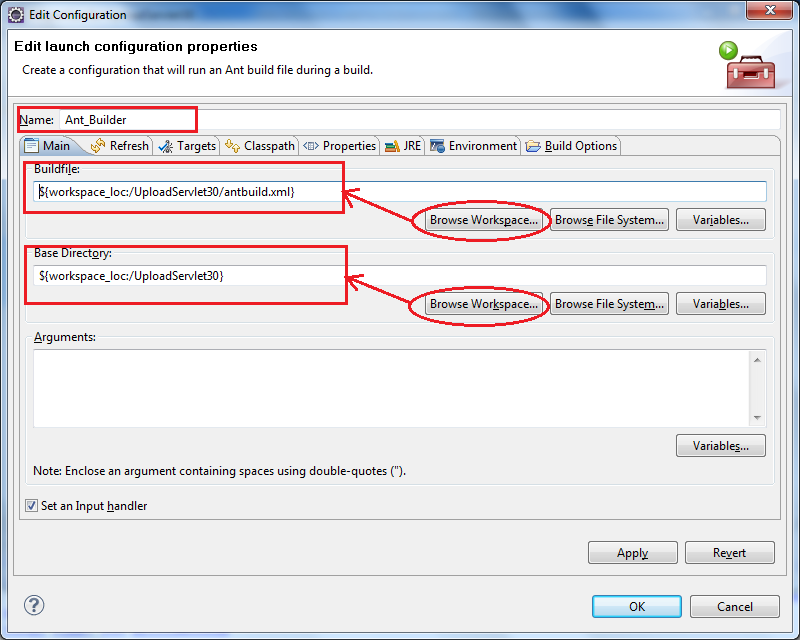
- Type Ant_Builder into Name field.
- Under Buildfile section, click Browse Workspace to select antbuild.xml file created previously.
- Under Base Directory section, click Browse Workspace to select project’s root directory.
Now switch to Targets tab. In this screen, we can assign targets from our Ant build file for 4 build actions:
- After a “Clean”.
- Manual Build.
- Auto Build.
- During a “Clean”.
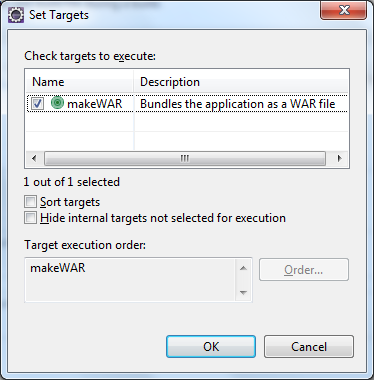 Click OK. The target makeWAR is now assigned to Auto Build action:
 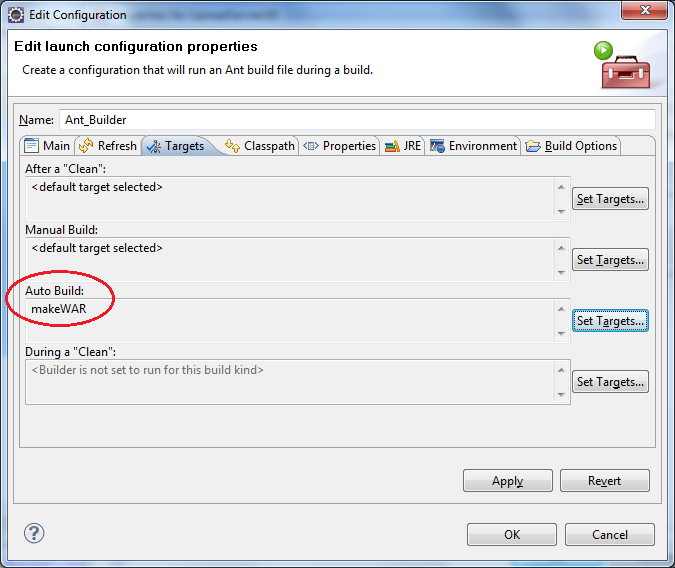 Note: You can select multiple targets for a build action.Click OK to close the Edit Configuration dialog and return to project properties dialog, our new builder – Ant_Builder is appended to the list:
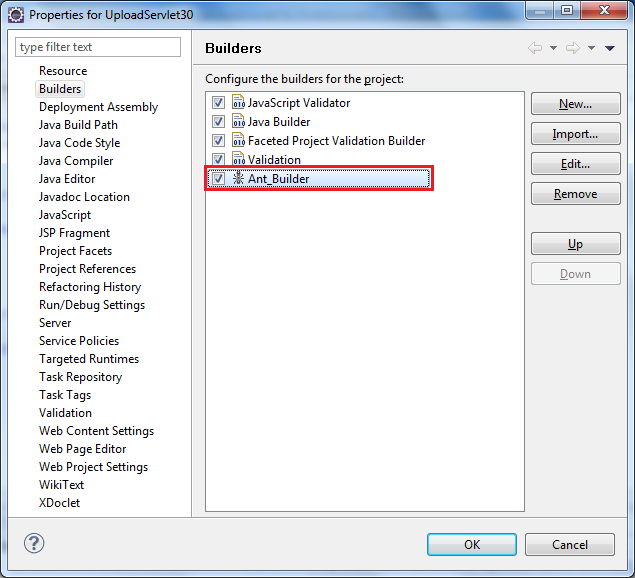 The Ant_Builder is at the end of the list which means it is executed lastly, after other builders.Note: use Up or Down button to change order of the builder.
Ant build execution in Eclipse
Because we assigned the target makeWAR for Auto Build action, the target is executed after every Eclipse’s auto build, as seen in the Console view: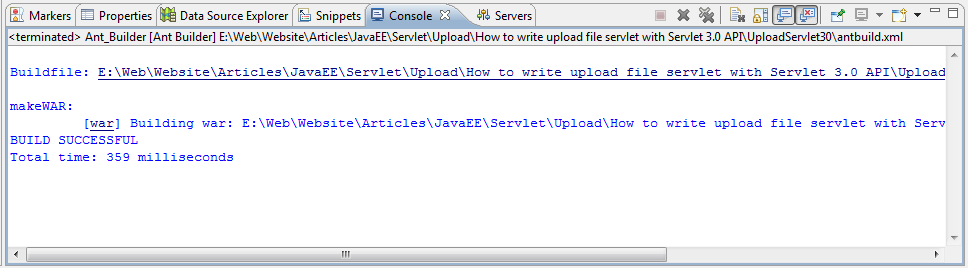 And a WAR file, UploadServlet30.war, is generated after every build, as a result of executing the custom ant build script.
 Remove Ant build from project’s builders
When the custom Ant build is no longer needed, we can disable or remove it by clicking the checkbox to disable or clicking button Remove to remove it completely.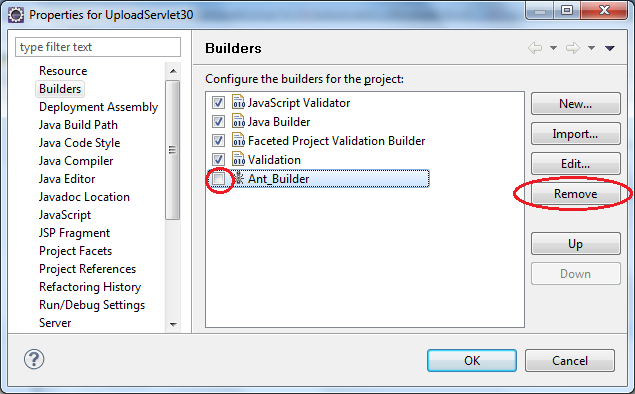 The builder is removed from builders list, but the ant build file is not deleted.
 Related Tutorials:
Other Eclipse Tutorials:
- How to use Eclipse IDE for Java EE Developers
- How to create, build and run a Java Hello World program with Eclipse
- How to change font for Java code in Eclipse
- How to Add Copyright License Header for Java Source Files in Eclipse
- How to generate Javadoc in Eclipse
- How to create JAR file in Eclipse
- How to generate WAR file in Eclipse
- How to pass arguments when running a Java program in Eclipse
- How to create Java web project with Maven in Eclipse
- 25 Eclipse Shortcut Keys for Code Editing
About the Author:
 Nam Ha Minh is certified Java programmer (SCJP and SCWCD). He began programming with Java back in the days of Java 1.4 and has been passionate about it ever since. You can connect with him on Facebook and watch his Java videos on YouTube.
| [Ant build file] | 0.4 kB |
Comments