Create Multi-Module Maven Project in Eclipse IDE
- Details
- Written by Nam Ha Minh
- Last Updated on 23 August 2021 | Print Email
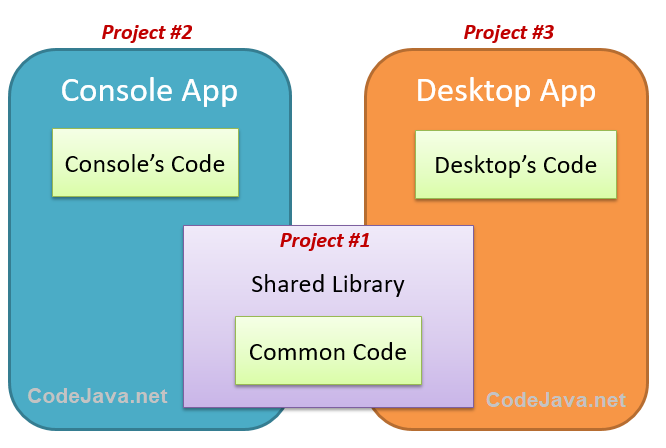 You see, this application has some common code that is shared between the console program and desktop program. Building as Maven project, it would consist of 3 modules: Shared library, Console app and Desktop app. Each module is a separate project.The following picture explains a Maven’s project structure with multiple modules:
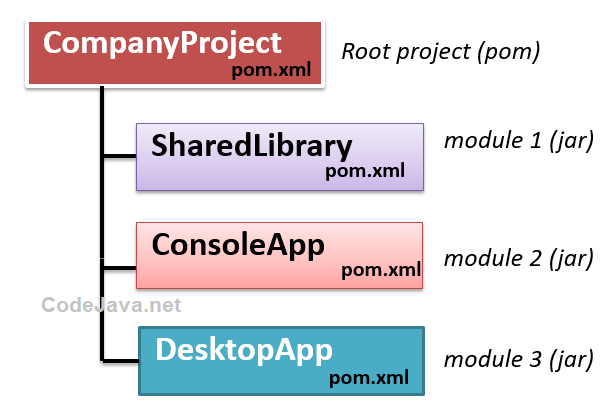 Here, CompanyProject is the root Maven project (packaging type must be pom). SharedLibrary project is the first module; ConsoleApp project is the second module; and DesktopApp is the third module. The packaging type of modules can be jar or war.Now, let’s see how to create this multi-module Maven project in Eclipse IDE.
 1. Create the root Maven project
In Eclipse, click File > New > Project… and choose Maven > Maven project from the New project wizard: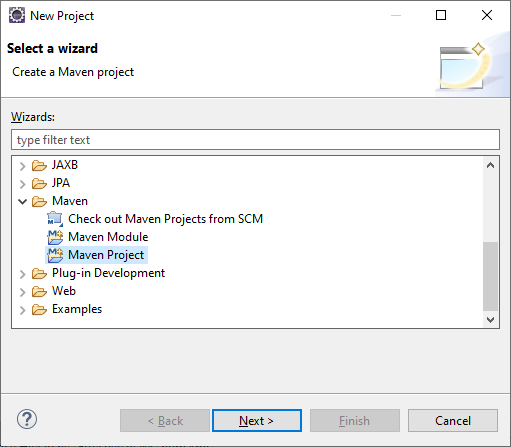 In the New Maven Project dialog, check the option Create a simple project (skip archetype selection):
 Then enter project name and specify information for the Maven project as below:
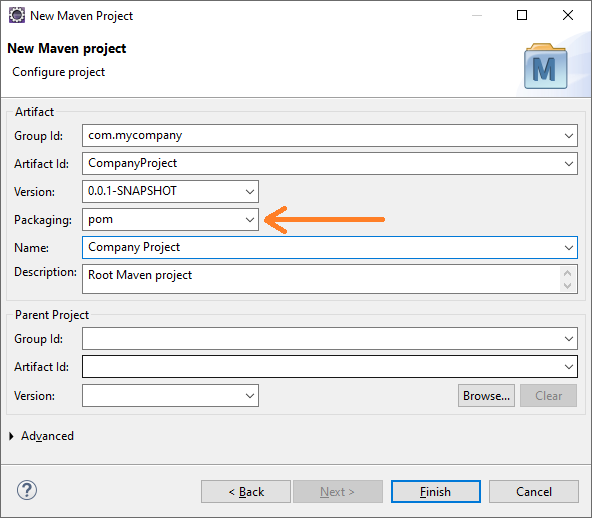 Choose the packaging type is pom. Click Finish. Eclipse will create a simple Maven POM project that acts as the root project for sub modules.
2. Create the first Maven module
Next, let’s create the first Maven module for the shared library project. Right-click on the CompanyProject in the Package Explorer/Project Explorer view, then select New > Project… from the context menu. Then choose Maven Module in the New Project dialog: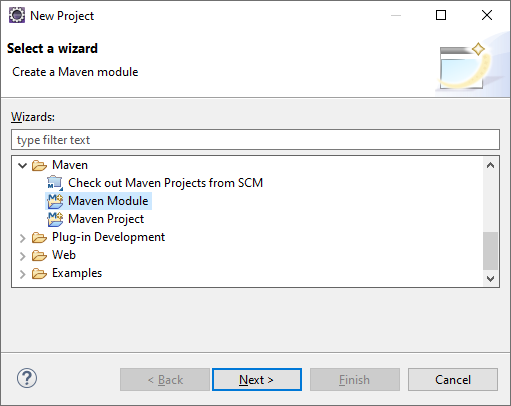 Then in the New Maven Module Dialog, check the option “Create a simple project”, and enter module name as SharedLibrary as follows:
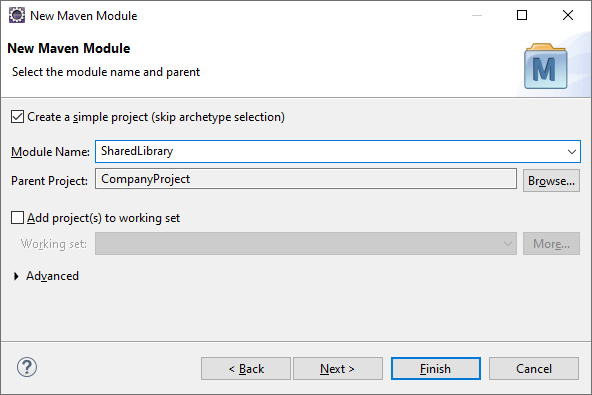 Click Next if you want to specify project information for this module. Else click Finish to create the first module with the same groupId as the root project.You can notice a new module is added to the root project’s pom.xml file as below:
<project ...>

    [...]

    <groupId>com.mycompany</groupId>
    <artifactId>CompanyProject</artifactId>
    <packaging>pom</packaging>
    <version>0.0.1-SNAPSHOT</version>
    <description>Root Maven project</description>

    <modules>
        <module>SharedLibrary</module>
    </modules>

    [...]

</project>
Here, the packaging type of the root project is pom. And in the SharedLibrary project, its parent information is specified as below:<project ...>
<parent>
<artifactId>CompanyProject</artifactId>
<groupId>com.mycompany</groupId>
<version>0.0.1-SNAPSHOT</version>
</parent>
<artifactId>SharedLibrary</artifactId>
[...]
</project>Then code a simple class in the SharedLibrary project as follows:package com.mycompany;
public class CommonUtility {
public static String getAppName() {
return "My Company App Beta version";
}
}The static method getAppName() will be used by both console app and desktop app.
3. Create the second Maven module
Similarly, create the second Maven module for the ConsoleApp project. And in the ConsoleApp project, it should refer to the SharedLibrary project in the pom.xml file follows:<project ...>
[..]
<artifactId>ConsoleApp</artifactId>
<dependencies>
<dependency>
<groupId>com.mycompany</groupId>
<artifactId>SharedLibrary</artifactId>
<version>0.0.1-SNAPSHOT</version>
</dependency>
</dependencies>
[..]
</project>And write simple console program as below:package com.mycompany;
public class ConsoleApp {
public static void main(String[] args) {
String appName = CommonUtility.getAppName();
System.out.println("Welcome to " + appName);
}
}You see, this class makes use of the CommonUtility class from the SharedLibrary project.
4. Create the third Maven module
Next, let’s create the third Maven module for the DesktopApp project. The root project’s pom.xml should be updated for containing 3 modules as follows:<project ...>
<groupId>com.mycompany</groupId>
<artifactId>CompanyProject</artifactId>
<packaging>pom</packaging>
<version>0.0.1-SNAPSHOT</version>
<modules>
<module>SharedLibrary</module>
<module>ConsoleApp</module>
<module>DesktopApp</module>
</modules>
[...]
</project>For demo purpose, code a simple Swing program for the desktop program with the following code:package com.mycompany;
import javax.swing.*;
import java.awt.*;
public class DesktopApp extends JFrame {
static String appName = CommonUtility.getAppName();
public DesktopApp() {
super(appName);
init();
}
private void init() {
setLayout(new FlowLayout());
add(new JLabel("Welcome to " + appName));
setDefaultCloseOperation(EXIT_ON_CLOSE);
setSize(640, 480);
setLocationRelativeTo(null);
}
public static void main(String[] args) {
SwingUtilities.invokeLater(new Runnable() {
@Override
public void run() {
new DesktopApp().setVisible(true);
}
});
}
}You see, this class also makes use of the CommonUtility class from the SharedLibrary project.
5. Build a Multi-Module Maven project in Eclipse IDE
To build the whole multi-module Maven project in Eclipse, right click on the root project, and select Run As > Maven install… Maven will build this multi-module project including sub modules as follows: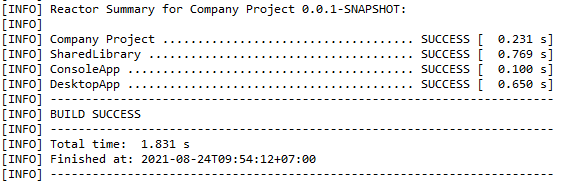 Now you can check the target directory in each project. Maven should have generated jar file for each project there.That’s how to create a multi-module Maven project in Eclipse IDE. To see the steps and coding in action, I recommend you to watch the following video:
 Other Eclipse Tutorials:
- How to import existing projects into Eclipse workspace
- How to create, deploy and run Java Servlet in Eclipse
- How to generate JAR file in Eclipse
- How to create WAR file for Java web application in Eclipse
- How to create Ant build file for existing Java project in Eclipse
- How to generate Javadoc in Eclipse
- How to create Java web project with Maven in Eclipse
- 25 Eclipse Shortcut Keys for Code Editing
- How to Add Copyright License Header for Java Source Files in Eclipse
- How to monitor HTTP requests and responses using TCP/IP Monitor in Eclipse
About the Author:
 Nam Ha Minh is certified Java programmer (SCJP and SCWCD). He began programming with Java back in the days of Java 1.4 and has been passionate about it ever since. You can connect with him on Facebook and watch his Java videos on YouTube.
Comments