How to code login and logout with Java Servlet, JSP and MySQL
- Details
- Written by Nam Ha Minh
- Last Updated on 04 July 2019 | Print Email
1. Create database table used for authentication
7. Test Login and Logout Functions
1. Create database table used for authentication
In the login page, the user enters email and password – so we need to verify that login information against data in a database table, typically the users table.Make sure that the table you use for authentication has at least 3 fields: fullname, email and password.Here’s the structure of the table users I use for this tutorial: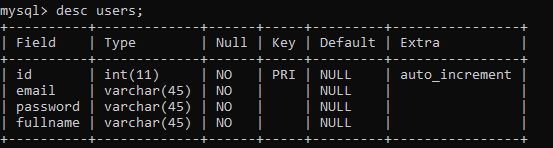 If you haven’t created any table for authentication, execute the following MySQL script to create one:
CREATE TABLE `users` (
  `id` int(11) NOT NULL AUTO_INCREMENT,
  `email` varchar(45) NOT NULL,
  `password` varchar(45) NOT NULL,
  `fullname` varchar(45) NOT NULL,
  PRIMARY KEY (`id`)
) ENGINE=InnoDB;
2. The User model class
Next, create a plain old Java object (POJO) class that represents a user:package net.codejava;
public class User {
private int id;
private String fullname;
private String email;
private String password;
// getters and setters are not shown for brevity
}You should generate getter and setter methods for all fields of this class. They are not shown in the above code or brevity.
3. Code Check Login method
Next, we need to implement a method that checks the login information entered by the user against the data in the database. So create UserDAO class with the following code:package net.codejava;
import java.sql.*;
public class UserDAO {
public User checkLogin(String email, String password) throws SQLException,
ClassNotFoundException {
String jdbcURL = "jdbc:mysql://localhost:3306/bookshop";
String dbUser = "root";
String dbPassword = "password";
Class.forName("com.mysql.jdbc.Driver");
Connection connection = DriverManager.getConnection(jdbcURL, dbUser, dbPassword);
String sql = "SELECT * FROM users WHERE email = ? and password = ?";
PreparedStatement statement = connection.prepareStatement(sql);
statement.setString(1, email);
statement.setString(2, password);
ResultSet result = statement.executeQuery();
User user = null;
if (result.next()) {
user = new User();
user.setFullname(result.getString("fullname"));
user.setEmail(email);
}
connection.close();
return user;
}
}Note that the database connection information specified in the beginning of the checkLogin() method. You should update the JDBC URL, username and password accordingly to MySQL on your computer.You can see checkLogin() method returns a non-null User object if the email and password are found in the database. Otherwise null is returned.To learn more about database programming in Java, read this JDBC tutorial.
4. Code Login Page
Write code for the login page (login.jsp) with the following code:<%@ page language="java" contentType="text/html; charset=utf-8"
pageEncoding="utf-8"%>
<!DOCTYPE html>
<html>
<head>
<meta charset="utf-8">
<title>Bookshop Website</title>
</head>
<body>
<div style="text-align: center">
<h1>Admin Login</h1>
<form action="login" method="post">
<label for="email">Email:</label>
<input name="email" size="30" />
<br><br>
<label for="password">Password:</label>
<input type="password" name="password" size="30" />
<br>${message}
<br><br>
<button type="submit">Login</button>
</form>
</div>
</body>
</html>When running, this login page looks like this: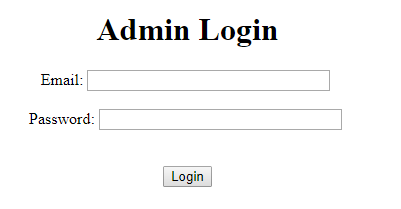 Note that in the login.jsp page, we use an EL expression ${message} to display the message sent from the server – typically to tell the user that the login failed.If you want to validate the fields in the form before the form is submitted, add the following script tags inside the <head> section of the page:
<script
  src="https://code.jquery.com/jquery-3.4.1.min.js"
  integrity="sha256-CSXorXvZcTkaix6Yvo6HppcZGetbYMGWSFlBw8HfCJo="
  crossorigin="anonymous"></script>
<script type="text/javascript"
	src="https://cdn.jsdelivr.net/npm/jquery-validation@1.19.0/dist/jquery.validate.min.js"></script>
Here we use 2 jQuery libraries (core and validation) from CDN websites.And add the following jQuery code before the closing </html> tag:
<script type="text/javascript">

	$(document).ready(function() {
		$("#loginForm").validate({
			rules: {
				email: {
					required: true,
					email: true
				},

				password: "required",
			},

			messages: {
				email: {
					required: "Please enter email",
					email: "Please enter a valid email address"
				},

				password: "Please enter password"
			}
		});

	});
</script>
This script validates the email and password fields are not empty, and the user must enter a valid email address. You can use plain Javascript to validate the form’s fields, but using jQuery is more convenient.
5. Code Login Servlet Class
On the server side, create a Java servlet class to handle the submission of the login form above. Here’s the code:package net.codejava;
import java.io.*;
import java.sql.SQLException;
import javax.servlet.*;
import javax.servlet.annotation.WebServlet;
import javax.servlet.http.*;
@WebServlet("/login")
public class UserLoginServlet extends HttpServlet {
private static final long serialVersionUID = 1L;
public UserLoginServlet() {
super();
}
protected void doPost(HttpServletRequest request, HttpServletResponse response)
throws ServletException, IOException {
String email = request.getParameter("email");
String password = request.getParameter("password");
UserDAO userDao = new UserDAO();
try {
User user = userDao.checkLogin(email, password);
String destPage = "login.jsp";
if (user != null) {
	HttpSession session = request.getSession();
	session.setAttribute("user", user);
	destPage = "home.jsp";
} else {
String message = "Invalid email/password";
request.setAttribute("message", message);
}
RequestDispatcher dispatcher = request.getRequestDispatcher(destPage);
dispatcher.forward(request, response);
} catch (SQLException | ClassNotFoundException ex) {
throw new ServletException(ex);
}
}
}As you can see, the doPost() method handles the request to login from the client. It calls the checkLogin() method of the UserDAO class to verify email and password against the database.If the login succeeds, it sets an attribute in the session to store information about the logged in user, and forwards the request to the admin home page:if (user != null) {
HttpSession session = request.getSession();
session.setAttribute("user", user);
destPage = "home.jsp";
}To learn more about session handling in Java, read this Java session tutorial.If the login fails, sets error message as an attribute in the request, and forwards to the login page again:} else {
String message = "Invalid email/password";
request.setAttribute("message", message);
}You can learn more about redirection in Java servlet here.And code of the home.jsp page is as follows:<%@ page language="java" contentType="text/html; charset=utf-8"
pageEncoding="utf-8"%>
<!DOCTYPE html>
<html>
<head>
<meta charset="utf-8">
<title>Admin CPanel - Bookshop</title>
</head>
<body>
<div style="text-align: center">
<h1>Welcome to Bookshop Website Admin Panel</h1>
<b>${user.fullname} (${user.email})</b>
<br><br>
<a href="/logout">Logout</a>
</div>
</body>
</html>Note that we use EL expression ${user.fullname} to display the full name and ${user.email} to show the email of the logged in user. And there is a logout link that allows the user to logout from the website.You can learn more about EL operators in JSP by reading this EL operators summary article.
6. Code Logout Servlet Class
To implement the logout function, create a Java servlet class to handle request to logout from the client as follows:package net.codejava;
import java.io.IOException;
import javax.servlet.*;
import javax.servlet.annotation.WebServlet;
import javax.servlet.http.*;
@WebServlet("/logout")
public class UserLogoutServlet extends HttpServlet {
private static final long serialVersionUID = 1L;
public UserLogoutServlet() {
super();
}
protected void doGet(HttpServletRequest request, HttpServletResponse response)
throws ServletException, IOException {
HttpSession session = request.getSession(false);
if (session != null) {
session.removeAttribute("user");
RequestDispatcher dispatcher = request.getRequestDispatcher("login.jsp");
dispatcher.forward(request, response);
}
}
}As you can see, we check if a session exists, remove the attribute user which is set in the login function, and forward the request to the login page.
7. Test Login and Logout Functions
You can download the sample project in the attachments section at the end of this tutorial to run and test. Suppose that we have the following data in the table users: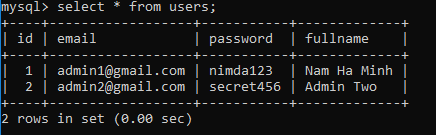 Access the login page showing the following screen:
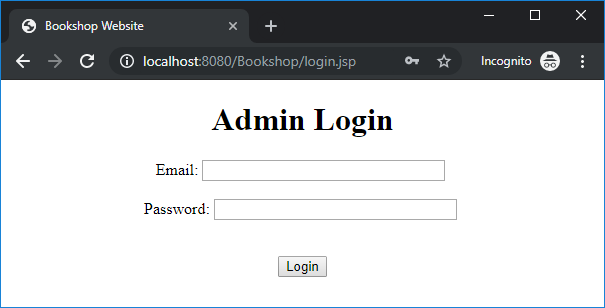 Try to enter an invalid email and blank password, you will see the validation error message appears like this:
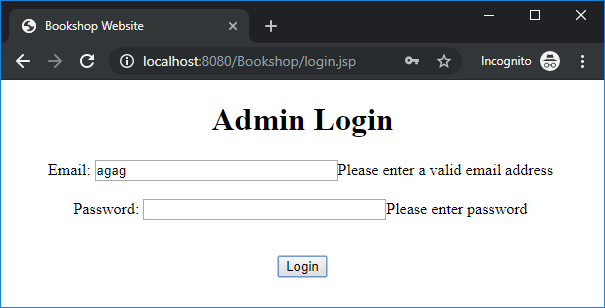 Now let’s enter correct email and password and click Login, you will see the admin home page appears as follows:
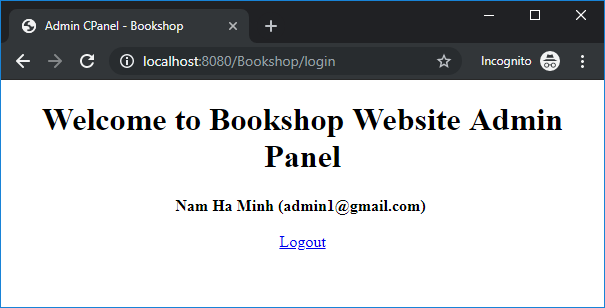 You can see the full name and email of the logged in user are displayed on this page.Click the Logout link and you will see it redirects to the login page.That’s how to implement the login and logout functions for a Java web application using Java Servlet, JSP, JDBC and MySQL. It’s very simple so you can easily add to your existing small project, without using any frameworks.However, to fully secure login-required pages of a website, you need to implement an authentication filter.By the way, I have a video course that teaches you how to build a complete Java web application (e-commerce). You can learn here.
 Other Java Coding Tutorials:
- How to display images from database in JSP page with Java Servlet
- How to implement remember password (remember me) for Java web application
- How to implement forgot password feature for Java web application
- How to Code Hit Counter for Java web application
- 10 Common Mistakes Every Beginner Java Programmer Makes
- 10 Java Core Best Practices Every Java Programmer Should Know
- How to become a good programmer? 13 tasks you should practice now
- How to calculate MD5 and SHA hash values in Java
- Java File Encryption and Decryption Example
About the Author:
 Nam Ha Minh is certified Java programmer (SCJP and SCWCD). He began programming with Java back in the days of Java 1.4 and has been passionate about it ever since. You can connect with him on Facebook and watch his Java videos on YouTube.
| [Java Login Logout Sample Project] | 20 kB |
Comments
How do I prevent access to html or jsp webpages that are already created?