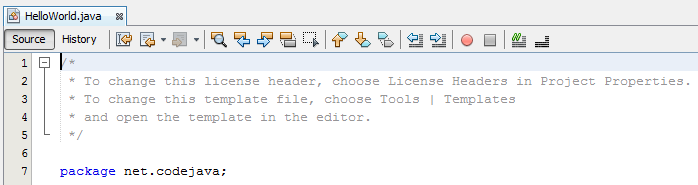
Today we would like to share with you a couple of tips on how to manage copyright license header for Java source files using NetBeans IDE. If the license is important to your project, let’s get it managed properly and painlessly.By default, NetBeans adds the following license text at the beginning of every Java file you created:And of course you want to change this meaningless license header. In fact, NetBeans allows you to change this license header, as per the instruction right in the text of the default license. But the change takes effect only for new files created afterward. How about old files with old license text? In that case, you have to manually update license for the old files, unless you install and use a plugin called License Changer which is dedicated to solve the license problem.Let’s look at how to change license header using NetBean’s default feature first.
1. Changing License Headers for Project
In NetBeans, right click on a project then select Properties. Then select License Headers in the Project Properties dialog:Here you can replace the default license with a pre-defined one or your own. If you intend to use an open source license for your project i.e. GPL, click on the drop-down list next to the option Use global license to select one:
NetBeans provides templates common open source licenses for your convenience. You can use it out of the box, or edit one if needed. Click the Edit global licenses button brings the Template Manager dialog that allows you to edit a specific license:Select a license template, and then click Open in Editor. NetBeans will open a new editor just like the code editor. Once you have done editing, press Ctrl + S to save the changes. From now on, NetBeans will append the selected license to every new Java file you create.NOTE: A global license applies to all projects. In case you want to have your own copyright license which is specific to only one project, choose the option Use project location in the Project Properties dialog:Then enter your own license text inside the text area, and click OK to finish. From now on, every new Java class will be appended the customized license. For example:But how about existing files which need to be updated as well? In this case, we recommend you install and use a great plugin call License Changer.
2. Using License Changer Plugin
The most useful feature of this plugin is that it allows us to replace license headers for all existing files in the project with just few clicks in some simple wizards. Head over to the following link to download this plugin:http://plugins.netbeans.org/plugin/17960/license-changerClick Download button, you are prompted to download a file with the following name:1395994281_org-netbeans-modules-licensechanger.nbmNow in Netbeans, go to Tools > Plugins to open the Plugins dialog. Select the Downloaded tab:Click Add Plugins button and choose the .nbm file you have downloaded previously. This causes NetBeans to load information about the plugin:Click Install to proceed to the next screen:Click Next to continue. The License Agreement screen appears:Accept and click Install. You may get the following warning message:Click Continue to begin the installation. It should be installed very quickly. Finally NetBeans asks to restart the IDE:Choose Restart IDE Now and click Finish.So far we have installed the License Changer plugin. Now, let’s see how to use this plugin to update copyright license for existing source files.Right click on source folder or on a Java package, and select Tools > Change License Header:The Change License Headers dialog appears:This screen allows us to choose which types of files whose license headers need to be updated. By default Java files are selected, just click Next to continue. The Choose License Header screen appears:In this step, choose a pre-defined license header in the drop-down list or click the Browse button to select your own license file (in .txt format). Here we choose the Lesser GPL 2.1 license. And then click Next.The next screen allows us to review which folders to be updated:You can uncheck folders that should be ignored, and click Next. The last screen allows us to preview the changes:This is a very cool feature. And finally click Finish to apply changes to all the source files.
Nam Ha Minh is certified Java programmer (SCJP and SCWCD). He began programming with Java back in the days of Java 1.4 and has been passionate about it ever since. You can connect with him on Facebook and watch his Java videos on YouTube.
 And of course you want to change this meaningless license header. In fact, NetBeans allows you to change this license header, as per the instruction right in the text of the default license. But the change takes effect only for new files created afterward. How about old files with old license text? In that case, you have to manually update license for the old files, unless you install and use a plugin called License Changer which is dedicated to solve the license problem.Let’s look at how to change license header using NetBean’s default feature first.
  Here you can replace the default license with a pre-defined one or your own. If you intend to use an open source license for your project i.e. GPL, click on the drop-down list next to the option Use global license to select one:
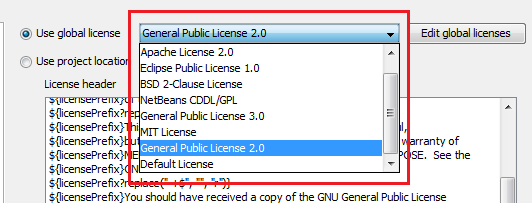 NetBeans provides templates common open source licenses for your convenience. You can use it out of the box, or edit one if needed. Click the Edit global licenses button brings the Template Manager dialog that allows you to edit a specific license:
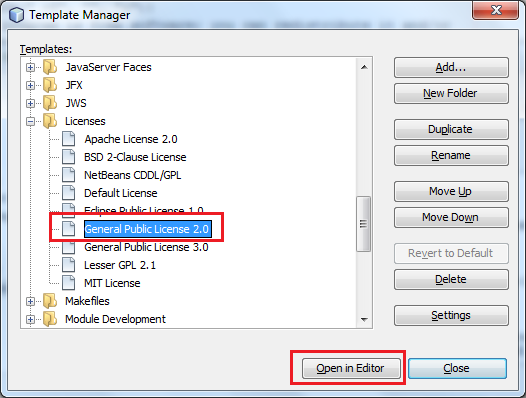 Select a license template, and then click Open in Editor. NetBeans will open a new editor just like the code editor. Once you have done editing, press Ctrl + S to save the changes. From now on, NetBeans will append the selected license to every new Java file you create.NOTE: A global license applies to all projects. In case you want to have your own copyright license which is specific to only one project, choose the option Use project location in the Project Properties dialog:
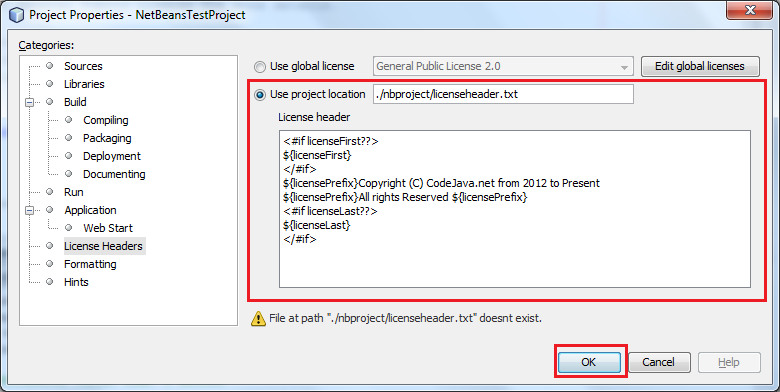 Then enter your own license text inside the text area, and click OK to finish. From now on, every new Java class will be appended the customized license. For example:
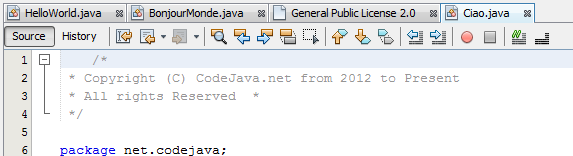 But how about existing files which need to be updated as well? In this case, we recommend you install and use a great plugin call License Changer.
 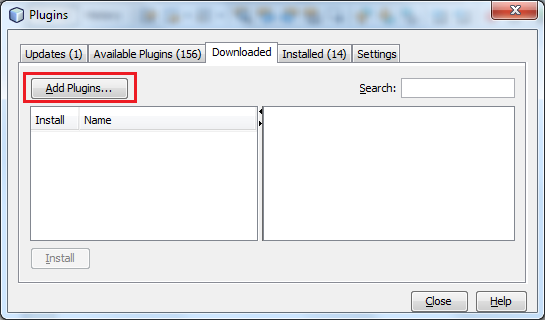 Click Add Plugins button and choose the .nbm file you have downloaded previously. This causes NetBeans to load information about the plugin:
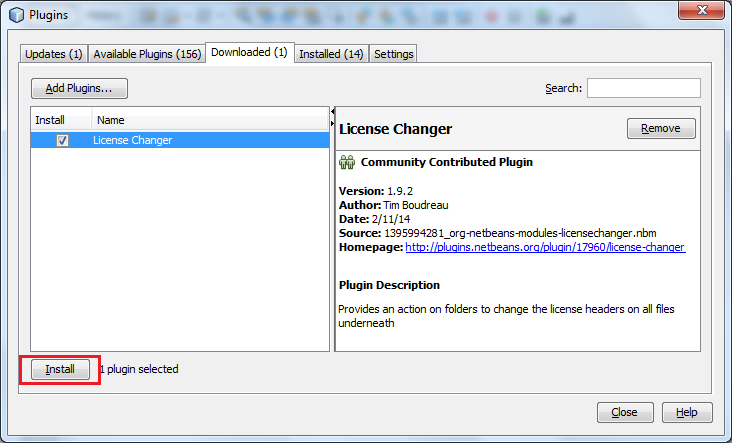 Click Install to proceed to the next screen:
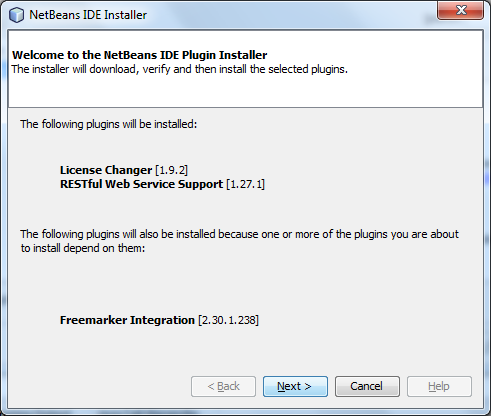 Click Next to continue. The License Agreement screen appears:
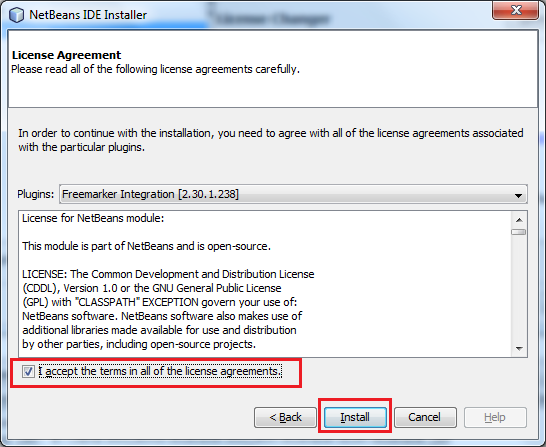 Accept and click Install. You may get the following warning message:
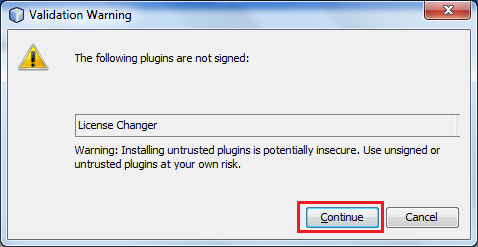 Click Continue to begin the installation. It should be installed very quickly. Finally NetBeans asks to restart the IDE:
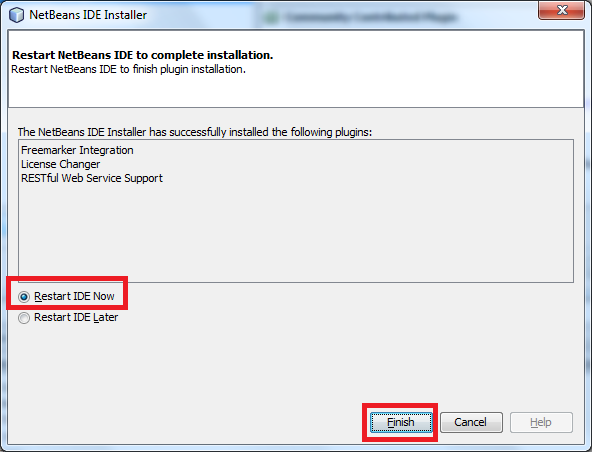 Choose Restart IDE Now and click Finish.So far we have installed the License Changer plugin. Now, let’s see how to use this plugin to update copyright license for existing source files.Right click on source folder or on a Java package, and select Tools > Change License Header:
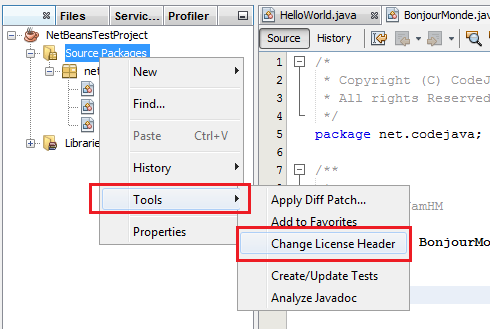 The Change License Headers dialog appears:
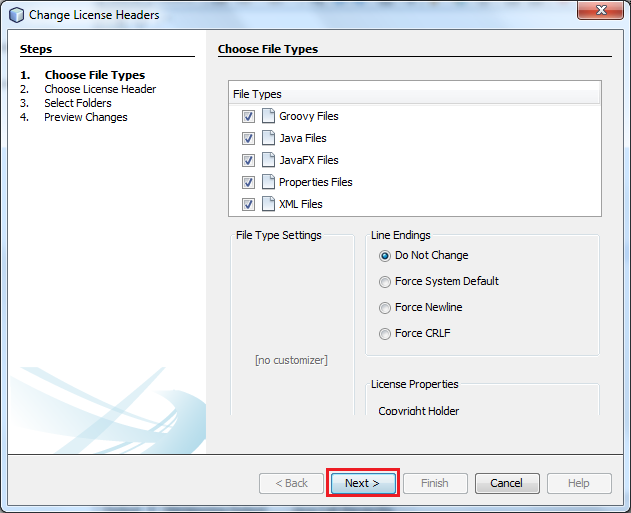 This screen allows us to choose which types of files whose license headers need to be updated. By default Java files are selected, just click Next to continue. The Choose License Header screen appears:
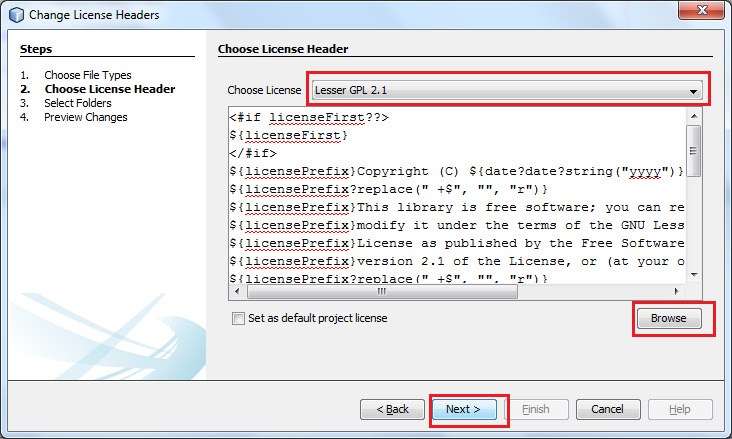 In this step, choose a pre-defined license header in the drop-down list or click the Browse button to select your own license file (in .txt format). Here we choose the Lesser GPL 2.1 license. And then click Next.The next screen allows us to review which folders to be updated:
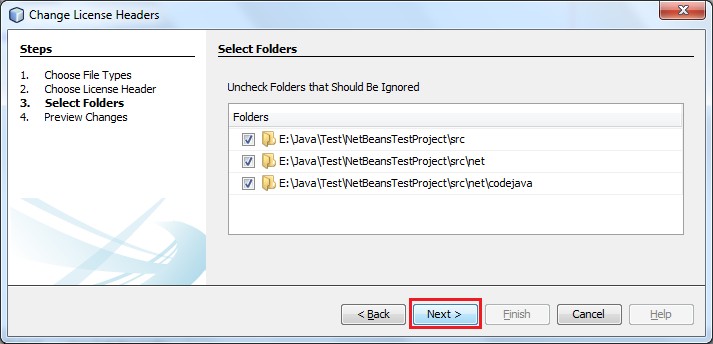 You can uncheck folders that should be ignored, and click Next. The last screen allows us to preview the changes:
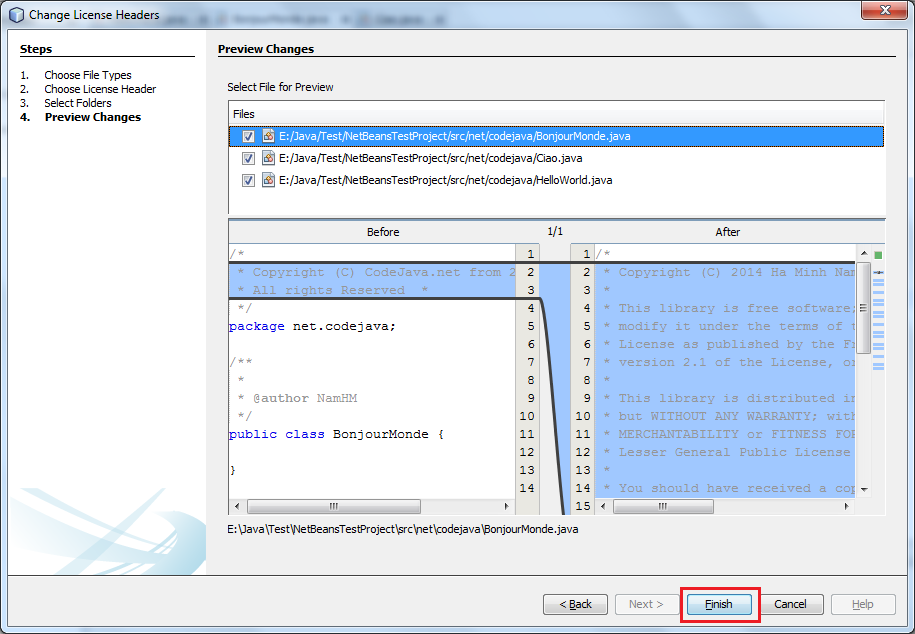 This is a very cool feature. And finally click Finish to apply changes to all the source files.
  Nam Ha Minh is certified Java programmer (SCJP and SCWCD). He began programming with Java back in the days of Java 1.4 and has been passionate about it ever since. You can connect with him on Facebook and watch his Java videos on YouTube.
Comments