In this tutorial, you will learn how to code a Java web application that hosts Java XML web services (JAX-WS) running on Apache Tomcat server. This tutorial focuses on project configuration that enables clients to access web services deployed on Tomcat. So for the details of creating Java XML/SOAP web services, please refer to this tutorial.
1. Add JAX-WS Runtime Dependency
First, add the following dependency to the project’s pom.xml file if Maven is used:
This will download the JAR files required to compile and run Java XML web services in servlet environment.
2. Create a simple XML/SOAP Web Service
Let’s create a simple Java XML web service class as below:
package net.codejava;

import javax.jws.WebMethod;
import javax.jws.WebService;
import javax.jws.soap.SOAPBinding;
import javax.jws.soap.SOAPBinding.Style;

@WebService
@SOAPBinding(style = Style.RPC)
public class Hello {

	@WebMethod
	public String bonjour(String name) {
		return String.format("Bonjour %s", name);
	}
}
As you can see, this web service class implements a webservice method that returns a French greeting message followed by a name supplied by the client.
3. Configure Web Services Endpoints
To allow the web services to be discoverable by clients, we need to declare endpoints in JAX-WS descriptor file. Create the sun-jaxws.xmlfile under WEB-INF directory with the following code:
Here, you declare an <endpoint> element for each web service class. The implementation attribute is for the fully-qualified class name of the web service class, and the url-pattern attribute specifies a URL relative to the web application’s context path. So in this configuration, the web service can be accessed via this URL: http://hostname/appname/ws/hello.In case you need to declare multiple endpoints, for example:
This configuration enables JAX-WS runtime to handles requests from the clients that invoke the web service endpoints. Note that that URL pattern of JAXWSServlet should be configured in a way that does not conflict with URL patterns other servlets.
5. Code a Web Services Client Test Program
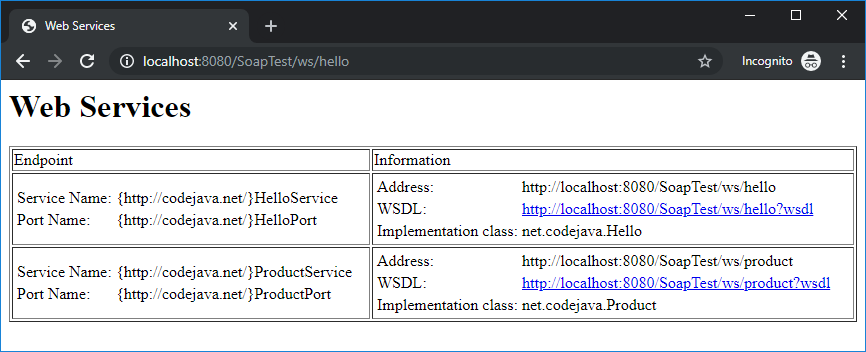
Now, you can start Tomcat server. Open a browser and access the URL http://localhost:8080/SoapTest/ws/hello, you will see the following page appears:This means the Java web services were deployed successfully on Tomcat and ready to accept client’s requests. And let’s code a Java client program (create a different project) to call the web services.Open a Command prompt or Terminal window, and type the following command to generate code for the webservice client program:
The wsimporttool is provided in the JDK’s bin directory. Copy the generated Java source files Hello.java and HelloService.java into the new project, and code the client program as follows:
package net.codejava.test;

public class HelloTest {

	public static void main(String[] args) {
		HelloService service = new HelloService();
		Hello hello = service.getHelloPort();

		String response = hello.bonjour("Chef");

		System.out.println(response);
	}

}
Note that you also need to use the JAX-WS runtime dependency for the client project (if JDK version > 9). Run this client program and you should see the following output:
Bonjour Chef
Congratulations! You have successfully coded and deployed Java XML web services on Apache Tomcat server. For reference, you can download the sample project in the Attachments section below.You may like to follow the video below:
Nam Ha Minh is certified Java programmer (SCJP and SCWCD). He began programming with Java back in the days of Java 1.4 and has been passionate about it ever since. You can connect with him on Facebook and watch his Java videos on YouTube.
 This means the Java web services were deployed successfully on Tomcat and ready to accept client’s requests. And let’s code a Java client program (create a different project) to call the web services.Open a Command prompt or Terminal window, and type the following command to generate code for the webservice client program:
 Nam Ha Minh is certified Java programmer (SCJP and SCWCD). He began programming with Java back in the days of Java 1.4 and has been passionate about it ever since. You can connect with him on Facebook and watch his Java videos on YouTube.
Comments