Add Custom Domain Names for Heroku Apps
- Details
- Written by Nam Ha Minh
- Last Updated on 29 October 2021 | Print Email
- Firstly, you need to purchase a domain name from a registrar such as NameCheap or Hostgator
- Assign the domain name to your Heroku app using Heroku CLI
- Configure DNS settings at your domain name service provider
- Wait for DNS propagation completes
1. Add Primary Domain to a Heroku App
Say you have an app named shopme-frontend, and a domain name shopme1.com. Login to Heroku CLI, and type the following command:heroku domains:add shopme1.com –a shopme-frontend
The result of this command is something like this: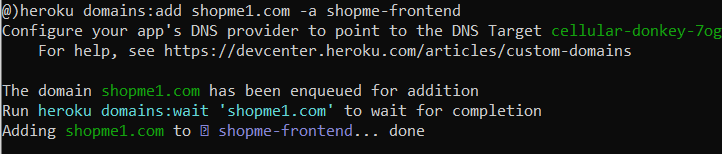 As you can see, Heroku instructs to configure your app’s DNS provider to point the given DNS target. Type the following command to see more details:
heroku domains –a shopme-frontend
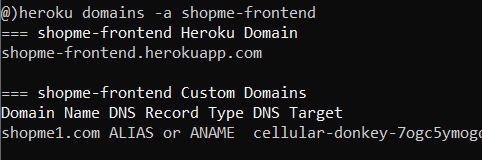 Notice the given values for DNS Record Type and DNS Target set for the custom domain. Now, login to your domain name registrar, to add a new DNS record as per the instruction.I use NameCheap, so I add a new ALIAS record like this:
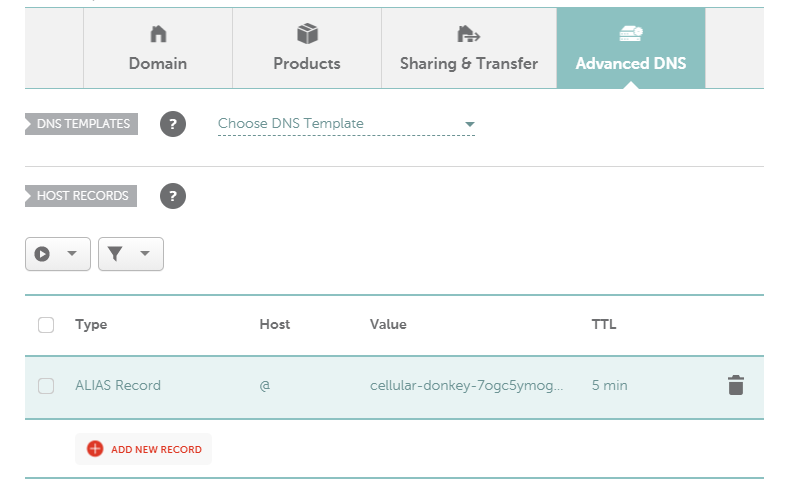 Note that I put @ for the Host field and DNS target value for Value field. That’s done. Wait for a few minutes or an hour for the DNS propagation takes place. Then you will be able to access your app via the custom domain name shopme1.com.
2. Add Sub Domain to a Heroku App
Do similar steps to assign a subdomain, e.g. admin.shopme1.com to another app, e.g. shopme-admin. Type the following command to add this subdomain:heroku domains:add admin.shopme1.com –a shopme-admin
And type this command to view the instruction in detailed:heroku domains –a shopme-admin
The output would be like this: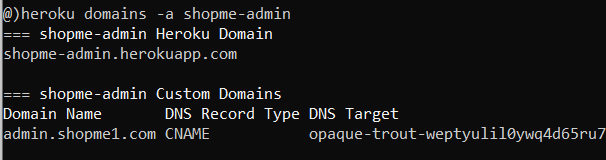 Note that for a subdomain, the DNS Record Type is CNAME. So add a new DNS record in your domain name service provider like this:
 Note that I put admin (subdomain) for the Host field, and the given DNS Target for the Value field. And you’re all set. Just wait for a few minutes (or an hour) for the changes to take affect (DNS propagation completes).That’s the tutorial for adding custom domain names (primary domain and subdomain) to apps deployed on Heroku. To see each step in action, I recommend you watch this video:
 Other Heroku tutorials:
- What is Heroku for Developers (Benefits, how it works and key concepts)
- Deploy Simple Spring Boot Project to Heroku using Git and Heroku CLI
- Change Java version for Apps deployed on Heroku
- Deploy Spring Boot App with MySQL Database on Heroku
- How to Enable Secure Connection (HTTPS) for Heroku Apps
- How to Deploy JAR File to Heroku
- How to Deploy WAR File to Heroku
About the Author:
 Nam Ha Minh is certified Java programmer (SCJP and SCWCD). He began programming with Java back in the days of Java 1.4 and has been passionate about it ever since. You can connect with him on Facebook and watch his Java videos on YouTube.