How to Enable Secure Connection (HTTPS) for Heroku Apps
- Details
- Written by Nam Ha Minh
- Last Updated on 29 October 2021 | Print Email
1. Heroku’s Automated Certificate Management (ACM)
The simplest way to enable secure connection for your app is using Heroku’s Automated Certificate Management (ACM), which automatically manages SSL certificates for apps. ACM makes use of Let’s Encrypt – a free and open certificate authority. That means connection to your website will be secured with a SSL certificate issued by Let’s Encrypt.The expiration time of the SSL certificate is 90 days, and it is automatically renewed one month before it expires.NOTE: ACM can be only enabled for apps running on dynos with Hobby or Professional plan, meaning that you will have to pay, in order to enable secure connection for your apps.
2. Enable SSL Certificate for a Heroku app
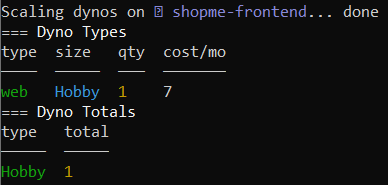
Open a new command prompt on Windows, or a terminal on Mac/Linux. Then type heroku login to sign in your Heroku account in Heroku CLI.If your app is running on Free dynos, type the following command to upgrade to a paid plan, such as Hobby plan (costs $7 per month):heroku ps:resize web=hobby -a app-name
You would see the output of this command like this: Next, type the following command to enable ACM for your app:
heroku certs:auto:enable –a app-name
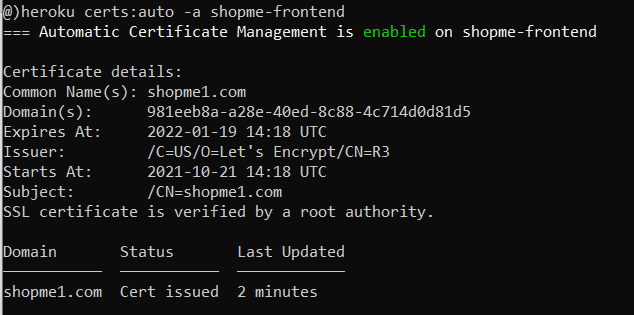
Then Heroku will create a new SSL certificate for your app. Now type this command to view certificate details:heroku certs:auto –a app-name
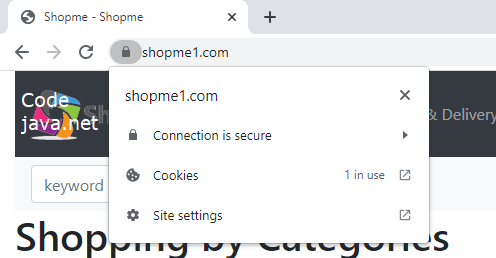
You would see the output something like this: You can see the SSL certificate issued for the custom domain name shopme1.com, and its expiration time is about 3 months.And you’re all set. Now you can access your website via the custom domain and you would see the browser saying connection is secure:
 That’s how to enable HTTPS/SSL for an application deployed on Heroku with custom domain name, using Heroku’s Automated Certificate Management (ACM). To see the steps in action, I recommend you watch the following video:
 Other Heroku tutorials:
- What is Heroku for Developers (Benefits, how it works and key concepts)
- Deploy Simple Spring Boot Project to Heroku using Git and Heroku CLI
- Change Java version for Apps deployed on Heroku
- Add Custom Domain Names for Heroku Apps
- Deploy Spring Boot App with MySQL Database on Heroku
- How to Deploy JAR File to Heroku
- How to Deploy WAR File to Heroku
About the Author:
 Nam Ha Minh is certified Java programmer (SCJP and SCWCD). He began programming with Java back in the days of Java 1.4 and has been passionate about it ever since. You can connect with him on Facebook and watch his Java videos on YouTube.