Java Web Services Tutorial using Apache Axis2, Ant and Tomcat
- Details
- Written by Nam Ha Minh
- Last Updated on 21 December 2019 | Print Email
- Writing a POJO class whose public methods will be exposed as Web services.
- Writing services.xml file to describe the service.
- Generating an AAR (Axis ARchive) file.
- Deploying the .aar file on Tomcat using Axis2 web application.
- Coding a RPC-based client program to consume the web service.
1. Setting up Axis2, Tomcat and Ant
Click on the following links to download and install Axis2, Tomcat and Ant on your computer:- Axis2 Download: Both binary distribution and WAR distribution are required.
- Tomcat 7 Download
- Ant Download
- AXIS2_HOME=e:\Java\Apache\Axis2\axis2-1.6.2
- ANT_HOME= e:\Java\Frameworks\Ant\apache-ant-1.9.3
http://localhost:8080/axis2
You should see the following screen: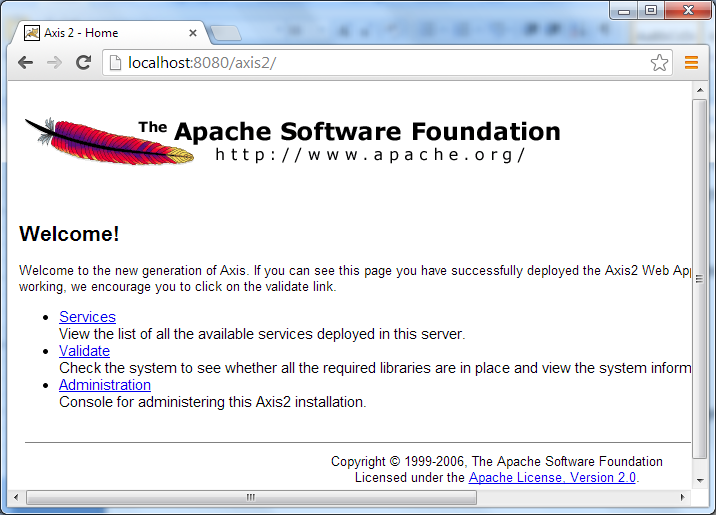 That verifies the Axis2 web application was deployed successfully. Later, we’ll use its administration page to deploy an AAR file.
2. Code a POJO Class
We implement business logic for our web service in a POJO class. Create a CalculatorService.java file with the following code:package net.codejava.ws.axis2;
/**
* A simple POJO class.
* @author www.codejava.net
*/
public class CalculatorService {
public int sum(int x, int y) {
return (x + y);
}
}As you can see, this is a very simple POJO class which provides a simple service: calculating sum of two given numbers. 3. Describe the Web service
We have created the POJO class, now we need to tell Axis2 something about the service which is going to be deployed. Create a services.xml file under META-INF directory of your source directory (also create the META-INF directory), and write the following XML:<service name="CalculatorService" scope="application">
<description>POJO Calculator Service</description>
<messageReceivers>
<messageReceiver mep="http://www.w3.org/2004/08/wsdl/in-out"
class="org.apache.axis2.rpc.receivers.RPCMessageReceiver"/>
</messageReceivers>
<parameter name="ServiceClass">net.codejava.ws.axis2.CalculatorService</parameter>
</service>As you can see, this XML descriptor is quite simple. It declares the service name (CalculatorService) and scope (application). The messageReceiver tag describes the method’s data flow (e.g. IN-ONLY or IN-OUT). In our POJO class, the sum() is an IN-OUT method. The ServiceClass parameter specifies the full qualified name of the web service’s class, which is our POJO class - net.codejava.ws.axis2.CalculatorService. 4. Code Ant build file
The purpose of writing an Ant build file is to automate the process of compiling the service classes and packaging the resources as an AAR file. Create a build.xml file with the following XML content:<project name="Axis2-POJO" basedir="." default="generate.aar">
<property environment="env"/>

<property name="axis2.home" value="${env.AXIS2_HOME}" />

<property name="dest.dir" value="build" />

<property name="dest.dir.classes" value="${dest.dir}/classes" />

<path id="build.class.path">
	<fileset dir="${axis2.home}/lib">
		<include name="*.jar" />
	</fileset>
	  <pathelement location="${dest.dir.classes}" />
</path>
<target name="clean">
<delete dir="${dest.dir}" />
</target>
<target name="prepare">
<mkdir dir="${dest.dir}" />
<mkdir dir="${dest.dir.classes}" />
<mkdir dir="${dest.dir.classes}/META-INF" />
</target>
<target name="generate.aar" depends="clean,prepare">

	<copy file="src/META-INF/services.xml"
		tofile="${dest.dir.classes}/META-INF/services.xml" overwrite="true" />

	<javac srcdir="src" destdir="${dest.dir.classes}"
		includes="net/codejava/ws/axis2/CalculatorService.java">
	</javac>

	<jar basedir="${dest.dir.classes}" destfile="${dest.dir}/CalculatorService.aar" />

</target>
</project>This build file would be familiar to Ant users. The first section defines some properties for Axis2 home, build directories and classpath:<property environment="env"/>
<property name="axis2.home" value="${env.AXIS2_HOME}" />
<property name="dest.dir" value="build" />
<property name="dest.dir.classes" value="${dest.dir}/classes" />
<path id="build.class.path">
<fileset dir="${axis2.home}/lib">
<include name="*.jar" />
</fileset>
<pathelement location="${dest.dir.classes}" />
</path>The two targets clean and prepare are very familiar, and the most important one is generate.aar target:<target name="generate.aar" depends="clean,prepare">
<copy file="src/META-INF/services.xml"
tofile="${dest.dir.classes}/META-INF/services.xml" overwrite="true" />
<javac srcdir="src" destdir="${dest.dir.classes}"
includes="net/codejava/ws/axis2/CalculatorService.java">
</javac>
<jar basedir="${dest.dir.classes}" destfile="${dest.dir}/CalculatorService.aar" />
</target>This target performs three tasks sequentially:- Copy the services.xml file to the build directory.
- Compile the service class.
- Generating the CalculatorService.aar file using jar tool.
5. Generate AAR file and Deploy on Tomcat
Type the following Ant command to compile the source file and generate the AAR file:ant
Or:ant generate.aar
Look at the build directory, we see that a CalculatorService.aar file is generated. Take a closer look, it’s actually a JAR file (standard zip format) which consists of the compiled .class files and the services.xml file.Now, we are ready to deploy our web service on Tomcat using Axis2 administration page. Go back to the Axis2 web application, and click on the Administration link:http://localhost:8080/axis2/axis2-admin
That brings us to the Login page. Using Axis2 default credential (username: admin; password: axis2) to login, we would see the Axis2 Web Admin Module as follows: Click the Upload Service link on the left menu, and then click Choose File to locate the CalculatorService.aar file, and finally click Upload:
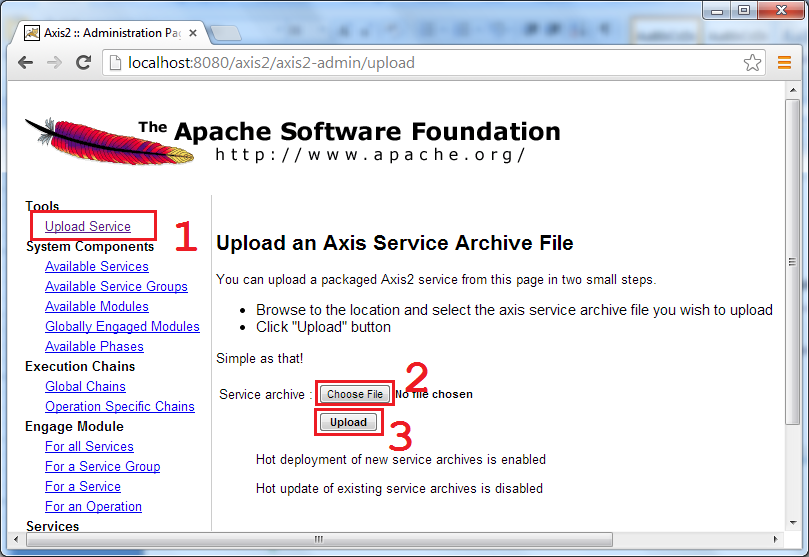 You should see a small message saying that “File CalculatorService.aar successfully uploaded”:
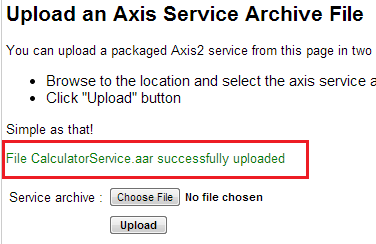 We have to reload the Axis2 web application in Tomcat admin or restart Tomcat to see the service available to serve requests. Click Available Services on the left menu, we see the CalculatorService is deployed with the sum() method is listed in the Available operations:
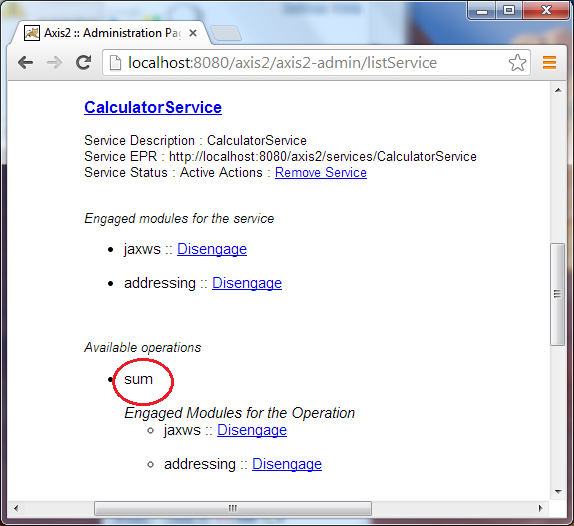 Click the CalculatorService link, we see the WSDL document appears:
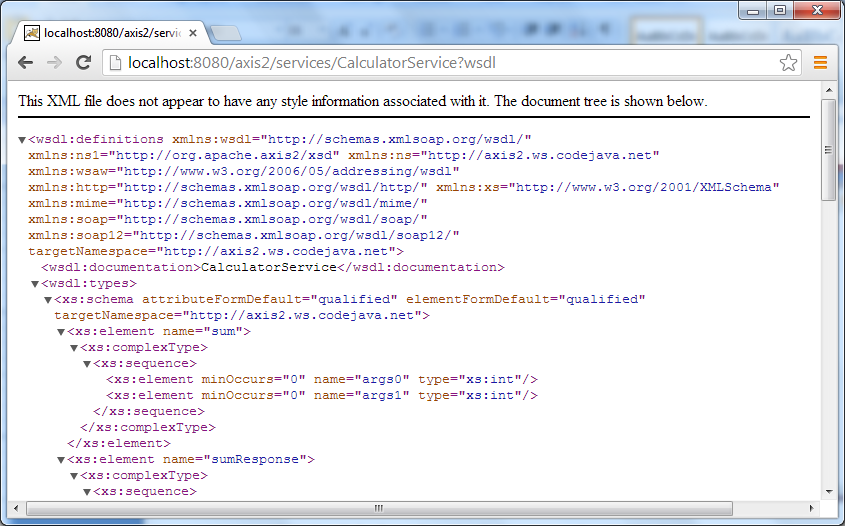 Now, it’s time to test the web service by writing a console program, which is covered next.
 6. Code a RPC-based Client Program to Consume the Web Service
Using Axis2 APIs to code the following client program:package net.codejava.ws.axis2;
import javax.xml.namespace.QName;
import org.apache.axis2.AxisFault;
import org.apache.axis2.addressing.EndpointReference;
import org.apache.axis2.client.Options;
import org.apache.axis2.rpc.client.RPCServiceClient;
/**
* This program demonstrates consuming a web service by a RCP-based client.
*
* @author www.codejava.net
*/
public class CalculatorRPCClient {
public static void main(String[] args1) throws AxisFault {
RPCServiceClient serviceClient = new RPCServiceClient();
Options options = serviceClient.getOptions();
EndpointReference targetEPR
= new EndpointReference("http://localhost:8080/axis2/services/CalculatorService");
options.setTo(targetEPR);
QName opSum = new QName("http://axis2.ws.codejava.net", "sum");
Object[] opSumArgs = new Object[] { new Integer(99), new Integer(28) };
Class[] returnTypes = new Class[] { Integer.class };
Object[] response = serviceClient.invokeBlocking(opSum,
opSumArgs, returnTypes);
Integer result = (Integer) response[0];
if (result == null) {
System.out.println("CalculatorService didn't initialize!");
return;
}
System.out.println("The Sum is: " + result);
}
}Here, an endpoint reference is created and it points to the web service URL at http://localhost:8080/axis2/services/CalculatorService. Two integer number arguments are passed into the opSumArgs array (99 and 28), before the service method is invoked, and finally the result is displayed.To compile and run this program, add the following two targets to the build.xml file:<target name="rpc.client.compile">
<javac srcdir="src" destdir="${dest.dir.classes}"
includes="net/codejava/ws/axis2/CalculatorRPCClient.java">
<classpath refid="build.class.path" />
</javac>
</target>
<target name="rpc.client.run">
<java classname="net.codejava.ws.axis2.CalculatorRPCClient" fork="true">
<classpath refid="build.class.path" />
</java>
</target>To compile the program, type:ant rpc.client.compile
And to run the program, type:ant rpc.client.run
We would see the following output:Buildfile: e:\Java\JavaEE\WebServices\Axis2Test\POJO\CalculatorService\build.xml
rpc.client.run:
[java] log4j:WARN No appenders could be found for logger (org.apache.axis2.context.AbstractContext).
[java] log4j:WARN Please initialize the log4j system properly.
[java] The Sum is: 127
BUILD SUCCESSFUL
Total time: 1 secondNotice the result gets displayed as:[java] The Sum is: 127
This is exactly the sum of 99 and 28.So far we have gone through the process of exposing a POJO class as a web service using Apache Axis2, Ant and Tomcat. As you can see, Axis2 greatly simplifies the process: with a given POJO class, just create services description, package an AAR file and deploy it on Tomcat.References:
Other Java Web Services Tutorial:
- Java Client Server Web Services (JAX-WS) Tutorial
- Java Web Services Binary Data Transfer Example (base64 encoding)
- Monitoring SOAP Messages using TCP/IP Monitor in Eclipse
- Using MTOM to optimize binary data transfer with JAX-WS web services
- Java RESTful Web Services Tutorial for Beginner with Jersey and Tomcat
- How to code and deploy Java XML Web Services (JAX-WS) on Tomcat
- Java CRUD RESTful Web Services Examples with Jersey and Tomcat
About the Author:
 Nam Ha Minh is certified Java programmer (SCJP and SCWCD). He began programming with Java back in the days of Java 1.4 and has been passionate about it ever since. You can connect with him on Facebook and watch his Java videos on YouTube.
| [Java source files] | 3 kB |
Comments
mep="http://www.w3.org/ns/wsdl/in-out"
Exception in thread "main" org.apache.axis2.AxisFault: The ServiceClass object does not implement the required method in the following form: OMElement sum(OMElement e)