Upload File to S3 using AWS Java SDK - Java Servlet JSP Web App
- Details
- Written by Nam Ha Minh
- Last Updated on 03 January 2022 | Print Email
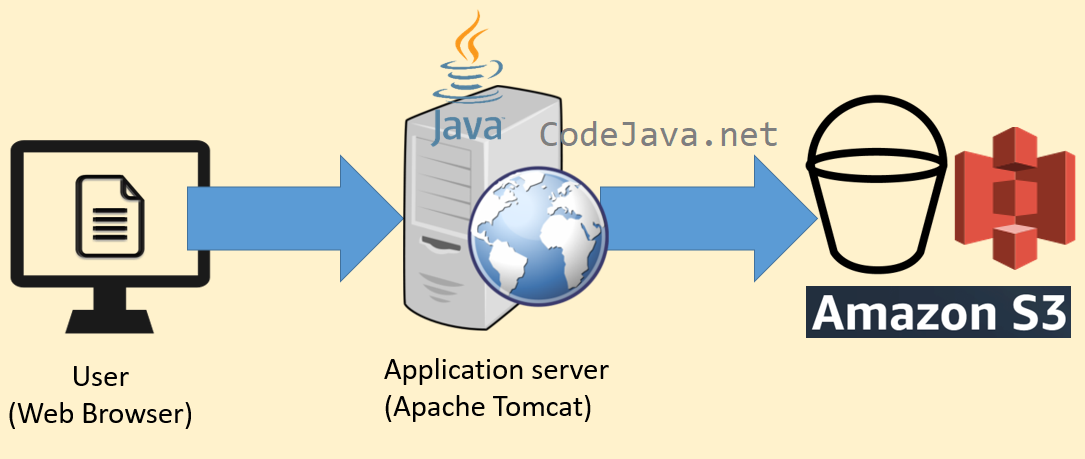 As you can see, a file will be uploaded two times. Firstly, it is transferred from the user’s computer to the application server (e.g. Apache Tomcat) which hosts the Java web app, which transfers the file to a bucket on S3 server programmatically using AWS SDK for Java. That means the files are stored on the application server temporarily.Before following this tutorial, I recommend you to check the article How to setup AWS SDK for Java for S3.Software programs required: Java Development Kit (JDK), Apache Tomcat 9.0 server, Eclipse IDE.
 1. Setup Java Web Maven project
In Eclipse IDE, create a Java Dynamic Web project, and then convert to Maven project (follow this guide). Then update the pom.xml file with the following dependency information:<project ...>
<dependencyManagement>
<dependencies>
<dependency>
<groupId>software.amazon.awssdk</groupId>
<artifactId>bom</artifactId>
<version>2.15.0</version>
<type>pom</type>
<scope>import</scope>
</dependency>
</dependencies>
</dependencyManagement>
<dependencies>
<dependency>
<groupId>software.amazon.awssdk</groupId>
<artifactId>s3</artifactId>
</dependency>
<dependency>
<groupId>javax.servlet</groupId>
<artifactId>javax.servlet-api</artifactId>
<version>4.0.1</version>
<scope>provided</scope>
</dependency>
</dependencies>
</project>As you can see, at least two dependencies required: S3 and Java Servlet.
2. Code File Upload Form
<div><h1>S3 Upload File Example</h1></div>

<div>
	<form action="upload" method="post" enctype="multipart/form-data">
		<p>Description: <input type="text" name="description" size="30" required /></p>
		<p><input type="file" name="file" required /></p>
		<p><button type="submit">Submit</button></p>
	</form>
</div>
The file upload page would look like this in web browser:
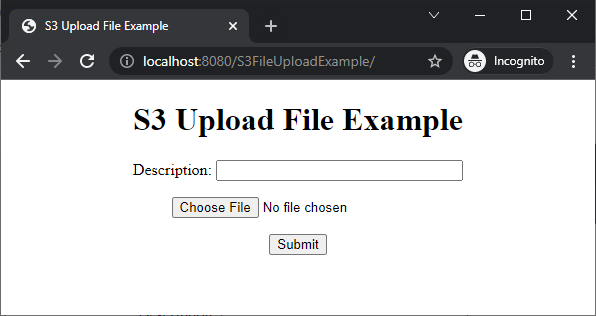 Here, on this form, we can type some description text and choose a file to be uploaded.
 3. Code S3 Utility class
Next, code a utility class that implements code for uploading a file to a bucket on Amazon S3 server, using S3 API provided by the AWS SDK. Here’s the code:package net.codejava.aws;
import java.io.IOException;
import java.io.InputStream;
import software.amazon.awssdk.awscore.exception.AwsServiceException;
import software.amazon.awssdk.core.exception.SdkClientException;
import software.amazon.awssdk.core.sync.RequestBody;
import software.amazon.awssdk.services.s3.S3Client;
import software.amazon.awssdk.services.s3.model.PutObjectRequest;
import software.amazon.awssdk.services.s3.model.S3Exception;
public class S3Util {
private static final String BUCKET = "your-bucket-name";
public static void uploadFile(String fileName, InputStream inputStream)
throws S3Exception, AwsServiceException, SdkClientException, IOException {
S3Client client = S3Client.builder().build();
PutObjectRequest request = PutObjectRequest.builder()
.bucket(BUCKET)
.key(fileName)
.acl("public-read")
.build();
client.putObject(request,
RequestBody.fromInputStream(inputStream, inputStream.available()));
}
}The code is pretty simple and straightforward. You should specify a bucket name in your AWS S3 account. The above code transfers a file that is read from an InputStream to the specified S3 bucked.Note that the file will be stored in S3 with public-read permission, meaning that it is accessible to everyone - which is suitable for hosting public static resources (images, JS, CSS, …). If you want to keep the files private, do not use the acl() method. Wait until the file exists on S3:
And the put object operation is executed asynchronously, meaning the uploadFile() method returns immediately, regardless of the file completely transferred or not. So if you want to run some logics that depend on the existence of the file on S3, consider adding the following code:S3Waiter waiter = client.waiter();
HeadObjectRequest waitRequest = HeadObjectRequest.builder()
.bucket(BUCKET)
.key(fileName)
.build();
WaiterResponse<HeadObjectResponse> waitResponse = waiter.waitUntilObjectExists(waitRequest);
waitResponse.matched().response().ifPresent(response -> {
// run custom logics when the file exists on S3
});By using this code snippet, the uploadFile() method will return when the file exists on S3 (uploaded completely). Set additional information for the upload file:
You can use the contentXXX() methods of the PutObjectRequest class to specify additional information for the file stored on S3. For example, the following code set content type of the file to be “image/png” for the file:PutObjectRequest request = PutObjectRequest.builder()
.bucket(bucketName)
.key(key)
.acl("public-read")
.contentType("image/png")
.build();The other methods are contentDisposition(), contentEncoding(), contentLanguage(), contentLength()…
4. Code File Upload Servlet Class
Next, code a Java servlet class that handles submission of the upload form. Below is the code:package net.codejava.aws;
import java.io.IOException;
import javax.servlet.ServletException;
import javax.servlet.annotation.MultipartConfig;
import javax.servlet.annotation.WebServlet;
import javax.servlet.http.HttpServlet;
import javax.servlet.http.HttpServletRequest;
import javax.servlet.http.HttpServletResponse;
import javax.servlet.http.Part;
@WebServlet("/upload")
@MultipartConfig(
		fileSizeThreshold = 1024*1024*2, // 2MB
		maxFileSize = 1024*1024*10,	// 10MB
		maxRequestSize = 1024*1024*11	// 11MB
		)
public class FileUploadServlet extends HttpServlet {
private static final long serialVersionUID = 1L;
public FileUploadServlet() {
super();
}
protected void doPost(HttpServletRequest request, HttpServletResponse response)
throws ServletException, IOException {
String description = request.getParameter("description");
System.out.println("Description: " + description);
Part filePart = request.getPart("file");
String fileName = getFileName(filePart);
System.out.println("File name = " + fileName);
String message = "";
try {
S3Util.uploadFile(fileName, filePart.getInputStream());
message = "The file has been uploaded successfully";
} catch (Exception ex) {
message = "Error uploading file: " + ex.getMessage();
}
request.setAttribute("message", message);
request.getRequestDispatcher("message.jsp").forward(request, response);
}
private String getFileName(Part part) {
String contentDisposition = part.getHeader("content-disposition");
int beginIndex = contentDisposition.indexOf("filename=") + 10;
int endIndex = contentDisposition.length() - 1;
return contentDisposition.substring(beginIndex, endIndex);
}
}Note that we need to use the @MultipartConfig annotation for this servlet class like this:@MultipartConfig( fileSizeThreshold = 1024*1024*2, // 2MB maxFileSize = 1024*1024*10, // 10MB maxRequestSize = 1024*1024*11 // 11MB )You can change the values accordingly, based you your application’s need. The fileSizeThreshold value specifies the threshold beyond which the file will be stored on disk temporarily (otherwise the file is stored in memory); maxFileSize is the maximum of the file which users can upload per request; maxRequestSize is the total size of a HTTP request, including form data.
5. Code Message JSP Page
As you can see in the doPost() method of the FileUploadServlet class above, it always redirects users to a JSP page named message.jsp - to show successful message or error message. So create the message.jsp file under WebContent (webapp) with the following HTML code in the body:<body>
<div align="center">
<div><h3>${message}</h3></div>
</div>
</body>It simply prints the value of an attribute named message, which set in the servlet class above.
6. Test Uploading Files to Amazon S3
Now, you can run the project in Eclipse by deploying it on Apache Tomcat server. Follow this video if you don’t know how. Then access the application’s home page at this URL:http://localhost:8080/S3FileUploadExample/
The upload form should appear as shown below:Enter some text into description field, and choose a file. Then click Submit. Wait a moment. If everything is going smoothly, you should see the message page: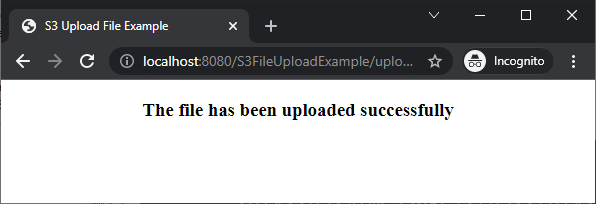 Now, sign in your AWS account. Go to S3 service, go in the bucket you specified in the code. Be sure that the file exists there.That’s my tutorial about coding S3 file upload functionality in a Java web application based on Servlet and JSP. To see the coding in action, I recommend you watch the following video:You can also download the sample project attached below.
 Related AWS Java SDK Tutorials:
- How to Generate AWS Access Key ID and Secret Access Key
- How to setup AWS SDK for Java for Amazon S3 Development
- AWS Java SDK S3 List Buckets Example
- AWS Java SDK S3 List Objects Examples
- AWS Java SDK S3 Create Bucket Examples
- AWS Java SDK S3 Create Folder Examples
- Upload File to S3 using AWS Jav SDK - Java Console Program
- Spring Boot File Upload to Amazon S3 Example
- AWS Java SDK Download File from S3 Example
- AWS Java SDK S3 Delete Objects Examples
- AWS Java SDK S3 Delete Buckets Examples
About the Author:
 Nam Ha Minh is certified Java programmer (SCJP and SCWCD). He began programming with Java back in the days of Java 1.4 and has been passionate about it ever since. You can connect with him on Facebook and watch his Java videos on YouTube.
| [Sample Java web project] | 18 kB |