In this tutorial, you will learn how to integrate S3 file upload functionality into a Java web application based on Spring Boot using AWS SDK for Java - for the purpose of hosting static resources on a cloud storage service such as S3.The following picture explains the workflow of uploading files from user’s computer to Amazon S3:Firstly, the end users choose files from their computer and submit a web form. The files will be transferred to a Spring Boot application which is running with embedded Tomcat server. And then the application uses S3 API for transferring the files to a bucket on S3 server. That means the files are transferred two times, but the process is transparent to the users.To follow this tutorial, you have to setup AWS SDK on your computer.Technologies used: Spring framework with Spring Boot; Spring MVC; Thymeleaf and AWS SDK for Java.Software programs: Java Development Kit (JDK), Spring Tool Suite (STS) IDE.
1. Create Java Spring Boot Maven Project
Create a Spring Starter project in STS with project type is Maven and language is Java. Then update the pom.xmlfile as follows:
As you can see, besides the Spring Boot starter dependencies required for a typical Spring MVC web application, you need to declare dependencies for AWS SDK and S3.
2. Code Upload Form
Next, let’s code a page that allows the users to pick a file for upload. Create an HTML file named upload.html under src/main/resources/templates directory with the following code:
At runtime, this page would look like this:Also create the MainController class with the following code:
package net.codejava.aws;

import org.springframework.stereotype.Controller;
import org.springframework.web.bind.annotation.GetMapping;

@Controller
public class MainController {

	@GetMapping("")
	public String viewHomePage() {
		return "upload";
	}

}
This is a Spring MVC controller class that implements a handler method that handles requests coming to the homepage of the application. You can see it returns the logical view name “upload” which will be resolved to the upload.html file mentioned above.
3. Code S3 Utility Class for File Upload
Next, let’s code a utility class that uses AWS Java SDK for implementing a method that uploads a file to Amazon S3. So create the S3Util class with the following code:
This class will be used by the MainController class, and you can see the code is simple and straightforward. It uses S3 API to put an object into a S3 bucket, with object’s data is read from an InputStream object. Note that you must specify a bucket name that is available in your AWS account.
Upload File to S3 with public-read permission:
By default, the file uploaded to a bucket has read-write permission for object owner. It is not accessible for public users (everyone). If you want to give public-read access for public users, use the acl() method as below:
In the code example above, the uploadFile() method returns immediately as the put object operation is executed asynchronously. In case you want to run some custom logics that depend on the existence of the uploaded file, add the following code that waits until the file exists on S3:
S3Waiter waiter = client.waiter();
HeadObjectRequest waitRequest = HeadObjectRequest.builder()
					.bucket(BUCKET)
					.key(fileName)
					.build();

WaiterResponse<HeadObjectResponse> waitResponse = waiter.waitUntilObjectExists(waitRequest);

waitResponse.matched().response().ifPresent(x -> {
	// run custom code that should be executed after the upload file exists
});
This may cause the uploadFile() method runs slower as it has to wait until the file exists on S3 server, and also run your custom logics.
Set additional information for the upload file:
You can use the contentXXX() methods of the PutObjectRequest class to specify additional information for the file stored on S3. For example, the following code set content type of the file to be “image/png” for the file:
As you can see, it uses the S3Util class for transferring the uploaded file to Amazon S3, and returns the view name “message” which will be resolved to the message.html file whose code is as below:
In this file, we simply use a Thymleaf expression to print value of an attribute named “message”, which is set in the controller class.
5. Test Uploading Files to Amazon S3
Run the Spring Boot project and access the URL http://localhost:8080/ in a web browser. You would see the upload page like this:Enter some text into the description field, then choose a file and click Submit button. Wait a moment, and you will see the message page like this:Now, sign in to your AWS account and check the bucket you used in the code. You should see the file appears there.That’s my tutorial about adding S3 file upload function to a Spring Boot application. To see the coding in action, watch the following video:You can also download the sample project attached below.
Nam Ha Minh is certified Java programmer (SCJP and SCWCD). He began programming with Java back in the days of Java 1.4 and has been passionate about it ever since. You can connect with him on Facebook and watch his Java videos on YouTube.
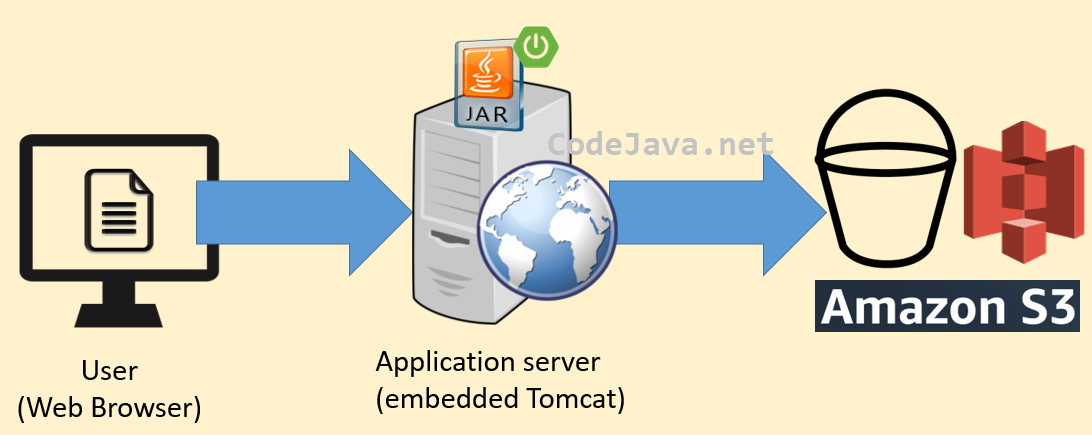 Firstly, the end users choose files from their computer and submit a web form. The files will be transferred to a Spring Boot application which is running with embedded Tomcat server. And then the application uses S3 API for transferring the files to a bucket on S3 server. That means the files are transferred two times, but the process is transparent to the users.To follow this tutorial, you have to setup AWS SDK on your computer.Technologies used: Spring framework with Spring Boot; Spring MVC; Thymeleaf and AWS SDK for Java.Software programs: Java Development Kit (JDK), Spring Tool Suite (STS) IDE.
 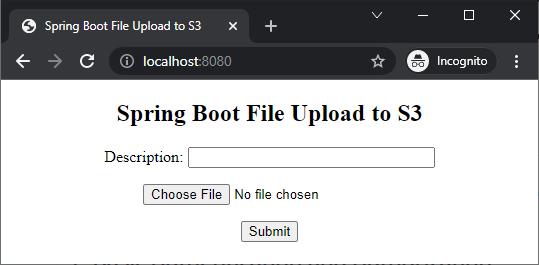 Also create the MainController class with the following code:
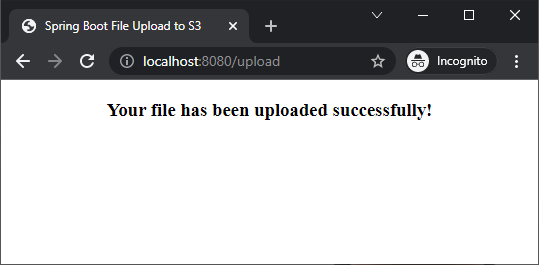 Now, sign in to your AWS account and check the bucket you used in the code. You should see the file appears there.That’s my tutorial about adding S3 file upload function to a Spring Boot application. To see the coding in action, watch the following video:You can also download the sample project attached below.
  Nam Ha Minh is certified Java programmer (SCJP and SCWCD). He began programming with Java back in the days of Java 1.4 and has been passionate about it ever since. You can connect with him on Facebook and watch his Java videos on YouTube.