How to Send E-mail with Spring MVC and JavaMail
- Details
- Written by Nam Ha Minh
- Last Updated on 21 June 2019 | Print Email
 In this tutorial, you are supposed to familiar with Java EE development as well as developing Spring MVC-based applications.Table of contents:
1.Spring framework’s support for e-mail
3.Creating e-mail sending form
4.Configuring SMTP server settings and Spring MVC
5.Creating Spring MVC controller class
6.Creating result page and error page
8.Download Eclipse project/WAR file
1. Spring framework’s support for e-mail
Based on JavaMail, Spring framework provides high-level abstraction API which greatly simplifies e-mail sending process. Let’s take a brief look at this API in the following class diagram: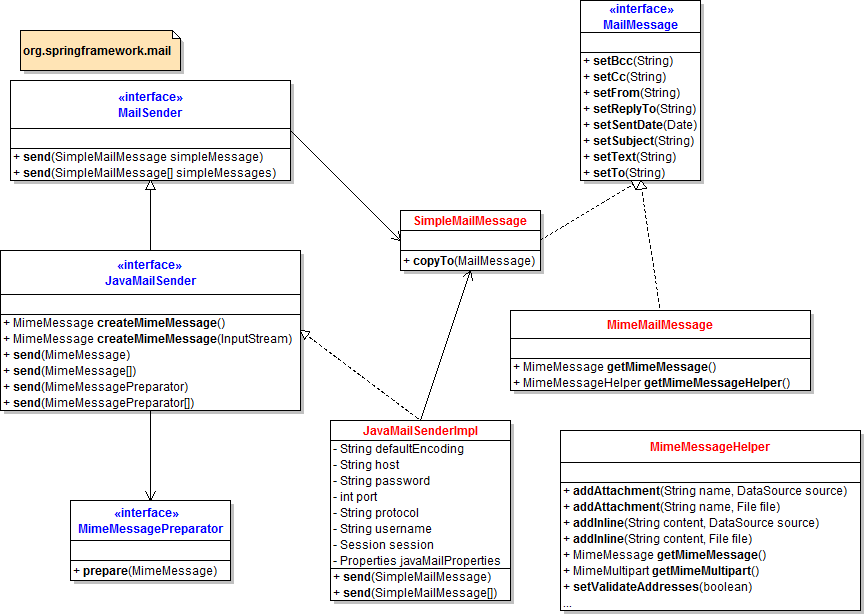 To send e-mail messages, we can use an implementation of interface MailSender – the JavaMailSenderImpl class which is built upon on JavaMail. It’s convenient to configure this implementation as a bean in Spring’s context:
<bean id="mailSender" class="org.springframework.mail.javamail.JavaMailSenderImpl">
    <!-- SMTP settings -->
    <property name="host" value="SMTP_HOST" />
    <property name="port" value="SMTP_PORT" />
    <property name="username" value="USER_NAME" />
    <property name="password" value="PASSWORD" />

    <property name="javaMailProperties">
        <!-- additional properties specific to JavaMail -->
        <props>
            <prop key="mail.transport.protocol">smtp</prop>
            <prop key="mail.smtp.auth">true</prop>
            <prop key="mail.smtp.starttls.enable">true</prop>
        </props>
    </property>
</bean>
This bean holds properties for SMTP and JavaMail and can be injected to a business/service class which needs to send an e-mail, for example:mailSender.send(email);
SimpleMailMessage email = new SimpleMailMessage();
email.setTo(toAddress);
email.setSubject(subject);
email.setText(body);
That’s for a simple mail message (plain text). In case if we want to send HTML e-mail or attach files to the e-mail, we can use MimeMailMessage class with the help of MimeMessagePreparator class and MimeMessageHelper class. For example, sending an e-mail in HTML format with an attachment:
 mailSender.send(new MimeMessagePreparator() {
   public void prepare(MimeMessage mimeMessage) throws MessagingException {
     MimeMessageHelper message = new MimeMessageHelper(mimeMessage, true, "UTF-8");
     message.setFrom(fromEmail);
     message.setTo(toEmail);
     message.setSubject("A file for you");
     message.setText("<b>See the attached</b>", true);
     message.addAttachment("CoolStuff.doc", new File("CoolStuff.doc"));
   }
 });
The following table summarizes the interfaces and classes provided in org.springframework.mail package:org.springframework.mail | |
2. Required jar files
The application requires the following jar files copied to its WEB-INF\libdirectory:Required jar files | |
mail.jar | |
spring-beans-3.2.0.RELEASE.jar spring-context-3.2.0.RELEASE.jar spring-context-support-3.2.0.RELEASE.jar spring-core-3.2.0.RELEASE.jar spring-expression-3.2.0.RELEASE.jar spring-web-3.2.0.RELEASE.jar spring-webmvc-3.2.0.RELEASE.jar | |
commons-logging-1.1.1.jar | |
- EmailForm.jsp: displays an e-mail form.
- Result.jsp: shows successful message after the e-mail has been sent.
- Error.jsp: shows error message in case of an exception is thrown.
- SendEmailController.java: the Spring controller class that takes input from e-mail form, calls Spring’s mailSender to send the e-mail, and redirects user to either successful page or error page.
- spring-mvc.xml: Spring’s context configuration file. Here we will configure SMTP server settings and various properties for JavaMail.
- web.xml: web deployment descriptor file.
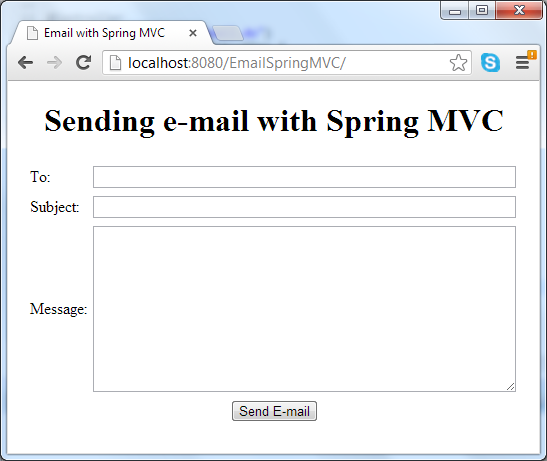
3. Creating e-mail sending form
Create a JSP file called EmailForm.jspwith the following HTML code:<%@ page language="java" contentType="text/html; charset=UTF-8"
pageEncoding="UTF-8"%>
<!DOCTYPE html PUBLIC "-//W3C//DTD HTML 4.01 Transitional//EN"
"http://www.w3.org/TR/html4/loose.dtd">
<html>
<head>
<meta http-equiv="Content-Type" content="text/html; charset=UTF-8">
<title>Email with Spring MVC</title>
</head>
<body>
<center>
<h1>Sending e-mail with Spring MVC</h1>
<form method="post" action="sendEmail.do">
<table border="0" width="80%">
<tr>
<td>To:</td>
<td><input type="text" name="recipient" size="65" /></td>
</tr>
<tr>
<td>Subject:</td>
<td><input type="text" name="subject" size="65" /></td>
</tr>
<tr>
<td>Message:</td>
<td><textarea cols="50" rows="10" name="message"></textarea></td>
</tr>
<tr>
<td colspan="2" align="center">
<input type="submit" value="Send E-mail" />
</td>
</tr>
</table>
</form>
</center>
</body>
</html>This is a simple form with three fields: To, Subject and Message – which are necessary attributes for a simple outgoing e-mail message. On submitting this form, the action named “sendEmail.do” will be called, as specified by the form’s action attribute. We will implement a Spring controller class for handling this action in the next section. 4. Configuring SMTP server settings and Spring MVC
Create a Spring context configuration file called spring-mvc.xml with the following XML code:<?xml version="1.0" encoding="UTF-8"?>
<beans xmlns="http://www.springframework.org/schema/beans"
xmlns:xsi="http://www.w3.org/2001/XMLSchema-instance"
xmlns:context="http://www.springframework.org/schema/context"
xsi:schemaLocation="http://www.springframework.org/schema/beans
http://www.springframework.org/schema/beans/spring-beans-3.0.xsd
http://www.springframework.org/schema/context
http://www.springframework.org/schema/context/spring-context-3.0.xsd">
<context:component-scan base-package="net.codejava.spring" />
<bean id="mailSender" class="org.springframework.mail.javamail.JavaMailSenderImpl">
<property name="host" value="smtp.gmail.com" />
<property name="port" value="587" />
<property name="username" value="youremail" />
<property name="password" value="yourpassword" />
<property name="javaMailProperties">
<props>
<prop key="mail.transport.protocol">smtp</prop>
<prop key="mail.smtp.auth">true</prop>
<prop key="mail.smtp.starttls.enable">true</prop>
</props>
</property>
</bean>
<bean id="viewResolver"
class="org.springframework.web.servlet.view.InternalResourceViewResolver">
<property name="prefix" value="/" />
<property name="suffix" value=".jsp" />
</bean>
<bean
class="org.springframework.web.servlet.handler.SimpleMappingExceptionResolver">
<property name="exceptionMappings">
<props>
<prop key="java.lang.Exception">Error</prop>
</props>
</property>
</bean>
</beans>This configuration is pretty straightforward:- <context:component-scan ... />: tells Spring to scan the package net.codejava.spring for initializing components which are annotated by Spring annotations (It’s a Spring controller class, in case of this application).
- Bean mailSender: this is the important part because it declares a Spring bean for e-mail implementation – the JavaMailSenderImpl class and configures SMTP server settings, which is for a Gmail account in this case. This bean will be injected to a Spring controller class which will be covered in the next section.
- Bean viewResolver: maps logical view names to real JSP file names.
- Bean SimpleMappingExceptionResolver: maps all exceptions of type java.lang.Exception to be handled by Error.jsp page.
<?xml version="1.0" encoding="UTF-8"?>
<web-app xmlns:xsi="http://www.w3.org/2001/XMLSchema-instance"
    xmlns="http://java.sun.com/xml/ns/javaee"
    xmlns:web="http://java.sun.com/xml/ns/javaee/web-app_2_5.xsd"
    xsi:schemaLocation="http://java.sun.com/xml/ns/javaee
        http://java.sun.com/xml/ns/javaee/web-app_3_0.xsd"
    id="WebApp_ID" version="3.0">
  <display-name>EmailSpringMVC</display-name>

    <servlet>
        <servlet-name>SpringController</servlet-name>
        <servlet-class>org.springframework.web.servlet.DispatcherServlet</servlet-class>
        <init-param>
            <param-name>contextConfigLocation</param-name>
            <param-value>/WEB-INF/spring-mvc.xml</param-value>
        </init-param>
        <load-on-startup>1</load-on-startup>
    </servlet>

    <servlet-mapping>
        <servlet-name>SpringController</servlet-name>
        <url-pattern>*.do</url-pattern>
    </servlet-mapping>

  <welcome-file-list>
    <welcome-file>EmailForm.jsp</welcome-file>
  </welcome-file-list>
</web-app>
It declares Spring controller servlet with its context configuration file (/WEB-INF/spring-mvc.xml). The controller is configured to handle all requests whose URL end with pattern: *.do. And the default page when accessing the application is the email form (EmailForm.jsp). 5. Creating Spring MVC controller class
In order to handle submission from the e-mail form, we need to create a Spring controller class as follows:package net.codejava.spring;
import javax.servlet.http.HttpServletRequest;
import org.springframework.beans.factory.annotation.Autowired;
import org.springframework.mail.SimpleMailMessage;
import org.springframework.mail.javamail.JavaMailSender;
import org.springframework.stereotype.Controller;
import org.springframework.web.bind.annotation.RequestMapping;
import org.springframework.web.bind.annotation.RequestMethod;
@Controller
@RequestMapping("/sendEmail.do")
public class SendEmailController {
@Autowired
private JavaMailSender mailSender;
@RequestMapping(method = RequestMethod.POST)
public String doSendEmail(HttpServletRequest request) {
// takes input from e-mail form
String recipientAddress = request.getParameter("recipient");
String subject = request.getParameter("subject");
String message = request.getParameter("message");
// prints debug info
System.out.println("To: " + recipientAddress);
System.out.println("Subject: " + subject);
System.out.println("Message: " + message);
// creates a simple e-mail object
SimpleMailMessage email = new SimpleMailMessage();
email.setTo(recipientAddress);
email.setSubject(subject);
email.setText(message);
// sends the e-mail
mailSender.send(email);
// forwards to the view named "Result"
return "Result";
}
}This controller class is quite simple. It is declared as a Spring MVC controller by the annotation @Controller, and is mapped to the e-mail form’s action by the @RequestMapping annotation. We inject the mailSender bean declared in spring-mvc.xml file into this controller through the private field also named mailSender. The injection is done automatically by Spring as we use the @Autowired annotation.The method doSendEmail()is responsible for capturing input from e-mail form, creating a SimpleMailMessage object and sending the e-mail by invoking the send() method on the mailSender bean. The e-mail is in plain text format. Finally, it returns a view named “Result” which causes Spring to use the viewResolver to find and load appropriate JSP file (Result.jsp). 6. Creating result page and error page
Code the Result.jsp file as follows:<%@ page language="java" contentType="text/html; charset=UTF-8"
pageEncoding="UTF-8"%>
<!DOCTYPE html PUBLIC "-//W3C//DTD HTML 4.01 Transitional//EN"
"http://www.w3.org/TR/html4/loose.dtd">
<html>
<head>
<meta http-equiv="Content-Type" content="text/html; charset=UTF-8">
<title>Send e-mail result</title>
</head>
<body>
<center>
<h2>Thank you, your email has been sent.</h2>
</center>
</body>
</html>And code the Error.jsp as follows:<%@ page language="java" contentType="text/html; charset=UTF-8"
pageEncoding="UTF-8"%>
<!DOCTYPE html PUBLIC "-//W3C//DTD HTML 4.01 Transitional//EN"
"http://www.w3.org/TR/html4/loose.dtd">
<html>
<head>
<meta http-equiv="Content-Type" content="text/html; charset=UTF-8">
<title>Error</title>
</head>
<body>
<center>
<h2>Sorry, the email was not sent because of the following error:</h2>
<h3>${exception.message}</h3>
</center>
</body>
</html>As we can see, the result page simply tells the user that the e-mail has been sent, while the error page displays an error message if any exception thrown during the process of sending e-mail. 7. Run the application
So far we have created all the key pieces of the application. Let’s deploy it on a servlet container like Tomcat, and access the application by typing the following URL into browser’s address bar (your host name and port number maybe different, depending on server configuration):http://localhost:8080/EmailSpringMVC
The e-mail form is displayed, type in required information: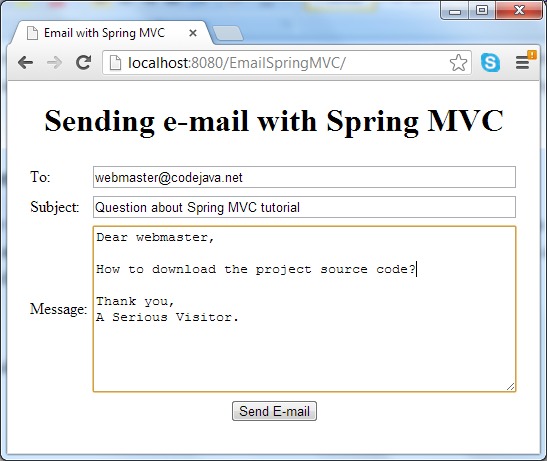 Hit Send E-mail button, it may take a while for the e-mail to be sent. A successful message comes from the result page in case everything is going well:
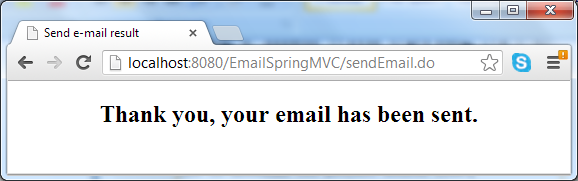 In case of error (such as network failure or the SMTP server could not be reached), the error page displays:
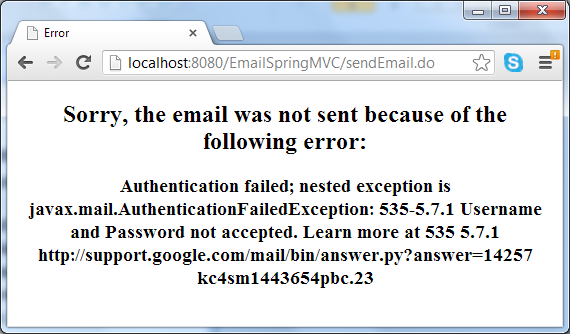 You can download the sample application as an Eclipse project or deployable WAR file in the attachment section, and remember to update SMTP settings to match your e-mail account.
 Related Java E-mail Tutorials:
- Spring MVC send e-mail with attachments
- How to send e-mail in HTML format in Java
- How to send email with attachments in Java
Other Spring Tutorials:
- Understand the core of Spring framework
- Understand Spring MVC
- Spring MVC beginner tutorial with Spring Tool Suite IDE
- Spring MVC Form Handling Tutorial
- Spring MVC Form Validation Tutorial
- Spring MVC with JdbcTemplate Example
- Spring MVC + Spring Data JPA + Hibernate - CRUD Example
- 14 Tips for Writing Spring MVC Controller
- Spring and Hibernate Integration Tutorial Part (XML Configuration)
About the Author:
 Nam Ha Minh is certified Java programmer (SCJP and SCWCD). He began programming with Java back in the days of Java 1.4 and has been passionate about it ever since. You can connect with him on Facebook and watch his Java videos on YouTube.
| [Deployable WAR file] | 3907 kB | |
| [Eclipse project] | 3908 kB |
Comments
This video is useful.
Can you help me out on this.(sending email with Spring MVC)
getting error on the following line:
cvc-complex-type.2.4.c: The matching wildcard is strict, but no declaration can be found for element 'bean'.
Am getting the below error , Please help.