Spring MVC XstlView and XsltViewResolver Example
- Details
- Written by Nam Ha Minh
- Last Updated on 24 June 2019 | Print Email
<?xml version="1.0"?>
<xsl:stylesheet xmlns:xsl="http://www.w3.org/1999/XSL/Transform"
    version="1.0">
    <xsl:output method="html" indent="yes" />
    <xsl:template match="/">
        <html>
            <body>
            	<div align="center">
                	<xsl:apply-templates />
                </div>
            </body>
        </html>
    </xsl:template>
    <xsl:template match="citizens">
        <table border="1" width="100%">
            <xsl:for-each select="citizen">
                <tr>
                    <td>
                        <xsl:value-of select="ssn" />
                    </td>
                    <td>
                        <xsl:value-of select="firstname" />
                    </td>
                    <td>
                        <xsl:value-of select="lastname" />
                    </td>
                    <td>
                        <xsl:value-of select="role" />
                    </td>
                    <td>
                        <xsl:value-of select="salary" />
                    </td>

                </tr>
            </xsl:for-each>
        </table>
    </xsl:template>
</xsl:stylesheet>
And the following source XML document (citizens.xml):<?xml version='1.0' encoding='UTF-8' standalone='no'?>
<citizens>
<citizen>
<ssn>Z345T</ssn>
<firstname>Cheryl</firstname>
<lastname>Johnson</lastname>
<role>Manager</role>
<salary>12000</salary>
</citizen>
<citizen>
<ssn>Z446T</ssn>
<firstname>John</firstname>
<lastname>Smith</lastname>
<role>Employee</role>
<salary>1000</salary>
</citizen>
<citizen>
<ssn>Z335T</ssn>
<firstname>Justin</firstname>
<lastname>Claire</lastname>
<role>Senior Manager</role>
<salary>14000</salary>
</citizen>
<citizen>
<ssn>Z389T</ssn>
<firstname>Clark</firstname>
<lastname>Rick</lastname>
<role>Employee</role>
<salary>2000</salary>
</citizen>
</citizens>So we are going to code a simple Spring MVC application that allows the user to view result of the transformation. The application’s default page looks like this: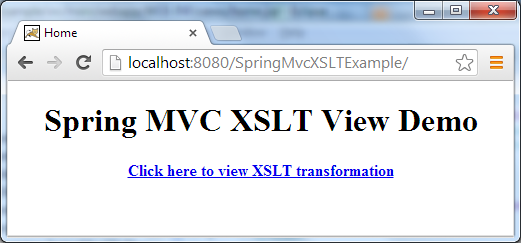 When clicking on the hyperlink, Spring will apply the XSL stylesheet for the XML document and render the following page as a result of the XSL transformation:
 Spring MVC makes it easy to perform an XSL transformation because it’s just the matter of configuration using the XsltView and XsltViewResolver either in XML descriptor approach or Java code approach. In this tutorial, we prefer using Java code to configure the XSLT view, but also include the XML descriptor for convenience.NOTE: We don’t use the AbstractXsltView because it is deprecated since Spring 2.5.
1. Creating Maven-Eclipse project
In Eclipse IDE, create a Maven project using spring-mvc-archetype (see: Creating a Spring MVC project using Maven and Eclipse in one minute) with the following structure: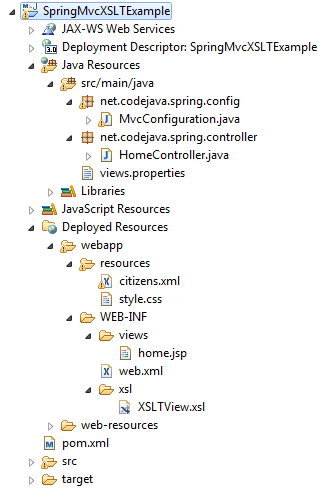 We need to add some new files and update the auto-generated ones. Here are descriptions of the main files:
- MvcConfiguration.java: is used to configure Spring MVC stuffs using Java code and annotations. We’ll configure XSLT view resolvers in this file.
- HomeController.java: main controller of the application.
- views.properties: this is an alternative to the Java code configuration. We’ll provide an example of configuring XSLT view in a properties file.
- home.jsp: the default page of the application.
- XSLTView.xsl: The XSL stylesheet document (code shown previously).
- citizens.xml: The XML document will be transformed using the stylesheet (code shown previously).
- Java and Spring:
<properties>
	<java.version>1.7</java.version>
	<spring.version>3.2.5.RELEASE</spring.version>
	<cglib.version>2.2.2</cglib.version>
</properties>
- Servlet API:
<dependency>
	<groupId>javax.servlet</groupId>
	<artifactId>javax.servlet-api</artifactId>
	<version>3.0.1</version>
	<scope>provided</scope>
</dependency>
2. Updating the Default Page
Update the home.jsp file with the following content:<%@page contentType="text/html" pageEncoding="UTF-8"%>
<!DOCTYPE HTML PUBLIC "-//W3C//DTD HTML 4.01 Transitional//EN"
"http://www.w3.org/TR/html4/loose.dtd">
<html>
<head>
<meta http-equiv="Content-Type" content="text/html; charset=UTF-8">
<title>Home</title>
</head>
<body>
<div align="center">
<h1>Spring MVC XSLT View Demo</h1>
<p>
<b><a href="/viewXSLT">Click here to view XSLT transformation</a></b>
</p>
</div>
</body>
</html>This page simply displays a hyperlink that allows the user to view the result of XSL transformation. And we are going to update the controller class to handle this hyperlink’s URL in the next section.
3. Coding Spring Controller
Update the HomeController.java with the following code:package net.codejava.spring.controller;
import java.io.File;
import java.io.IOException;
import javax.servlet.http.HttpServletRequest;
import javax.servlet.http.HttpServletResponse;
import javax.xml.transform.Source;
import javax.xml.transform.stream.StreamSource;
import org.springframework.stereotype.Controller;
import org.springframework.web.bind.annotation.RequestMapping;
import org.springframework.web.servlet.ModelAndView;
@Controller
public class HomeController {
@RequestMapping(value="/")
public ModelAndView goHome(HttpServletResponse response) throws IOException{
return new ModelAndView("home");
}
@RequestMapping(value="/viewXSLT")
public ModelAndView viewXSLT(HttpServletRequest request,
HttpServletResponse response) throws IOException {
// builds absolute path of the XML file
String xmlFile = "resources/citizens.xml";
String contextPath = request.getServletContext().getRealPath("");
String xmlFilePath = contextPath + File.separator + xmlFile;
Source source = new StreamSource(new File(xmlFilePath));
// adds the XML source file to the model so the XsltView can detect
ModelAndView model = new ModelAndView("XSLTView");
model.addObject("xmlSource", source);
return model;
}
}The viewXSLT() method is added in order to handle the /viewXSLT URL. In this method, we locate the XML source file which is relative to the application’s directory, and wrap it in a Source object which is added to the model. Pay attention to the two lines of code:ModelAndView model = new ModelAndView("XSLTView");
model.addObject("xmlSource", source);We add the XML source object under the key xmlSource to the model of the view XSLTView - these two names are very important because we’ll configure the XSLT View based on them.
4. Configuring XsltView and XsltViewResolver using Java code
Now, it comes to the most important part: configuring the XSLT view. Update the MvcConfiguration.java file with the following code:package net.codejava.spring.config;
import org.springframework.context.annotation.Bean;
import org.springframework.context.annotation.ComponentScan;
import org.springframework.context.annotation.Configuration;
import org.springframework.web.servlet.ViewResolver;
import org.springframework.web.servlet.config.annotation.EnableWebMvc;
import org.springframework.web.servlet.config.annotation.ResourceHandlerRegistry;
import org.springframework.web.servlet.config.annotation.WebMvcConfigurerAdapter;
import org.springframework.web.servlet.view.InternalResourceViewResolver;
import org.springframework.web.servlet.view.ResourceBundleViewResolver;
import org.springframework.web.servlet.view.xslt.XsltView;
import org.springframework.web.servlet.view.xslt.XsltViewResolver;
@Configuration
@ComponentScan(basePackages="net.codejava.spring")
@EnableWebMvc
public class MvcConfiguration extends WebMvcConfigurerAdapter{
@Bean
public ViewResolver getXSLTViewResolver(){
XsltViewResolver xsltResolover = new XsltViewResolver();
xsltResolover.setOrder(1);
xsltResolover.setSourceKey("xmlSource");

xsltResolover.setViewClass(XsltView.class);
xsltResolover.setViewNames(new String[] {"XSLTView"});
xsltResolover.setPrefix("/WEB-INF/xsl/");
xsltResolover.setSuffix(".xsl");
return xsltResolover;
}
@Bean
public ViewResolver getJSPViewResolver(){
InternalResourceViewResolver resolver = new InternalResourceViewResolver();
resolver.setPrefix("/WEB-INF/views/");
resolver.setSuffix(".jsp");
resolver.setOrder(2);
return resolver;
}
@Override
public void addResourceHandlers(ResourceHandlerRegistry registry) {
registry.addResourceHandler("/resources/**").addResourceLocations("/resources/");
}
}Pay attention to the getXSLTViewResolver() method where we actually configure our XSLT view:XsltViewResolver xsltResolover = new XsltViewResolver();
xsltResolover.setOrder(1);
xsltResolover.setSourceKey("xmlSource");
xsltResolover.setViewClass(XsltView.class);
xsltResolover.setViewNames(new String[] {"XSLTView"});
xsltResolover.setPrefix("/WEB-INF/xsl/");
xsltResolover.setSuffix(".xsl");Here, the XsltViewResolver can infer the XSL document based on the view name, prefix and suffix:/WEB-INF/xsl/XSLTView.xslAnd the source XML document can be located by searching the model for a supported object associates with the key specified by the setSourceKey() method. Currently, the XsltView supports the following object types: Source, Document, Node, Reader, InputStream and Resource.If you are using XML descriptor approach, the following XML configuration is equivalent to the Java code approach above, for your convenience:
<bean id="XSLTViewResolver" class="org.springframework.web.servlet.view.xslt.XsltViewResolver">
	<property name="order" value="1"/>
	<property name="sourceKey" value="xmlSource"/>
	<property name="viewClass" value="org.springframework.web.servlet.view.xslt.XsltView"/>
	<property name="viewNames">
		<array>
			<value>XSLTView</value>
		</array>
	</property>
	<property name="prefix" value="/WEB-INF/xsl/" />
	<property name="suffix" value=".xsl" />
</bean>

<bean id="JSPViewResolver"
	class="org.springframework.web.servlet.view.InternalResourceViewResolver">
	<property name="order" value="2"/>
	<property name="prefix" value="/WEB-INF/jsp/" />
	<property name="suffix" value=".jsp" />
</bean>
Note that the view order is important here, as we set the XsltViewResolver’s order (1) higher than the JSPViewResolver (2).
5. An Alternative: Using ResourceBundleViewResolver with Properties File
Besides using the XsltViewResolver, it’s also possible to use a ResourceBundleViewResolver in conjunction with a properties file to achieve the same purpose. Therefore, we can have an alternate version of the getXSLTViewResolver() method as follows:public ViewResolver getXSLTViewResolver(){
ResourceBundleViewResolver resolver = new ResourceBundleViewResolver();
resolver.setBasename("views");
resolver.setOrder(1);
return resolver;
}If you are using XML:<bean id="XSLTViewResolver" class="org.springframework.web.servlet.view.ResourceBundleViewResolver"> <property name="order" value="1"/> <property name="basename" value="views"/> </bean>And create the views.properties file under the classpath with the following content:
XSLTView.(class)=org.springframework.web.servlet.view.xslt.XsltView
XSLTView.sourceKey=xmlSource
XSLTView.url=/WEB-INF/xsl/XSLTView.xsl
6. Testing the application
We have finished configuring the XSLT view. Now, deploy the application and access its default page using the following URL:http://localhost:8080/SpringMvcXSLTExample
The following page gets displayed:Click on the hyperlink, the following page gets displayed, as a result of the transformation when Spring applies the XSL stylesheet for the XML document:So far we have understood how to configure the XsltView and XsltViewResolver to create a XSLT view in a Spring MVC application. If you want more control, you can subclass the XsltView. References: Related Spring View Tutorials:
- Spring MVC URL-based View Resolution with UrlFilenameViewController Example
- Parameterize View Name with ParameterizableViewController in Spring MVC
- Spring MVC with Excel View Example
- Spring MVC with PDF View Example
Other Spring Tutorials:
- Understand the core of Spring framework
- Understand Spring MVC
- Understand Spring AOP
- Spring MVC beginner tutorial with Spring Tool Suite IDE
- Spring MVC Form Handling Tutorial
- Spring MVC Form Validation Tutorial
- 14 Tips for Writing Spring MVC Controller
- Spring Web MVC Security Basic Example (XML Configuration)
- Understand Spring Data JPA with Simple Example
About the Author:
 Nam Ha Minh is certified Java programmer (SCJP and SCWCD). He began programming with Java back in the days of Java 1.4 and has been passionate about it ever since. You can connect with him on Facebook and watch his Java videos on YouTube.
| [Eclipse-Maven project] | 19 kB |
Comments