Spring Web MVC Security Basic Example Part 1 with XML Configuration
- Details
- Written by Nam Ha Minh
- Last Updated on 24 June 2019 | Print Email
1. Overview of Spring Security
According to Spring Security Project, Spring Security is a powerful and highly customizable authentication and access-control framework. It is the de-facto standard for securing Spring-based applications.Spring Security is a framework that focuses on providing both authentication and authorization to Java applications. Like all Spring projects, the real power of Spring Security is found in how easily it can be extended to meet custom requirements.Spring Security can be integrated with Servlet API and Spring Web MVC seamlessly. The nice feature of Spring Security, when integrated with Spring MVC, is that it provides default login and logout functionalities and easy configuration for authentication and authorization.2. About the Sample Spring Security Application
We’ll walk you through the steps of building a simple Spring MVC application with the home page is accessible to everyone, and the administrator page is accessible to only authorized users (secured using Spring Security).When the user tries to access the administrator page, he will be asked to login. If correct username and password are entered, he will see the administrator page. Otherwise an error message will be displayed.3. Creating Dynamic Web Project with Maven
First, create a project in Eclipse. You can create a Maven project (File > New > Maven Project) for a Java web application by defining the packaging option to war, or you can create a dynamic web project first (File > New > Dynamic WebProject), the convert the project to Maven.In this project, the following technologies are used:- Java 8.
- Tomcat 8 with Servlet 3.1.
- Spring framework 4.2.4.RELEASE.
- Spring Security 4.0.3.RELEASE.
- JSTL 1.2
- Eclipse IDE, Mars Release (4.5.0).
4. Adding Maven Dependencies
In the Maven project file (pom.xml), declare the following properties:<properties> <spring.version>4.2.4.RELEASE</spring.version> <spring.security.version>4.0.3.RELEASE</spring.security.version> <jstl.version>1.2</jstl.version> </properties>These are the versions of Spring framework, Spring security and JSTL.Next, declare the dependencies for Spring and Spring Web MVC:
<!-- Spring framework -->
<dependency>
	<groupId>org.springframework</groupId>
	<artifactId>spring-core</artifactId>
	<version>${spring.version}</version>
</dependency>

<dependency>
	<groupId>org.springframework</groupId>
	<artifactId>spring-context</artifactId>
	<version>${spring.version}</version>
</dependency>

<dependency>
	<groupId>org.springframework</groupId>
	<artifactId>spring-webmvc</artifactId>
	<version>${spring.version}</version>
</dependency>
Dependencies for Spring Security Web and Spring Security Config:<!-- Spring Security -->
<dependency>
<groupId>org.springframework.security</groupId>
<artifactId>spring-security-web</artifactId>
<version>${spring.security.version}</version>
</dependency>
<dependency>
<groupId>org.springframework.security</groupId>
<artifactId>spring-security-config</artifactId>
<version>${spring.security.version}</version>
</dependency>And dependency for JSTL as we’ll write JSTL expressions in JSP pages:<!-- JSTL -->
<dependency>
<groupId>jstl</groupId>
<artifactId>jstl</artifactId>
<version>${jstl.version}</version>
</dependency> 5. Coding Index Page
Create a directory called views under the /WEB-INF directory, then create an index.jspfile with the following HTML code:<%@ page language="java" contentType="text/html; charset=ISO-8859-1"
pageEncoding="ISO-8859-1"%>
<!DOCTYPE html PUBLIC "-//W3C//DTD HTML 4.01 Transitional//EN"
"http://www.w3.org/TR/html4/loose.dtd">
<html>
<head>
<meta http-equiv="Content-Type" content="text/html; charset=ISO-8859-1">
<title>Spring Security Basic Demo (XML)</title>
</head>
<body>
<div align="center">
<h1>Spring Security Basic Demo (XML)</h1>
<a href="/admin">Go to Administrator Page</a>
</div>
</body>
</html>As you can see, this is very simple page with a heading “Spring Security Basic Demo (XML)” and a hyperlink to the administrator page. 6. Coding Admin Page
Next, create an admin.jsp file under the /WEB-INF/views directory with the following code:<%@taglib prefix="c" uri="http://java.sun.com/jsp/jstl/core"%>
<%@ page language="java" session="true" contentType="text/html; charset=ISO-8859-1"
pageEncoding="ISO-8859-1"%>
<!DOCTYPE html PUBLIC "-//W3C//DTD HTML 4.01 Transitional//EN"
"http://www.w3.org/TR/html4/loose.dtd">
<html>
<head>
<meta http-equiv="Content-Type" content="text/html; charset=ISO-8859-1">
<title>Spring Security Basic Demo (XML)</title>
</head>
<body>
<div align="center">
<h1>${title}</h1>
<h2>${message}</h2>
<c:if test="${pageContext.request.userPrincipal.name != null}">
<h2>Welcome : ${pageContext.request.userPrincipal.name} |
<a href="/<c:url value="/logout" />" > Logout</a></h2>
</c:if>
</div>
</body>
</html>This is the administrator page which requires authentication and authorization to access. We use JSTL expressions to display the title and message in the model. If the user is logged in, display his username along with a logout link. 7. Coding Spring MVC Controller
Next, we write code for a Spring controller in order to handle requests coming to the application. Create a Java class named MainControllerunder the package net.codejava.spring with the following code:package net.codejava.spring;
import org.springframework.stereotype.Controller;
import org.springframework.web.bind.annotation.RequestMapping;
import org.springframework.web.bind.annotation.RequestMethod;
import org.springframework.web.servlet.ModelAndView;
@Controller
public class MainController {
@RequestMapping(value="/", method = RequestMethod.GET)
public ModelAndView visitHome() {
return new ModelAndView("index");
}
@RequestMapping(value="/admin", method = RequestMethod.GET)
public ModelAndView visitAdmin() {
ModelAndView model = new ModelAndView("admin");
model.addObject("title", "Admministrator Control Panel");
model.addObject("message", "This page demonstrates how to use Spring security.");
return model;
}
}As you can see, this controller is designed to handle 2 requests:- “/”: the request to the application’s context root, or home page.
- “/admin”: the request to the administrator page, which will be secured by Spring security.
8. Configuring Web Deployment Descriptor (web.xml)
In the web deployment descriptor file (web.xml under /WEB-INF folder), we configure how Spring MVC and Spring Security are loaded when during the application startup time.Here’s content of the web.xml file:<?xml version="1.0" encoding="UTF-8"?> <web-app xmlns:xsi="http://www.w3.org/2001/XMLSchema-instance" xmlns="http://xmlns.jcp.org/xml/ns/javaee" xsi:schemaLocation="http://xmlns.jcp.org/xml/ns/javaee http://xmlns.jcp.org/xml/ns/javaee/web-app_3_1.xsd" id="WebApp_ID" version="3.1"> <display-name>Spring Security Basic XML</display-name> <servlet> <servlet-name>SpringController</servlet-name> <servlet-class>org.springframework.web.servlet.DispatcherServlet</servlet-class> <init-param> <param-name>contextConfigLocation</param-name> <param-value>/WEB-INF/spring-mvc.xml</param-value> </init-param> <load-on-startup>1</load-on-startup> </servlet> <servlet-mapping> <servlet-name>SpringController</servlet-name> <url-pattern>/</url-pattern> </servlet-mapping> <listener> <listener-class>org.springframework.web.context.ContextLoaderListener</listener-class> </listener> <context-param> <param-name>contextConfigLocation</param-name> <param-value> /WEB-INF/spring-security.xml </param-value> </context-param> <!-- Spring Security Filter --> <filter> <filter-name>springSecurityFilterChain</filter-name> <filter-class>org.springframework.web.filter.DelegatingFilterProxy</filter-class> </filter> <filter-mapping> <filter-name>springSecurityFilterChain</filter-name> <url-pattern>/*</url-pattern> </filter-mapping> </web-app>As standard, we declare a Spring dispatcher servlet that handles all URLs coming to the application, and a Spring Web Context Loader Listener to loads Spring security configuration (in a Spring security configuration file named spring-security.xml file under /WEB-INF folder).The interesting point here is the configuration of the Spring Security Filter:
<!-- Spring Security  Filter -->
<filter>
	<filter-name>springSecurityFilterChain</filter-name>
	<filter-class>org.springframework.web.filter.DelegatingFilterProxy</filter-class>
</filter>

<filter-mapping>
	<filter-name>springSecurityFilterChain</filter-name>
	<url-pattern>/*</url-pattern>
</filter-mapping>
The responsibility of the Spring Security Filter is to intercept some URL patterns in order to apply authentication and authorization as configured in the Spring security configuration file.
9. Configuring Spring MVC Application Context
Next, we configure Spring MVC to scan Java classes for controllers and resolve view names. Create a spring-mvc.xmlfile under the /WEB-INF folder with the following code:<?xml version="1.0" encoding="UTF-8"?> <beans xmlns:mvc="http://www.springframework.org/schema/mvc" xmlns:xsi="http://www.w3.org/2001/XMLSchema-instance" xmlns="http://www.springframework.org/schema/beans" xmlns:context="http://www.springframework.org/schema/context" xsi:schemaLocation="http://www.springframework.org/schema/mvc http://www.springframework.org/schema/mvc/spring-mvc.xsd http://www.springframework.org/schema/beans http://www.springframework.org/schema/beans/spring-beans.xsd http://www.springframework.org/schema/context http://www.springframework.org/schema/context/spring-context.xsd"> <mvc:annotation-driven /> <context:component-scan base-package="net.codejava.spring" /> <bean class="org.springframework.web.servlet.view.InternalResourceViewResolver"> <property name="prefix" value="/WEB-INF/views/" /> <property name="suffix" value=".jsp" /> </bean> </beans>As you are familiar with Spring MVC, the <mvc:annotation-driven /> element tells Spring to analyze annotations for loading configurations and controllers.The <context:component-scan /> element specifies which Java package to search for Spring components.And an InternalResourceViewResolverbean is declared to tell Spring how to resolve logical view names to physical view pages.
10. Configuring Spring Security
The last step is to declare authentication (who can login) and authorization (who can access which page). Create a spring-security.xml file under /WEB-INF folder with the following code:<beans:beans xmlns="http://www.springframework.org/schema/security"
xmlns:beans="http://www.springframework.org/schema/beans"
xmlns:xsi="http://www.w3.org/2001/XMLSchema-instance"
xsi:schemaLocation="http://www.springframework.org/schema/beans
http://www.springframework.org/schema/beans/spring-beans-4.0.xsd
http://www.springframework.org/schema/security
http://www.springframework.org/schema/security/spring-security-4.0.xsd">
<http auto-config="true">
<intercept-url pattern="/admin**" access="hasRole('ROLE_ADMIN')" />
<csrf disabled="true" />
</http>
<authentication-manager>
<authentication-provider>
<user-service>
<user name="admin" password="nimda" authorities="ROLE_ADMIN" />
</user-service>
</authentication-provider>
</authentication-manager>
</beans:beans> Here, there are two elements are used for authentication and authorization:- The <authentication-manager> element declares a user with username, password and role (ROLE_ADMIN per this configuration). This user can be authenticated to access the application.
- In the <http> element, we declare which URL pattern will be intercepted by Spring security filter, using the <intercept-url> element. As per this configuration, all the URL patterns /admin** are secured, and only the users having role ROLE_ADMIN can be authorized to access these URLs.
11. The Whole Project Structure
Finally, we end up with the following project structure: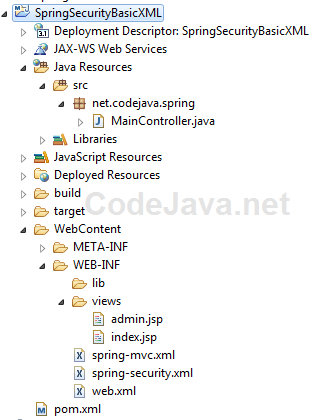 NOTE: You can download the Spring Security Basic XML Project (Eclipse-Maven) at the end of this article (in the Download Attachments section).
 12. Test the Spring Security Sample Application
Deploy the project on Tomcat, then type the following URL in your browser:http://localhost:8080/SpringSecurityBasicXML
You should see the index page looks like as following: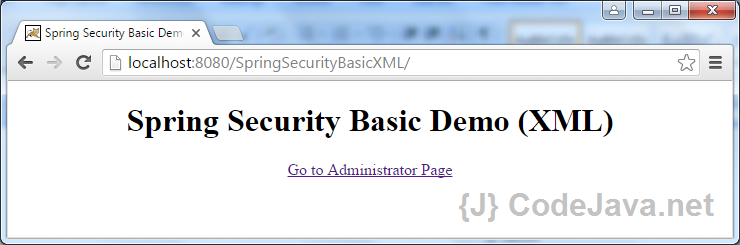 On this page, click on the link Go to Administrator Page (similar to typing the URL: http://localhost:8080/SpringSecurityBasicXML/admin), Spring security redirects you to the default login page like this:
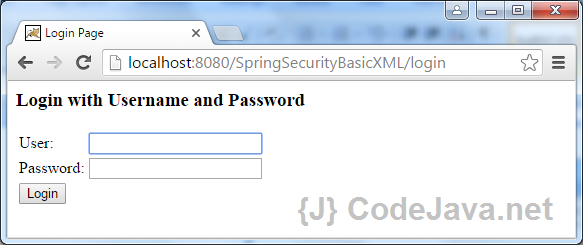 Try to enter a wrong username and password, Spring security automatically generates error message in red at the top of the form, as shown in the following screenshot:
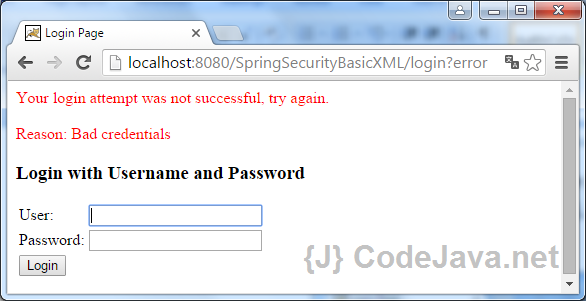 Now, enter the correct username and password (admin and nimda, as per configured in this application), Spring takes you to the admin page:
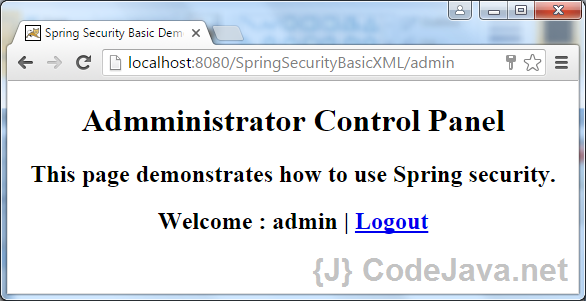 So far so good, now test the logout functionality. Click on the Logout link, Spring security filter automatically intercepts the/logout URL, invalidates the session and take you to the login page again:
 Notice the message ‘You have been logged out’ appears and the URL changes to http://localhost:8080/SpringSecurityBasicXML/login?logoutTo make sure Spring security already invalidated the session, try to access the page http://localhost:8080/SpringSecurityBasicXML/admin, you will see the login page. It’s perfect!That’s all! We’ve done a basic Spring security project with XML configuration.
 References:
Related Spring Security Tutorials:
Other Spring Tutorials:
- Understand the core of Spring framework
- Understand Spring MVC
- Understand Spring AOP
- Spring MVC beginner tutorial with Spring Tool Suite IDE
- Spring MVC Form Handling Tutorial
- Spring MVC Form Validation Tutorial
- 14 Tips for Writing Spring MVC Controller
- Spring Web MVC Security Basic Example (XML Configuration)
- Understand Spring Data JPA with Simple Example
About the Author:
 Nam Ha Minh is certified Java programmer (SCJP and SCWCD). He began programming with Java back in the days of Java 1.4 and has been passionate about it ever since. You can connect with him on Facebook and watch his Java videos on YouTube.
| [Spring Web MVC Security Basic XML Eclipse-Maven Project] | 16 kB |
Comments
Just wanted to point out a syntax error:
Logout
Removing the first forward slash is necessary; otherwise the href points to the absolute path "/logout".
Logout
cvc-complex-type.2.4.a: Invalid content was found starting with element 'http'. One of '{"http://www.springframework.org/schema/beans":description, "http://www.springframework.org/schema/beans":import, "http://www.springframework.org/schema/beans":alias, "http://www.springframework.org/schema/beans":bean, WC[##other:"http://www.springframework.org/schema/beans"], "http://www.springframework.org/schema/beans":beans}' is expected.