Configure HTTPS for Spring Boot Application with Self-Signed Certificate on Localhost
- Details
- Written by Nam Ha Minh
- Last Updated on 01 September 2021 | Print Email
1. Generate Self-Signed Certificate using Java keytool
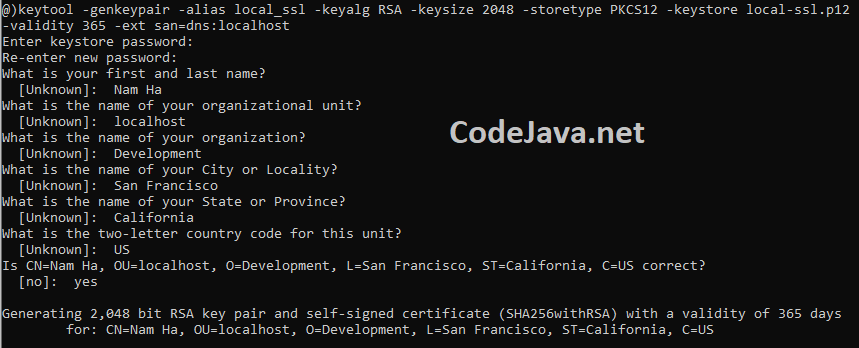
The SSL protocol requires a server provide a digital certificate which is trusted by an authority. Then clients will be able to establish a secure connection to your application. For development on localhost, you can create a self-signed certificate which is then installed to be trusted by your web browsers.Open a new command prompt window, and type the following command:keytool -genkeypair -alias local_ssl -keyalg RSA -keysize 2048 -storetype PKCS12 -keystore local-ssl.p12 –validity 365 -ext san=dns:localhost
This command will generate a key pair (public key and private key) using RSA cryptography algorithm. Let me explain the arguments for the keytool program:- -genkeypair: generates a key pair
- -alias local_ssl: specifies the alias of the keypair is local_ssl, which uniquely identifies it.
- -keyalg RSA: specifies the algorithm to be used is RSA
- -keysize 2048: specifies the size of the key is 2048 bit
- -storetype PKCS12: specifies the file format to store the key pair is PKCS12
- -keystore local-ssl.p12: species name of the file that stores the key pair is local-ssl.p12
- -validity 365: specifies the expiration date will be 365 days from now
- -ext san=dns:localhost: includes an X.509 extension for Subject Alternate Name (SAN) – a SAN is required so the certificate will be trusted by browsers on localhost
2. Enable SSL for Spring Boot Application
Copy the local-ssl.p12 file to your Spring Boot project, under src/main/resources like this: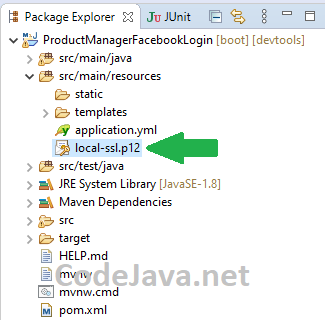 Then enable SSL for embedded Tomcat server in the Spring Boot application configuration file (application.yml in my case) as follows:
server:
port: 443
servlet:
context-path: /
ssl:
enabled: true
key-alias: local_ssl
key-store: classpath:local-ssl.p12
key-store-type: PKCS12
key-password: <keystore_password>
key-store-password: <keystore_password>
Now, you can start your Spring Boot application. And notice the embedded Tomcat server is now listening on HTTPS port number (443): Then try to access https://localhost in Chrome browser, you should see an error like this:
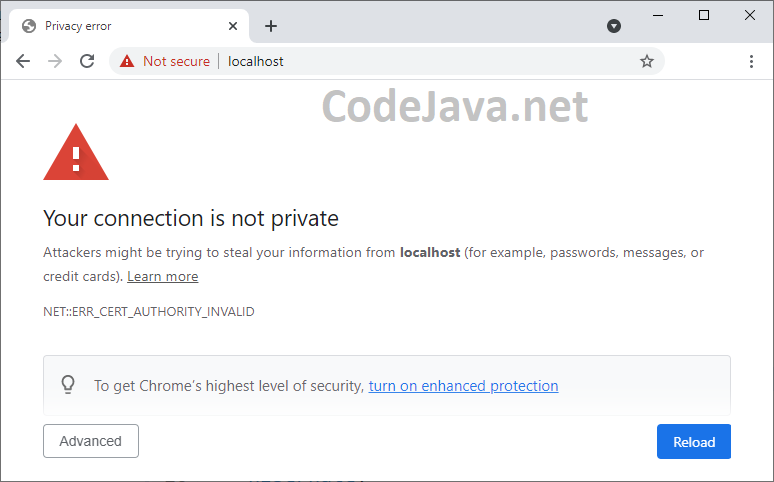 This is because the self-signed SSL certificate sent from the server is not trusted by the browser. Don’t worry. See the next step below.
3. Install Self-Signed Certificate
Now you have to generate a certificate file from the keystore file. Use the keytool program with this command:keytool -export -keystore local-ssl.p12 -alias local_ssl -file local-cert.crt
This command exports a digital certificate from the specified keystore file. You need to provide password: Now, open Windows Explorer and navigate to the directory where the local-cert.crt file created. Right-click on the file and click Install Certificate:
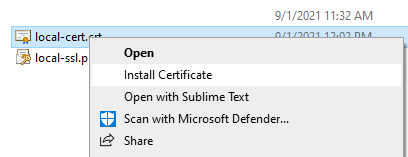 Then in the first screen of Certificate Import Wizard, click Next. Click Browse, and choose Trusted Root Certification Authorities:
 Click OK. Click Next. And Click Finish to complete the Certificate Import wizard. You should see a security warning, and click Yes to install the certificate.Now, restart your browser and reload https://localhost URL, you should see a security padlock appears like this:
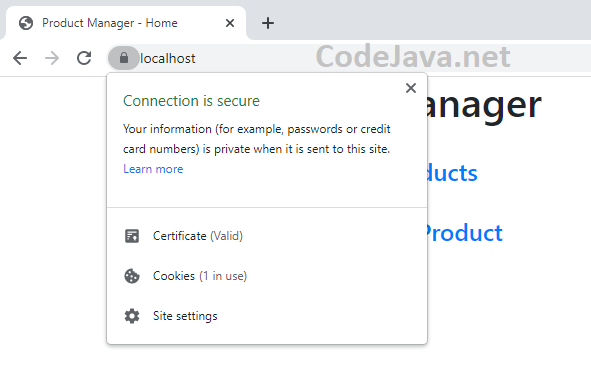 Congratulations! You have successfully configured secure connection (HTTPS) for a Spring Boot application using self-signed certificate. To see the steps in action, I recommend you watch the following video:
 Spring Security Tutorials:
- Spring Security Role-based Authorization Tutorial
- Spring Security Customize Login and Logout
- How to Get Logged-in User's Details with Spring Security
- Spring Security: Prevent User from Going Back to Login Page if Already logged in
Other Spring Boot Tutorials:
- How to create a Spring Boot Web Application (Spring MVC with JSP/ThymeLeaf)
- Spring Boot CRUD Example with Spring MVC – Spring Data JPA – ThymeLeaf - Hibernate - MySQL
- Spring Boot Registration and Login with MySQL Database Tutorial
- Spring Boot Hello World RESTful Web Services Tutorial
- Spring Boot Thymeleaf Form Handling Tutorial
- Spring Data JPA Paging and Sorting Examples
- Spring Boot Error Handling Guide
- Spring Boot Logging Basics
About the Author:
 Nam Ha Minh is certified Java programmer (SCJP and SCWCD). He began programming with Java back in the days of Java 1.4 and has been passionate about it ever since. You can connect with him on Facebook and watch his Java videos on YouTube.
Comments