In web application development, it’s very common of having two separate modules - one for admin users and one for regular users. Each module has a separate login page and may be associated with the same or different authentication source. In other words, the application provides multiple login pages for different type of users: admins and users, or admins and customers.In this Spring Boot article, I’d like to share with you how to code such kind of authentication with Spring Security. In details, you’ll learn:
How to implement login pages for admin users and regular users with the same authentication source
How to implement login pages for admins and customers with different authentication sources
In both cases, I also show the code examples with different Spring Boot and Spring Security versions, i.e. Spring Boot version 2.7.0 and older: Spring Boot 2.7.0+ comes with Spring Security 5.7.1+ that deprecates the use of WebSecurityConfigurerAdapterand the older versions that still support it.Note that for the shake of simplicity, I use H2 in-memory database and plain text passwords in the following code examples. In practice, you can easily switch to a physical database such as MySQL.
1. Setup Dependencies for Project
If you use Maven, make sure to include the following dependencies for your project:
This means we use Spring Web, Spring Data JPA, Spring Security, Thymeleaf, Thymeleaf Extras for Spring Security, and H2 database.
2. Implement Multiple Login Pages with the Same Authentication Provider
In this scenario, we’re going to code the admin login page and user login page - both sharing the same authentication source (user credentials are stored in a single table). And role names are used to differentiate admin user (ADMIN) or regular user (USER). So define the Roleenum type as follows:
package net.codejava;

public enum Role { ADMIN, USER }
And code the User entity class as follows:
package net.codejava;

import javax.persistence.*;

@Entity
@Table(name = "users")
public class User {
	@Id @GeneratedValue(strategy = GenerationType.IDENTITY)
	private Integer id;

	@Column(nullable = false, unique = true, length = 40)
	private String email;

	@Column(nullable = false, unique = true, length = 10)
	private String password;

	@Enumerated(EnumType.STRING)
	private Role role;

	public User() {}

	public User(String email, String password, Role role) {
		this.email = email;
		this.password = password;
		this.role = role;
	}

	// getters and setters are not shown for brevity

}
Next, code the UserRepositoryinterface for data access layer:
package net.codejava;

import org.springframework.data.repository.CrudRepository;
import org.springframework.stereotype.Repository;

@Repository
public interface UserRepository extends CrudRepository<User, Integer> {
	public User findByEmail(String email);
}
We need to have some sample data for testing purpose. So code the following class that will initialize database upon application startup:
package net.codejava;

import java.util.List;

import org.springframework.boot.CommandLineRunner;
import org.springframework.context.annotation.Bean;
import org.springframework.context.annotation.Configuration;

@Configuration
public class DatabaseLoader {

	private UserRepository repo;

	public DatabaseLoader(UserRepository repo) {
		this.repo = repo;
	}

	@Bean
	public CommandLineRunner initializeDatabase() {
		return args -> {
			User user1 = new User("david@gmail.com", "david123", Role.ADMIN);
			User user2 = new User("john@yahoo.com", "john2020", Role.ADMIN);
			User user3 = new User("nam@codejava.net", "nam2022", Role.USER);
			User user4 = new User("ravi@gmail.com", "ravi2121", Role.USER);

			repo.saveAll(List.of(user1, user2, user3, user4));

			System.out.println("Database initialized");
		};
	}
}
You see, it persists 4 users into the database: two of whom have role ADMIN and twos have role USER - and the passwords are in plain text.And to implement authentication, create a class of type UserDetails as follows:
package net.codejava;

import java.util.ArrayList;
import java.util.Collection;
import java.util.List;

import org.springframework.security.core.GrantedAuthority;
import org.springframework.security.core.authority.SimpleGrantedAuthority;
import org.springframework.security.core.userdetails.UserDetails;

public class CustomUserDetails implements UserDetails {
	private User user;

	public CustomUserDetails(User user) {
		this.user = user;
	}

	@Override
	public Collection<? extends GrantedAuthority> getAuthorities() {
		List<SimpleGrantedAuthority> authorities = new ArrayList<>();

		authorities.add(new SimpleGrantedAuthority(user.getRole().toString()));

		return authorities;
	}

	@Override
	public String getPassword() {
		return user.getPassword();
	}

	@Override
	public String getUsername() {
		return user.getEmail();
	}

	@Override
	public boolean isAccountNonExpired() {
		return true;
	}

	@Override
	public boolean isAccountNonLocked() {
		return true;
	}

	@Override
	public boolean isCredentialsNonExpired() {
		return true;
	}

	@Override
	public boolean isEnabled() {
		return true;
	}

}
And code a class of type UserDetailsService as below:
package net.codejava;

import org.springframework.beans.factory.annotation.Autowired;
import org.springframework.security.core.userdetails.*s;

public class CustomUserDetailsService implements UserDetailsService {
	@Autowired private UserRepository repo;

	@Override
	public UserDetails loadUserByUsername(String email) throws UsernameNotFoundException {
		User user = repo.findByEmail(email);
		if (user == null) {
			throw new UsernameNotFoundException("No user found with the given email");
		}

		return new CustomUserDetails(user);
	}

}
Implement Login Page for Admin Users
Now, create a Spring security configuration class that configures authentication provider and login page for admin users. The code is as below:
You see, this security configuration class extends the WebSecurityConfigurerAdapter class, which means it should be used with Spring Boot version less than 2.7.0 and Spring Security version less than 5.7.1. For example, Spring Boot version 2.3.4:
Let me explain the code in this config class:It declares two Spring beans of type UserDetailsService and PasswordEncoder, which will be used by an authentication provider to authenticate users.The following statement allows public access (everyone) for the application’s home page:
The following statement applies Spring Security filter chain for all requests having path starts with /admin/:
http.antMatcher("/admin/**")
This means we should put all admin pages under /admin/ path. And the next statement requires authentication for all requests - users must have role ADMIN in order to access admin pages:
And to understand the rest of the code that configures login page, refer to this article.For your reference, below is code of the admin login page (templates/admin/admin_login.html):
The admin login page looks like this:If you enter the correct credentials (see the DatabaseLoaderclass) of an admin user, you will see the admin home page:And click Logout button to sign out. Code of the admin home page (templates/admin/admin_home.html) is as below:
<!DOCTYPE html>
<html xmlns:th="http://www.thymeleaf.org">
<head>
<meta charset="ISO-8859-1">
<title>Welcome to CodeJava.net Admin Control Panel</title>
</head>
<body>
	<div align="center">
		<h2>Welcome to CodeJava.net Admin Control Panel</h2>
		<p>Your user name is: <b>[[${#request.userPrincipal.principal.username}]]</b></p>
        <form th:action="@{/admin/logout}" method="post">
            <input type="submit" value="Logout" />
        </form>
	</div>
</body>
</html>
In case you’re using Spring Boot version >= 2.70 or Spring Security version >= 5.7.1, you need to use the following code for the AdminSecurityConfig class:
Similar to admin login module, we need to create the second security configuration class for the user login module as follows (below is the code for Spring Boot version < 2.7.0 or Spring Security < 5.7.1):
If you notice, we specify the filter order of the AdminSecurityConfigclass is @Order(1), and the UserSecurityConfig class is @Order(2). That means there will be two different Spring Security filters: one for admin module and one for user module. Two filters cannot have the same order.For your reference, below is code of the user login page (templates/user/user_login.html):
The user login page looks like the following screenshot:If you enter the correct credentials of a regular user, you will see the user home page appears:For your reference, below is code of the user home page (templates/user/user_home.html):
<!DOCTYPE html>
<html xmlns:th="http://www.thymeleaf.org">
<head>
<meta charset="ISO-8859-1">
<title>Welcome to CodeJava.net</title>
</head>
<body>
	<div align="center">
		<h2>Welcome to CodeJava.net User Home</h2>
		<p>Your user name is: <b>[[${#request.userPrincipal.principal.username}]]</b></p>
        <form th:action="@{/user/logout}" method="post">
            <input type="submit" value="Logout" />
        </form>
	</div>
</body>
</html>
And for all of this to work, code a controller class as below:
package net.codejava;

import org.springframework.stereotype.Controller;
import org.springframework.web.bind.annotation.GetMapping;

@Controller
public class MainController {

	@GetMapping("")
	public String viewHomePage() {
		return "index";
	}

	@GetMapping("/admin/login")
	public String viewAdminLoginPage() {
		return "admin/admin_login";
	}

	@GetMapping("/admin/home")
	public String viewAdminHomePage() {
		return "admin/admin_home";
	}

	@GetMapping("/user/login")
	public String viewUserLoginPage() {
		return "user/user_login";
	}

	@GetMapping("/user/home")
	public String viewUserHomePage() {
		return "user/user_home";
	}
}
Also, if you use Spring Boot version >= 2.7.0 or Spring Security >= 5.7.1, you need to code the UserSecurityConfig class as follows:
Note that in this approach, the two Spring Security configuration classes sharing the same authentication provider and password encoder. If you try to use admin credentials in user login page, you will get 403 error, and vice versa.
3. Implement Multiple Login Pages with Different Authentication Providers
In this scenario, we’re going to implement the admin login page and customer login page - with each using its own authentication source. That means admin authentication uses credentials from users table and customer authentication uses credentials from customers table.Firstly, update the Userentity class (remove Role enum) as follows:
package net.codejava.admin;

import javax.persistence.*;

@Entity
@Table(name = "users")
public class User {
	@Id @GeneratedValue(strategy = GenerationType.IDENTITY)
	private Integer id;

	@Column(nullable = false, unique = true, length = 40)
	private String email;

	@Column(nullable = false, length = 10)
	private String password;

	public User() {}

	public User(String email, String password) {
		this.email = email;
		this.password = password;
	}

	// getters and setters are not shown for brevity
}
Then update the getAuthorities()method of the CustomUserDetails class:
@Override
public Collection<? extends GrantedAuthority> getAuthorities() {
	return null;
}
Code of the CustomUserDetailsService class remains unchanged.And add the Customer entity class that represents a customer user:
And create the CustomerRepositoryinterface as follows:
package net.codejava.customer;

import org.springframework.data.repository.CrudRepository;
import org.springframework.stereotype.Repository;

@Repository
public interface CustomerRepository extends CrudRepository<Customer, Integer> {
	public Customer findByEmail(String email);
}
And for sample database, code the DatabaseLoader class as shown below:
package net.codejava;

import java.util.List;

import org.springframework.boot.CommandLineRunner;
import org.springframework.context.annotation.*;

import net.codejava.admin.*;
import net.codejava.customer.*;

@Configuration
public class DatabaseLoader {

	private UserRepository userRepo;
	private CustomerRepository customerRepo;

	public DatabaseLoader(UserRepository userRepo, CustomerRepository customerRepo) {
		this.userRepo = userRepo;
		this.customerRepo = customerRepo;
	}

	@Bean
	public CommandLineRunner initializeDatabase() {
		return args -> {
			User user1 = new User("david@gmail.com", "david123");
			User user2 = new User("john@yahoo.com", "john2020");

			userRepo.saveAll(List.of(user1, user2));

			Customer customer1 = new Customer("alex@gmail.com", "alex123", "Alex Stevenson");
			Customer customer2 = new Customer("peter@mail.ru", "peter246", "Peter Senkovski");

			customerRepo.saveAll(List.of(customer1, customer2));

			System.out.println("Database initialized");
		};
	}
}
You see, this code persists two admin users and two customers with plain text passwords.
Implement Login Page for Admin Users
To implement authentication for admin module, code the AdminSecurityConfig class as follows (for Spring Boot version >= 2.7.0 or Spring Security >= 5.7.1):
Note that code of the HTML pages remains the same as shown in the previous section.In case you use Spring Boot version < 2.7.0 or Spring Security < 5.7.1, use the following code for the security configuration class:
As you can see, we define an authentication provider in order to have a separate authentication source for admin login.
Implement Login Page for Customers
Similar to admin module, code the CustomerUserDetails class as below:
package net.codejava.customer;

import java.util.Collection;

import org.springframework.security.core.GrantedAuthority;
import org.springframework.security.core.userdetails.UserDetails;

public class CustomerUserDetails implements UserDetails {
	private Customer customer;

	public CustomerUserDetails(Customer customer) {
		this.customer = customer;
	}

	@Override
	public Collection<? extends GrantedAuthority> getAuthorities() {
		return null;
	}

	@Override
	public String getPassword() {
		return customer.getPassword();
	}

	@Override
	public String getUsername() {
		return customer.getEmail();
	}

	@Override
	public boolean isAccountNonExpired() {
		return true;
	}

	@Override
	public boolean isAccountNonLocked() {
		return true;
	}

	@Override
	public boolean isCredentialsNonExpired() {
		return true;
	}

	@Override
	public boolean isEnabled() {
		return true;
	}

}
And code of the CustomerUserDetailsService class:
package net.codejava.customer;

import org.springframework.beans.factory.annotation.Autowired;
import org.springframework.security.core.userdetails.*;

public class CustomerUserDetailsService implements UserDetailsService {

	@Autowired private CustomerRepository repo;

	@Override
	public UserDetails loadUserByUsername(String email) throws UsernameNotFoundException {
		Customer customer = repo.findByEmail(email);
		if (customer == null) {
			throw new UsernameNotFoundException("No customer found with the given email.");
		}

		return new CustomerUserDetails(customer);
	}

}
And below is code of the security configuration class for customer authentication module, applied for Spring Boot version >= 2.70 or Spring Security >= 5.7.1:
package net.codejava.customer;

import org.springframework.context.annotation.*;
import org.springframework.core.annotation.Order;
import org.springframework.security.authentication.dao.DaoAuthenticationProvider;
import org.springframework.security.config.annotation.web.builders.HttpSecurity;
import org.springframework.security.core.userdetails.UserDetailsService;
import org.springframework.security.crypto.password.*;
import org.springframework.security.web.SecurityFilterChain;

@Configuration
@Order(2)
public class CustomerSecurityConfig {

	@Bean
	public UserDetailsService customerUserDetailsService() {
		return new CustomerUserDetailsService();
	}

	@Bean
	public PasswordEncoder passwordEncoder2() {
		return NoOpPasswordEncoder.getInstance();
	}

	@Bean
	public DaoAuthenticationProvider authenticationProvider2() {
		DaoAuthenticationProvider authProvider = new DaoAuthenticationProvider();
		authProvider.setUserDetailsService(customerUserDetailsService());
		authProvider.setPasswordEncoder(passwordEncoder2());

		return authProvider;
	}

	@Bean
	public SecurityFilterChain filterChain2(HttpSecurity http) throws Exception {
		http.authenticationProvider(authenticationProvider2());

		http.antMatcher("/customer/**")
			.authorizeRequests().anyRequest().authenticated()
			.and()
			.formLogin()
				.loginPage("/customer/login")
				.usernameParameter("email")
				.loginProcessingUrl("/customer/login")
				.defaultSuccessUrl("/customer/home")
				.permitAll()
			.and()
				.logout()
					.logoutUrl("/customer/logout")
					.logoutSuccessUrl("/");

		return http.build();
	}
}
In case you use Spring Boot version < 2.70 or Spring Security version < 5.7.1, use the following code for the CustomerSecurityConfigclass:
package net.codejava.customer;

import org.springframework.context.annotation.*;
import org.springframework.core.annotation.Order;
import org.springframework.security.authentication.dao.DaoAuthenticationProvider;
import org.springframework.security.config.annotation.web.builders.HttpSecurity;
import org.springframework.security.config.annotation.web.configuration.WebSecurityConfigurerAdapter;
import org.springframework.security.core.userdetails.UserDetailsService;
import org.springframework.security.crypto.password.*;

@Configuration
@Order(2)
public class CustomerSecurityConfig extends WebSecurityConfigurerAdapter {

	@Bean
	public UserDetailsService customerUserDetailsService() {
		return new CustomerUserDetailsService();
	}

	@Bean
	public PasswordEncoder passwordEncoder2() {
		return NoOpPasswordEncoder.getInstance();
	}

	@Bean
	public DaoAuthenticationProvider authenticationProvider2() {
		DaoAuthenticationProvider authProvider = new DaoAuthenticationProvider();
		authProvider.setUserDetailsService(customerUserDetailsService());
		authProvider.setPasswordEncoder(passwordEncoder2());

		return authProvider;
	}

	@Override
	public void configure(HttpSecurity http) throws Exception {
		http.authenticationProvider(authenticationProvider2());

		http.antMatcher("/customer/**")
			.authorizeRequests().anyRequest().authenticated()
			.and()
				.formLogin()
					.loginPage("/customer/login")
					.usernameParameter("email")
					.loginProcessingUrl("/customer/login")
					.defaultSuccessUrl("/customer/home")
				.permitAll()
			.and()
				.logout()
					.logoutUrl("/customer/logout")
					.logoutSuccessUrl("/");
	}
}
As you can see, we define different UserDetailsService, PasswordEncoder and AuthenticationProvider in order to use a separate authentication source for customer login module.And the code of the view pages and controller class are similar to the previous code.That’s some code examples show you how to implement multiple login pages with Spring Security, covered two scenarios: admin users and regular users sharing the same authentication provider; and admin users and customer users using different authentication sources. I hope you found this article helpful. Thanks for reading.PS: to see the coding in action, I recommend you watch the following video:
Nam Ha Minh is certified Java programmer (SCJP and SCWCD). He began programming with Java back in the days of Java 1.4 and has been passionate about it ever since. You can connect with him on Facebook and watch his Java videos on YouTube.
hello. I found the article written on YouTube and blog helpful. We want to log in multiple login pages using JWT method. Spring Security JWT Authentication Tutorial (codejava.net/.../...), Spring Security Multiple Login Pages Examples (www.codejava.net/.../multiple-login-pages-examples) I read the post, but I'm not sure. Thanks for suggesting a solution
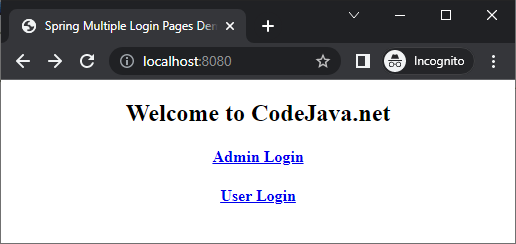 And below is code of the home page (src/main/resources/templates/index.html):
 If you enter the correct credentials (see the DatabaseLoader class) of an admin user, you will see the admin home page:
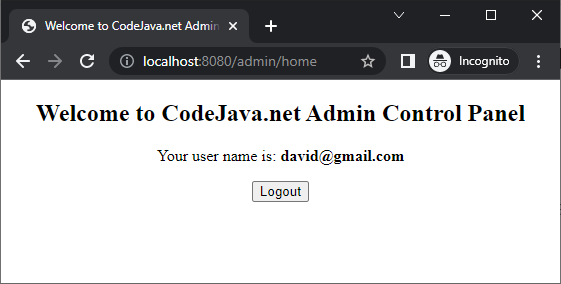 And click Logout button to sign out. Code of the admin home page (templates/admin/admin_home.html) is as below:
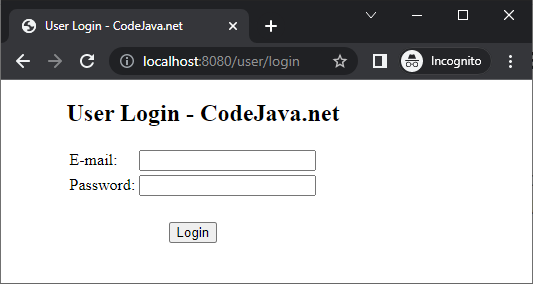 If you enter the correct credentials of a regular user, you will see the user home page appears:
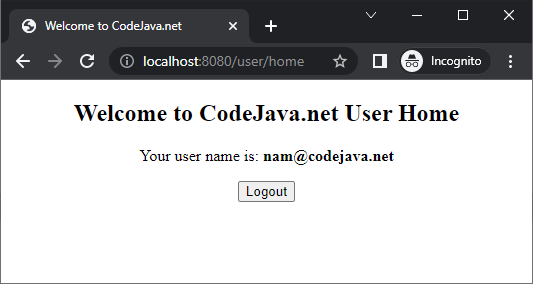 For your reference, below is code of the user home page (templates/user/user_home.html):
 Nam Ha Minh is certified Java programmer (SCJP and SCWCD). He began programming with Java back in the days of Java 1.4 and has been passionate about it ever since. You can connect with him on Facebook and watch his Java videos on YouTube.
Comments
I cannot download the attached program source code, can you send the source code to my email address. Thanks for your understanding
I found the article written on YouTube and blog helpful.
We want to log in multiple login pages using JWT method.
Spring Security JWT Authentication Tutorial
(codejava.net/.../...),
Spring Security Multiple Login Pages Examples
(www.codejava.net/.../multiple-login-pages-examples)
I read the post, but I'm not sure.
Thanks for suggesting a solution