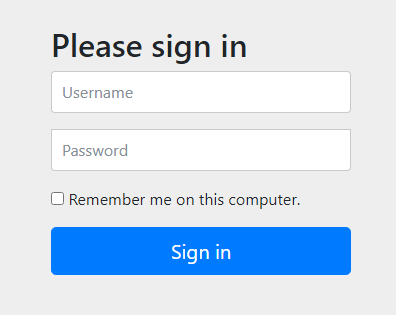
In this article, I would like to share with you how to code a custom login page in a Spring Boot application with Thymeleaf as the default template engine, HTML 5 for built-in support for field validation, and Bootstrap 4 for responsive user interface.When Spring Security API is present in the classpath, it will generate the default login page that looks as follows:This default login is suitable only for quick test, and in practice we almost need to have a custom login page that matches the application’s UI and requires other customizations. The code example below will create a custom login page that looks like the following:In this custom login page, we have a logo, a headline text, two fields email and password, a checkbox Remember me and a button Login.
1. Configure Custom Login Page in Spring Security Configuration Class
First, you need to specify URL of the custom login page in the Spring Security configuration class as follows:
As you can see, the login page URL is /login, so you need to have a handler method for this URL in a Spring MVC controller. For example:
@Controller
public class CommonController {

	...

	@GetMapping("/login")
	public String viewLoginPage() {
		// custom logic before showing login page...

		return "login";
	}
}
As you can see, the handler method returns the logical view name login which will be resolved to the login.html file by Thymeleaf template engine.If you don’t have any custom logic that needs to be performed before showing the login page, you can simply specify the view name resolution in a Spring MVC configuration class as shown in the code snippet below:
@Configuration
public class MvcConfig implements WebMvcConfigurer {

	@Override
	public void addViewControllers(ViewControllerRegistry registry) {
		registry.addViewController("/login").setViewName("login");
	}
}
You can also note that we use different name for the username field in the custom login form, e.g. email:
Check this article for more customizations of the form login. This article focuses on the code of the custom login page only.
2. Code Custom Login Page with Thymeleaf, HTML and Bootstrap
For your reference, below is the full code of the custom login page – login.html under src/main/resources/templates directory (all the CSS classes are from Bootstrap):
For the input fields, we use field type email and password so the browser will validate the email automatically. And use the attribute required for both email and password so the browser will check fields not empty:
So with HTML 5, you don’t have to write a single line of Javascript code to validate the form. Very convenient!And note that, to display the original error message in case failed login, you should print message of the SPRING_SECURITY_LAST_EXCEPTION object from the session like this:
That’s code example of a Spring Security custom login page with Thymeleaf, HTML 5 and Bootstrap. To see the coding in action, you can watch the following video:
Nam Ha Minh is certified Java programmer (SCJP and SCWCD). He began programming with Java back in the days of Java 1.4 and has been passionate about it ever since. You can connect with him on Facebook and watch his Java videos on YouTube.
 This default login is suitable only for quick test, and in practice we almost need to have a custom login page that matches the application’s UI and requires other customizations. The code example below will create a custom login page that looks like the following:
 In this custom login page, we have a logo, a headline text, two fields email and password, a checkbox Remember me and a button Login.
  Nam Ha Minh is certified Java programmer (SCJP and SCWCD). He began programming with Java back in the days of Java 1.4 and has been passionate about it ever since. You can connect with him on Facebook and watch his Java videos on YouTube.
Comments
You need to have the Spring boot starter security dependency present in the project's classpath.