Spring Boot CRUD Web Application with JDBC - Thymeleaf - Oracle
- Details
- Written by Nam Ha Minh
- Last Updated on 24 February 2020 | Print Email
- Spring JDBC to access a relational database (Oracle), via JdbcTemplate. We can use Spring JDBC for simple CRUD operations on a single table, instead of Hibernate. You will see how Spring simplifies programming with JDBC.
- Spring MVC for the controller layer, as the standard for a Spring web application.
- Thymeleaf for the view layer instead of classic JSP, as Thymeleaf is more modern, simpler and easier to use than JSP and JSTL.
 This application allows the user to manage daily sales for grocery.Table of content:
1. Create Oracle Database
2. Create Spring Boot Project in Eclipse
3. Specify Database Connection Properties
4. Code Domain Model Class
5. Code DAO Class
6. Code Spring MVC Controller Class
7. Code Spring Boot Application Main Class
8. Implement List Sales Feature
9. Implement Create Sale Feature
10. Implement Edit/Update Sale Feature
11. Implement Delete Sale Feature
12. Package and Run our Spring Boot Web Application
1. Create Oracle Database
Our Spring Boot web application will manage data in a table with the following structure:
CREATE TABLE "SALES" (
	"ID" NUMBER NOT NULL ENABLE,
	"ITEM" VARCHAR2(50 BYTE) NOT NULL ENABLE,
	"QUANTITY" NUMBER(*,0) NOT NULL ENABLE,
	"AMOUNT" FLOAT(126) NOT NULL ENABLE,
	CONSTRAINT "SALES_PK" PRIMARY KEY ("ID")
)
Since Oracle doesn’t support auto-increment attribute for a primary key, we need to create a sequence and a trigger so values for the ID column can be automatically generated.Run this statement to create a sequence:CREATE SEQUENCE "SALE_SEQUENCE" MINVALUE 1 MAXVALUE 100000 INCREMENT BY 1 START WITH 1;And execute the following Oracle SQL script to create a trigger:
CREATE TRIGGER "SYSTEM"."SALE_PRIMARY_KEY_TRG"
   before insert on "SYSTEM"."SALESABC"
   for each row
begin
   if inserting then
      if :NEW."ID" is null then
         select SALE_SEQUENCE_ABC.nextval into :NEW."ID" from dual;
      end if;
   end if;
end;
You can use Oracle SQL Developer to create sequence and trigger more easily. 2. Create Spring Boot Project in Eclipse
Create a new Maven project with the name SalesManager, and make sure that the pom.xml file has the following content:<project ...> <modelVersion>4.0.0</modelVersion> <groupId>net.codejava</groupId> <artifactId>SalesManager</artifactId> <version>0.0.1-SNAPSHOT</version> <properties> <java.version>1.8</java.version> </properties> <parent> <groupId>org.springframework.boot</groupId> <artifactId>spring-boot-starter-parent</artifactId> <version>2.1.8.RELEASE</version> </parent> <dependencies> <dependency> <groupId>org.springframework.boot</groupId> <artifactId>spring-boot-starter-jdbc</artifactId> </dependency> <dependency> <groupId>org.springframework.boot</groupId> <artifactId>spring-boot-starter-web</artifactId> </dependency> <dependency> <groupId>org.springframework.boot</groupId> <artifactId>spring-boot-starter-thymeleaf</artifactId> </dependency> <dependency> <groupId>com.oracle</groupId> <artifactId>ojdbc8</artifactId> <version>1.0</version> <scope>system</scope> <systemPath>C:/Path/To/Oracle/ojdbc8-full/ojdbc8.jar</systemPath> </dependency> </dependencies> <build> <plugins> <plugin> <groupId>org.springframework.boot</groupId> <artifactId>spring-boot-maven-plugin</artifactId> </plugin> </plugins> </build> </project>As you can see, we use Spring Boot version 2.1.8 with support for Spring JDBC (spring-boot-starter-jdbc), Spring MVC (spring-boot-starter-web) and Thymeleaf (spring-boot-starter-thymeleaf).Note that to use Oracle JDBC driver, you must manually download it from Oracle’s website (you must sign in with an Oracle’s account) and put the ojdbc8.jar file somewhere on your computer, and use Maven dependency as above.
3. Specify Database Connection Properties
Next, create the application.properties under the src/main/resources directory of the project, with the following content:spring.datasource.url=jdbc:oracle:thin:@localhost:1521:dbname spring.datasource.username=user spring.datasource.password=pass logging.level.root=INFOUpdate the database name, user and password accordingly to your environment.
4. Code Domain Model Class
Create the Sale class with fields that map to the columns of the SALES table in the database:package net.codejava;
public class Sale {
private int id;
private String item;
private int quantity;
private float amount;
protected Sale() {
}
protected Sale(String item, int quantity, float amount) {
this.item = item;
this.quantity = quantity;
this.amount = amount;
}
// getters and setters go here...
}Note that the getters and setters are not shown for brevity. So you must generate them using the IDE.
5. Code DAO Class
Next, we need to code a class that uses Spring JDBC to perform CRUD operations on the SALES table. Create the SalesDAO class with the following structure:package net.codejava;
import java.util.List;
import org.springframework.beans.factory.annotation.Autowired;
import org.springframework.jdbc.core.JdbcTemplate;
import org.springframework.stereotype.Repository;
import org.springframework.transaction.annotation.Transactional;
@Repository
@Transactional
public class SalesDAO {
@Autowired
private JdbcTemplate jdbcTemplate;
public List<Sale> list() {
return null;
}
public void save(Sale sale) {
}
public Sale get(int id) {
return null;
}
public void update(Sale sale) {
}
public void delete(int id) {
}
}The key point here is, we specify that an instance of JdbcTemplate class will be automatically created and injected by Spring:@Autowired private JdbcTemplate jdbcTemplate;Then it will be used in the class methods to perform CRUD operations. Gradually we will implement all those methods.Also note that this DAO class is annotated with the @Transactional annotation so Spring framework will automatically inject code to execute its methods within JDBC transactions.
6. Code Spring MVC Controller Class
As we are developing a Spring Boot web application, we need to have a controller class to handle requests from the clients. Create the AppController class with the following initial code:package net.codejava;
import org.springframework.stereotype.Controller;
@Controller
public class AppController {
@Autowired
private SalesDAO dao;
// handler methods go here...
}The key point here is an instance of the SalesDAO class will be created and injected automatically by Spring. Then in the handler methods we will invoke its CRUD methods. 7. Code Spring Boot Application Main Class
Next, we need to code the main class to run our Spring Boot web application. Create the SalesManager class as follows:package net.codejava;
import org.springframework.boot.SpringApplication;
import org.springframework.boot.autoconfigure.SpringBootApplication;
@SpringBootApplication
public class SalesManager {
public static void main(String[] args) {
SpringApplication.run(SalesManager.class, args);
}
}This program will start the embedded Tomcat server that hosts our Spring Boot web application.Next, let’s see how to implement each CRUD functions in detailed.
8. Implement List Sales Feature
The feature lists all the items sold in the home page. So write code for the list() method of the SalesDAO class as follows:public List<Sale> list() {
String sql = "SELECT * FROM SALES";
List<Sale> listSale = jdbcTemplate.query(sql,
BeanPropertyRowMapper.newInstance(Sale.class));
return listSale;
}The cool thing here is the BeanPropertyRowMapper does the mapping values from JDBC ResultSet to Java objects. You need to make sure the name of the fields in the Sale class are same as the names of the columns in the table.Then code a handler method in the AppController class as follows:@RequestMapping("/")
public String viewHomePage(Model model) {
List<Sale> listSale = dao.list();
model.addAttribute("listSale", listSale);
return "index";
}And now we write the first Thymeleaf view file. Create the templates folder under src/main/resources. Create the index.html file under templates with the following code:<!DOCTYPE html>
<html xmlns="http://www.w3.org/1999/xhtml"
xmlns:th="http://www.thymeleaf.org">
<head>
<meta charset="utf-8"/>
<title>Sales Manager Application</title>
</head>
<body>
<div align="center">
<h1>Sales Records</h1>
<a href="/new">Enter New Sale</a>
<br/><br/>
<table border="1" cellpadding="10">
<thead>
<tr>
<th>ID</th>
<th>Item Name</th>
<th>Quantity</th>
<th>Amount</th>
<th>Actions</th>
</tr>
</thead>
<tbody>
<tr th:each="sale : ${listSale}">
<td th:text="${sale.id}">ID</td>
<td th:text="${sale.item}">Item Name</td>
<td th:text="${sale.quantity}">Quantity</td>
<td th:text="${sale.amount}">Amount</td>
<td>
<a th:href="/@{'/edit/' + ${sale.id}}">Edit</a>
<a th:href="/@{'/delete/' + ${sale.id}}">Delete</a>
</td>
</tr>
</tbody>
</table>
</div>
</body>
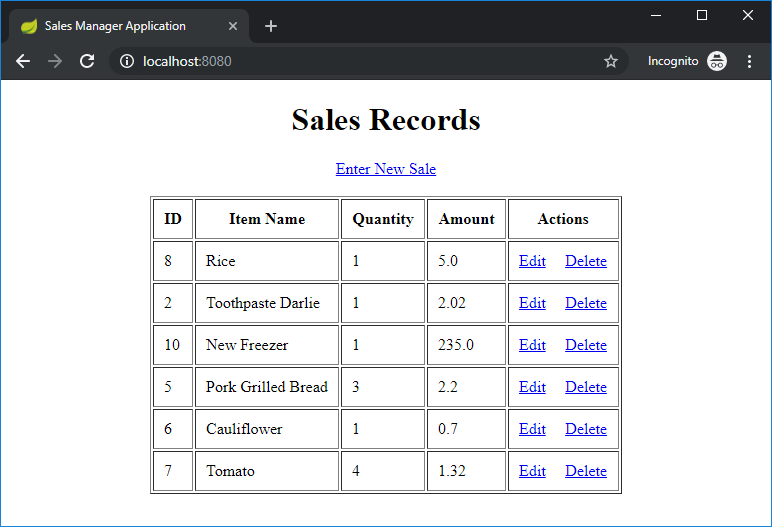
</html>Now we can run our Spring Boot application to test. Run the SalesManager class, and you will see Spring Boot logo appears in the console with some logging information.Open a web browser and type the URL http://localhost:8080, you will see an empty list like this: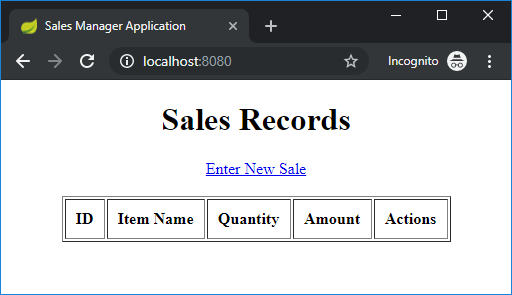 It’s because there’s no data in the SALES table. Use Oracle SQL Developer tool to insert a row and refresh the webpage, you will see the result:
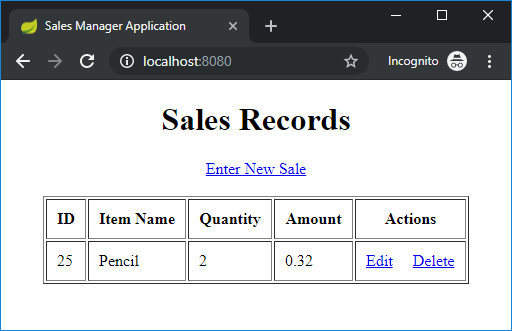 Voila, it works perfectly.
9. Implement Create Sale Feature
This feature allows the user to enter details of an item sold. Add another handler method in the controller class as below:@RequestMapping("/new")
public String showNewForm(Model model) {
Sale sale = new Sale();
model.addAttribute("sale", sale);
return "new_form";
}This will handle the click event of the Enter New Sale hyperlink in the home page. For the view, create the new_form.html file in the templates folder with the following code:<!DOCTYPE html>
<html xmlns="http://www.w3.org/1999/xhtml"
xmlns:th="http://www.thymeleaf.org">
<head>
<meta charset="utf-8" />
<title>New Sale</title>
</head>
<body>
<div align="center">
<h1>Enter New Sale</h1>
<br />
<form action="#" th:action="@{/save}" th:object="${sale}"
method="post">
<table border="0" cellpadding="10">
<tr>
<td>Item Name:</td>
<td><input type="text" th:field="*{item}" /></td>
</tr>
<tr>
<td>Quantity:</td>
<td><input type="text" th:field="*{quantity}" /></td>
</tr>
<tr>
<td>Amount (USD):</td>
<td><input type="text" th:field="*{amount}" /></td>
</tr>
<tr>
<td colspan="2"><button type="submit">Save</button> </td>
</tr>
</table>
</form>
</div>
</body>Now terminate the SalesManager program and run it again to test. Click Enter New Sale, and you will see the new form: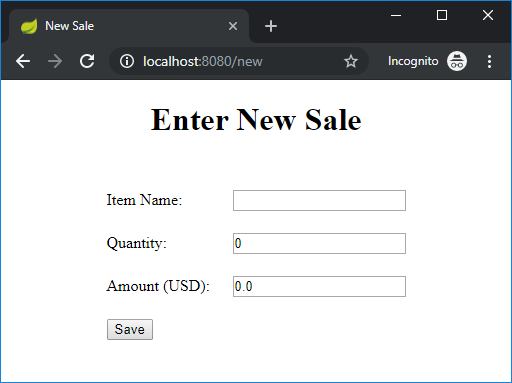 Next, let’s write code to handle the click of the Save button on this form. Implement the save() method in the SalesDAO class as follows:
public void save(Sale sale) {
	SimpleJdbcInsert insertActor = new SimpleJdbcInsert(jdbcTemplate);
	insertActor.withTableName("sales").usingColumns("item", "quantity", "amount");
	BeanPropertySqlParameterSource param = new BeanPropertySqlParameterSource(sale);

	insertActor.execute(param);
}
Here, we use the SimpleJdbcInsert class so we don’t have to write lengthy SQL Insert statement. Read this tutorial to learn more about SimpleJdbcInsert.And code for the hander method in the controller class as follows:@RequestMapping(value = "/save", method = RequestMethod.POST)
public String save(@ModelAttribute("sale") Sale sale) {
dao.save(sale);
return "redirect:/";
}Now, you can stop/start the application again to test the create new sale feature. 10. Implement Edit/Update Sale Feature
This feature allows the user to edit and update a sale item. Notice there’s a hyperlink Edit next to each item in the list. Add this handler method in the controller class:@RequestMapping("/edit/{id}")
public ModelAndView showEditForm(@PathVariable(name = "id") int id) {
ModelAndView mav = new ModelAndView("edit_form");
Sale sale = dao.get(id);
mav.addObject("sale", sale);
return mav;
}Implement the get() method in the SalesDAO class as follows:public Sale get(int id) {
String sql = "SELECT * FROM SALES WHERE id = ?";
Object[] args = {id};
Sale sale = jdbcTemplate.queryForObject(sql, args,
BeanPropertyRowMapper.newInstance(Sale.class));
return sale;
}Code the edit_form.html as follows:<!DOCTYPE html>
<html xmlns="http://www.w3.org/1999/xhtml"
xmlns:th="http://www.thymeleaf.org">
<head>
<meta charset="utf-8" />
<title>Edit Sale</title>
</head>
<body>
<div align="center">
<h1>Edit Sale</h1>
<br />
<form action="#" th:action="@{/update}" th:object="${sale}"
method="post">
<table border="0" cellpadding="10">
<tr>
<td>ID:</td>
<td><input type="text" th:field="*{id}" readonly="readonly" /></td>
</tr>
<tr>
<td>Item Name:</td>
<td><input type="text" th:field="*{item}" /></td>
</tr>
<tr>
<td>Quantity:</td>
<td><input type="text" th:field="*{quantity}" /></td>
</tr>
<tr>
<td>Amount (USD):</td>
<td><input type="text" th:field="*{amount}" /></td>
</tr>
<tr>
<td colspan="2"><button type="submit">Save</button> </td>
</tr>
</table>
</form>
</div>
</body>The edit form appears like this: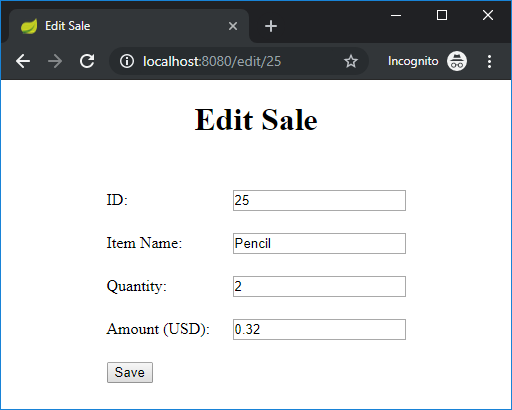 Code the following method in the controller class to handle the submission of the edit form:
@RequestMapping(value = "/update", method = RequestMethod.POST)
public String update(@ModelAttribute("sale") Sale sale) {
    dao.update(sale);

    return "redirect:/";
}
And code the update() method in the SalesDAO class as follows:public void update(Sale sale) {
String sql = "UPDATE SALES SET item=:item, quantity=:quantity, amount=:amount WHERE id=:id";
BeanPropertySqlParameterSource param = new BeanPropertySqlParameterSource(sale);
NamedParameterJdbcTemplate template = new NamedParameterJdbcTemplate(jdbcTemplate);
template.update(sql, param);
}Now you can test the edit/update feature.
11. Implement Delete Sale Feature
Code the delete() method of the SalesDAO class like this:public void delete(int id) {
String sql = "DELETE FROM SALES WHERE id = ?";
jdbcTemplate.update(sql, id);
}Notice in the homepage, there’s a Delete hyperlink next to each item. Add the handler method in the controller class as follows:@RequestMapping("/delete/{id}")
public String delete(@PathVariable(name = "id") int id) {
dao.delete(id);
return "redirect:/";
}Now you can test the delete sale feature.
12. Package and Run our Spring Boot Web Application
Since we use Oracle JDBC driver as system scope, we need to update the build section in the pom.xml file like this:<build> <plugins> <plugin> <groupId>org.springframework.boot</groupId> <artifactId>spring-boot-maven-plugin</artifactId> <configuration> <includeSystemScope>true</includeSystemScope> </configuration> </plugin> </plugins> </build>This tells Maven to include system JAR in the build.To package our Spring Boot web application as an executable JAR file, you can run mvn package command at command line prompt, or in Eclipse: right click on the project, click to Run As > Maven build… and enter package as the goal.Then you will see the SalesManager-0.0.1-SNAPSHOT.jar file under the project’s target directory. You can double click the JAR file to run, or type the following command from command prompt:
java -jar SalesManager-0.0.1-SNAPSHOT.jarFor your reference, here’s the screenshot of the project’s structure in Eclipse:
 That’s how to develop a Spring Boot web application that accesses Oracle database using Spring JDBC, Spring MVC and Thymeleaf. You can download the sample project in the attachment section below.You can also watch the video tutorial below: Check the following tutorials to learn more about using JDBC with Spring:
- Spring JDBC Template Simple Example
- Spring NamedParameterJdbcTemplate Examples
- Spring SimpleJdbcInsert Examples
Other Spring Boot Tutorials:
- How to use JDBC with Spring Boot
- Spring Boot Hello World Example
- Spring Boot automatic restart using Spring Boot DevTools
- Spring Boot Form Handling Tutorial with Spring Form Tags and JSP
- How to create a Spring Boot Web Application (Spring MVC with JSP/ThymeLeaf)
- Spring Boot - Spring Data JPA - MySQL Example
- Spring Boot CRUD Example with Spring MVC – Spring Data JPA – ThymeLeaf - Hibernate - MySQL
- Spring Boot Hello World RESTful Web Services Tutorial
- Spring Boot RESTful CRUD API Examples with MySQL database
- How to package Spring Boot application to JAR and WAR
About the Author:
 Nam Ha Minh is certified Java programmer (SCJP and SCWCD). He started programming with Java in the time of Java 1.4 and has been falling in love with Java since then. Make friend with him on Facebook and watch his Java videos you YouTube.
| [Spring Boot JDBC project] | 22 kB |