How to package Spring Boot application to JAR and WAR
- Details
- Written by Nam Ha Minh
- Last Updated on 24 February 2020 | Print Email
1. Package Spring Boot application to JAR file
The default packaging type of a Spring Boot project is jar if the <packaging> attribute is not present in the pom.xml file. It’s better to check your project’s pom.xml file to make sure that the packaging type is jar:<project ...> ... <packaging>jar</packaging> ... </project>If you use command line, change the current directory to your project’s directory, then type the following command to package your Spring Boot application to a JAR file:
mvn package
Notice that, to use Maven’s commands outside an IDE, you need to have Maven installed on your computer and the PATH environment variable includes an entry to Maven’s bin directory. The mvn package command will compile the project and package it to a JAR file which is created in the project’s target directory.To run your Spring Boot application from the generated JAR file in command line, change the current directory to target, and type:java –jar YourProjectName-version.jar
And to terminate the application, press Ctrl + C in the command line window.If you use an IDE such as Eclipse or Spring Tool Suite, right-click on the project, then select Run As > Maven build…: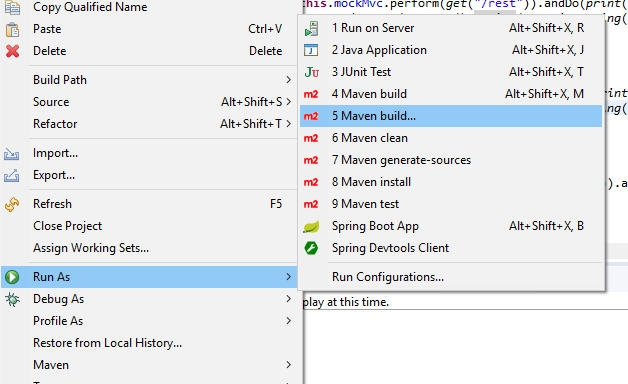 Then specify the goal package in the Edit Configuration dialog:
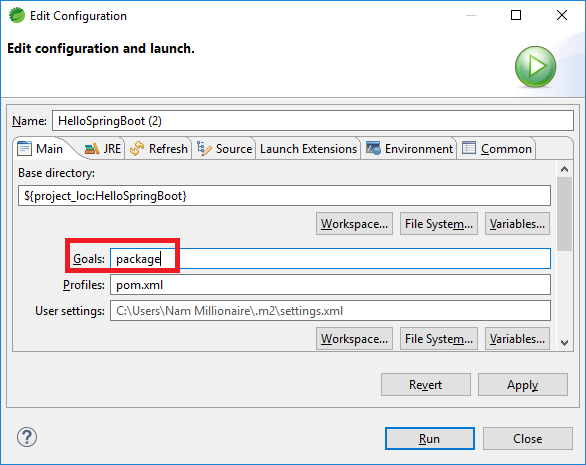 And then click Run button to package the project.You can run your Spring Boot application by double-clicking the generated JAR file. Notice that running a Spring Boot application this way, nothing displays on the screen because it is a background process. So you need to find and kill the right javaw process to terminate the running Spring Boot application.Watch this video understand how to package your Spring Boot project to JAR file visually:
 2. Package Spring Boot application to WAR file
To package a Spring Boot project to a deployable WAR file, you must do the following 2 steps first:- Specify packaging type is war in the pom.xml file:<project ...> ... <packaging>war</packaging> ... </project>- Make the Spring Boot main class to extend the SpringBootServletInitializer class, for example:
@SpringBootApplication
public class HelloSpringBootApplication extends SpringBootServletInitializer {

	public static void main(String[] args) {
		SpringApplication.run(HelloSpringBootApplication.class, args);
	}

}
Then you can package the project using the mvn package command in the command line, or Run As > Maven build… > package in Eclipse/Spring Tool Suite IDE – same as described above.The WAR file is generated in the project’s target directory, and you can copy it to Tomcat’s webapps directory for deployment. Watch this video to see the steps visually: Other Spring Boot Tutorials:
- Spring Boot Hello World Example
- Spring Boot automatic restart using Spring Boot DevTools
- Spring Boot Form Handling Tutorial with Spring Form Tags and JSP
- Spring Boot Hello World RESTful Web Services Tutorial
- How to create a Spring Boot Web Application (Spring MVC with JSP/ThymeLeaf)
- Spring Boot - Spring Data JPA - MySQL Example
- Spring Boot CRUD Example with Spring MVC – Spring Data JPA – ThymeLeaf - Hibernate - MySQL
- How to use JDBC with Spring Boot
- Spring Boot CRUD Web Application with JDBC - Thymeleaf - Oracle
- Spring Boot RESTful CRUD API Examples with MySQL database
About the Author:
 Nam Ha Minh is certified Java programmer (SCJP and SCWCD). He began programming with Java back in the days of Java 1.4 and has been passionate about it ever since. You can connect with him on Facebook and watch his Java videos on YouTube.
Comments
merci infiniment.
Good Job..! Thanks