Spring Boot Error Handling Guide
- Details
- Written by Nam Ha Minh
- Last Updated on 24 March 2022 | Print Email
1. Default Whitelabel Error Page
By default, Spring Boot will display the Whitelabel error page when an error occurred. For example, when a page could not be found (HTTP 404 error):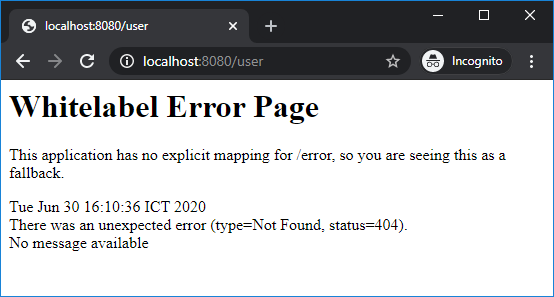 Or when an exception is thrown by Java Virtual Machine, causing HTTP 500 Internal server error – the white label error page gets displayed with the exception stack trace:
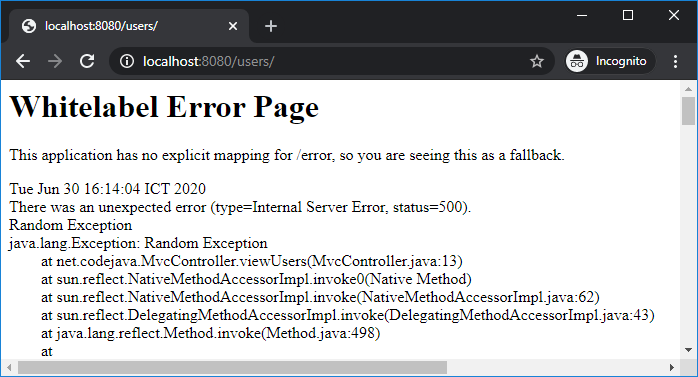 This kind of error page is certainly not friendly to the end users, and Spring Boot prints this statement:
This application has no explicit mapping for /error, so you are seeing this as a fallback.
That means programmers should handle mapping for /error URL and provide custom, user-friendly error pages.Spring Boot allows programmers to disable the white label error page by setting the following property in the application.properties file:server.error.whitelabel.enabled=false
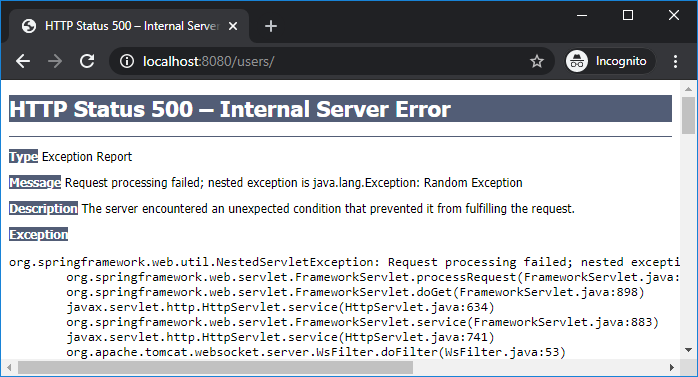 Anyway, we should provide custom error pages instead of the default ones which are very technical to the end users.
 2. Use Custom Error Pages
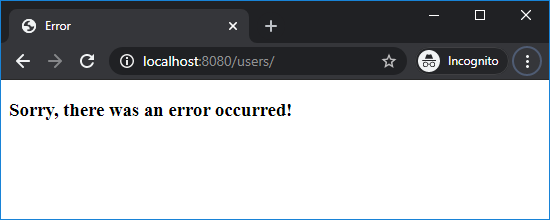
Spring Boot makes it easy to override the default whitelabel error page. Just create the error.html page under the src/main/resources/templates directory. For example, with the following code:<!DOCTYPE html> <html> <head> <meta charset="ISO-8859-1"> <title>Error</title> </head> <body> <h3>Sorry, there was an error occurred!</h3> </body> </html>Then when any error occurred, this custom error page will get displayed:
 You can also provide custom error page for a specific HTTP status code (403, 404, 500, etc) – just by creating the 403.html (Forbidden error), 404.html (Page not found error), 500.html (Internal server error)… files under the templates/error directory (you must create error directory):
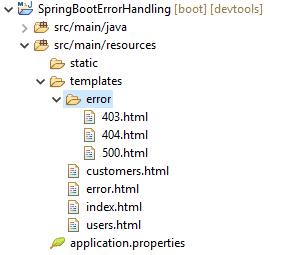 That’s it – very simple! Thanks to Spring Boot’s default configurations do all the details behind the scene.
 3. Implement Custom Error Controller
In case you want to perform some tasks before the custom error pages get displayed, you can code a controller class implementing the ErrorController interface like this:package net.codejava;
import javax.servlet.RequestDispatcher;
import javax.servlet.http.HttpServletRequest;
import org.springframework.boot.web.servlet.error.ErrorController;
import org.springframework.http.HttpStatus;
import org.springframework.stereotype.Controller;
import org.springframework.web.bind.annotation.GetMapping;
@Controller
public class CustomErrorController implements ErrorController {
@GetMapping("/error")
public String handleError(HttpServletRequest request) {
String errorPage = "error"; // default
Object status = request.getAttribute(RequestDispatcher.ERROR_STATUS_CODE);
if (status != null) {
Integer statusCode = Integer.valueOf(status.toString());
if (statusCode == HttpStatus.NOT_FOUND.value()) {
// handle HTTP 404 Not Found error
errorPage = "error/404";
} else if (statusCode == HttpStatus.FORBIDDEN.value()) {
// handle HTTP 403 Forbidden error
errorPage = "error/403";
} else if (statusCode == HttpStatus.INTERNAL_SERVER_ERROR.value()) {
// handle HTTP 500 Internal Server error
errorPage = "error/500";
}
}
return errorPage;
}
@Override
public String getErrorPath() {
return "/error";
}
}Here, the getErrorPath() method returns a URL to which will be forwarded when an error occurs. And this error path is handled by the handler method right in this class. I showed you the code that returns the corresponding error page name based on HTTP status code, and you can add code to perform the logics you want to execute before the error pages get displayed.Note that all exceptions are logged by Spring Boot by default, so you don’t have to log the errors again here in this custom controller class.In case you want to handle specific exception classes rather than HTTP error code, follow this article: Spring Boot Controller-Based Exception Handler Examples Conclusion
So far you have learned how to provide custom error pages in a Spring Boot application, and how to intercept the requests before those error pages get displayed. Again, Spring Boot makes error handling simple, easy and convenient. For reference, you can download the sample Spring Boot project attached below, and watch the following video to see the code in action:Related Tutorials:
Other Spring Boot Tutorials:
- Spring Boot automatic restart using Spring Boot DevTools
- Spring Boot Form Handling Tutorial with Spring Form Tags and JSP
- How to create a Spring Boot Web Application (Spring MVC with JSP/ThymeLeaf)
- Spring Boot - Spring Data JPA - MySQL Example
- Spring Boot Hello World RESTful Web Services Tutorial
- How to use JDBC with Spring Boot
- Spring Boot CRUD Web Application with JDBC - Thymeleaf - Oracle
- Spring Boot RESTful CRUD API Examples with MySQL database
- How to package Spring Boot application to JAR and WAR
- Spring Boot Security Authentication with JPA, Hibernate and MySQL
- Spring Data JPA Paging and Sorting Examples
About the Author:
 Nam Ha Minh is certified Java programmer (SCJP and SCWCD). He began programming with Java back in the days of Java 1.4 and has been passionate about it ever since. You can connect with him on Facebook and watch his Java videos on YouTube.
| [Sample Spring Boot project] | 75 kB |
Comments