In this Spring Boot tutorial, you will learn to code a web form that captures information from user and handle form submission – read form data. We will use Spring Boot as it simplifies Java web development and Thymeleaf as it keeps HTML templates still look like HTML when mixed with code (Thymeleaf is well-integrated with Spring MVC).Visually, I will walk you through the process of developing a Spring Boot application that presents the following form to the user:You will learn to use Thymeleaf to code this form with almost all of standard HTML fields like input textbox, password field, radio button, select/dropdown list, check box and textarea – and also handle submission of this form with Spring MVC.To follow this tutorial, I recommend you to use Spring Tool Suite IDE as it is dedicated for Spring projects development.
1. Create Spring Boot project with Thymeleaf and DevTools
In Spring Tool Suite, create a new Spring Starter project with Java 1.8 and Maven. Use the default packaging type which is jar. Choose the starters web, thymeleaf and devtools. The dependencies look like this in the Maven’s build file:
As you can see, the spring-boot-starter-webdependency enables Java web application based on Spring MVC and running on embedded Tomcat server. The spring-boot-starter-thymeleafis for integration between Spring MVC and Thymeleaf template engine.And the spring-boot-devtoolsdependency enables automatic restart and live reload features so whenever you make changes to the project, Spring Boot will automatically restart the application and refresh the browser – making your development experience more convenient.
The project’s directory structure looks like this:
2. Code the Homepage
We put Thymeleaf template files under the src/main/resources/templates directory. For the homepage of the application, create the index.html file with the following code:
<!DOCTYPE html>
<html>
<head>
<meta charset="ISO-8859-1">
<title>Spring Boot Form Demo</title>
</head>
<body>
	<div align="center">
		<h1>Spring Boot Form Demo</h1>
		<a href="/register">Click here to register</a>
	</div>
</body>
</html>
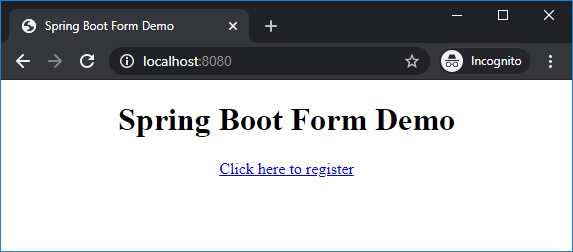
Now you can start your Spring Boot application and access the homepage in browser. It will look like this:When the user clicks on the hyperlink, we will display the registration form.
3. Code Java Model Class
To represent the information in the user registration form, create the User class with the following fields:
package net.codejava;

import java.sql.Date;

public class User {
	private String name;
	private String email;
	private String password;
	private String gender;
	private String note;
	private boolean married;
	private Date birthday;
	private String profession;

	// getters
	// setters

	// override toString()

}
This is a simple domain model class. Note that the getter and setter methods are not shown for brevity. Also you should override the toString() method to return all details of the user.
4. Code Spring MVC Controller Class
Next, create a Spring MVC controller class with the first handler method that handles the requests to show the form:
package net.codejava;

import java.util.*;

import org.springframework.stereotype.Controller;
import org.springframework.ui.Model;
import org.springframework.web.bind.annotation.*;

@Controller
public class MainController {

	@GetMapping("/register")
	public String showForm(Model model) {
		User user = new User();
		model.addAttribute("user", user);

		List<String> listProfession = Arrays.asList("Developer", "Tester", "Architect");
		model.addAttribute("listProfession", listProfession);

		return "register_form";
	}

}
As you can see, the showForm()method handles the request /register when the user clicks the hyperlink in the homepage. It creates and puts two objects to the model:- A User object to represent the information in the form.- a List of profession that will be used to display a select box/dropdown list in the form.Then it returns view name register_form which will be resolved to a Thymeleaf template file. I recommend you take this Spring Boot E-Commerce Ultimate Course in which form handling is used extensively in many modules: users, categories, brands, products, orders... You will also learn how to handle complex forms such as shopping cart, checkout page, etc.
5. Code Thymeleaf Form
Next, create the register_form.html file under src/main/resources/templates directory. To use Thymeleaf syntax, you should declare this XML namespace at the beginning of the document:
As you can see, Thymeleaf uses th:xxx attributes inside HTML tags so it doesn’t break the structure of the page – unlike JSP and JSTL. So a Thymeleaf template file still looks like HTML in browser – very convenient for both designer and programmer.In Thymeleaf, hyperlink is wrapped inside @{} and access a model object inside ${}. Note that in this form tag, the th:object attribute points to the name of the model object sent from Spring MVC controller.Then for each form field, use the following code:
The th:field attribute points to the field name of the object in the model. Field name is wrapped inside *{}.Below is the whole code of the user registration form:
Here, we use the th:each attribute to iterate over elements in a collection; th:value attribute to set value and th:text to set text for the HTML option tag.And to format the form, put the following CSS code inside the head section of the page:
When the user clicks on Register button on the form, an HTTP POST request will be sent to the relative URL /register, so we need to code the handler method in the controller class as follows:
@PostMapping("/register")
public String submitForm(@ModelAttribute("user") User user) {
	System.out.println(user);
	return "register_success";
}
You see, handling form submission with Spring MVC is very simple and easy – just use the @ModelAttribute annotation – then it will read form data and set the values to fields of the model object. So in the method we can print the user object. No need to write code to get form data.And this handler method returns a view name register_success which resolves to a Thymeleaf template file as described in the next section.
7. Code Thymeleaf Result Page
Create the register_success.html file with the following code:
In this page, we use Thymeleaf attribute th:text to set text for the HTML span element. The user object is still available in the model so we can access it. When running, it displays the details of the user – which is the information submitted by the user in the form:That’s the tutorial for form handing with Spring Boot and Thymeleaf. You can download the sample project in the attachments section below.Get code on GitHub.For form validation, read my Spring Boot Form Validation Tutorial.For visual howtos, I recommend you to watch the video version of this tutorial below:
Nam Ha Minh is certified Java programmer (SCJP and SCWCD). He began programming with Java back in the days of Java 1.4 and has been passionate about it ever since. You can connect with him on Facebook and watch his Java videos on YouTube.
Hi Nam, My parent project configured with the spring- security, so when I tried to create one thyme leaf based child project I had to override my custom UI form with the default login page but after that when I click on submit button, its not allowing me to redirect to the next page, getting either 302 or 405. could you please help me
To Lan: you can have multiple GET/POST handlers in a controller as long as the paths are different. And you can have one submit button per form. You can't have multiple submit buttons for a single form. if each form has a unique action (URL) and separate submit button, it will work.
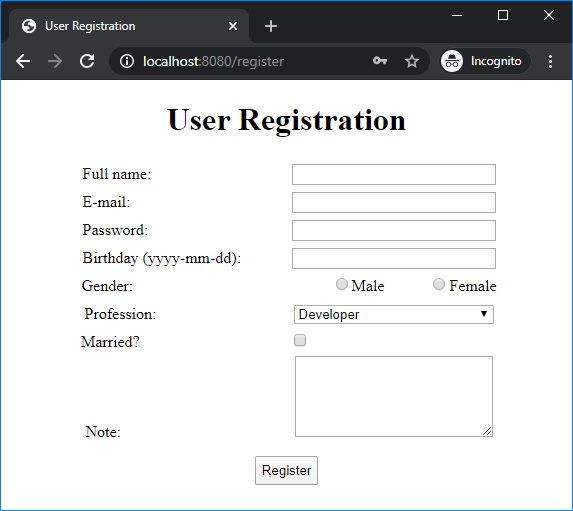 You will learn to use Thymeleaf to code this form with almost all of standard HTML fields like input textbox, password field, radio button, select/dropdown list, check box and textarea – and also handle submission of this form with Spring MVC.To follow this tutorial, I recommend you to use Spring Tool Suite IDE as it is dedicated for Spring projects development.
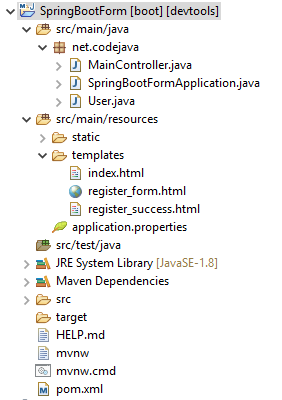
 When the user clicks on the hyperlink, we will display the registration form.
 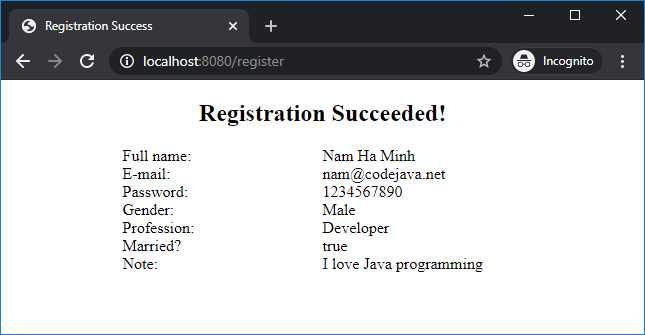 That’s the tutorial for form handing with Spring Boot and Thymeleaf. You can download the sample project in the attachments section below.Get code on GitHub.For form validation, read my Spring Boot Form Validation Tutorial.For visual howtos, I recommend you to watch the video version of this tutorial below:
  Nam Ha Minh is certified Java programmer (SCJP and SCWCD). He began programming with Java back in the days of Java 1.4 and has been passionate about it ever since. You can connect with him on Facebook and watch his Java videos on YouTube.
Comments
My parent project configured with the spring- security, so when I tried to create one thyme leaf based child project I had to override my custom UI form with the default login page but after that when I click on submit button, its not allowing me to redirect to the next page, getting either 302 or 405.
could you please help me