Through this Spring Boot tutorial, you will learn how to implement email verification for user registration, which is certainly an essential feature of any web application. You know, email verification helps preventing spam or fake users as only people with real emails are able to activate accounts after registration.Once a user submitted the signup form, a verification code is generated and sent to his email, and he must open that email and click on the verification hyperlink to activate account. Then the user will be able to login.In this tutorial, I assume that you have an existing Spring Boot web application in which the registration and login features were already implemented. If not, kindly follow this tutorial Spring Boot Registration and Login and then come back to this one.And standard technologies are used: Spring Boot Web, Spring Data JPA, Hibernate, Spring Security, Thymeleaf, Bootstrap 4, HTML 5 and MySQL database.NOTE: This tutorial is extracted from the full course Spring Boot E-Commerce Ultimate. You can take this course to Learn to Build a complete shopping website using Java, Spring Boot, Thymeleaf, Bootstrap, jQuery and MySQL database.
1. Update User Entity Class and Database Table
Update the Userentity class to ensure that it includes the 2 fields verificationCode and enabled, as shown below:
@Entity
@Table(name = "users")
public class User {

	@Column(name = "verification_code", length = 64)
	private String verificationCode;

	private boolean enabled;

	// other fields, getters and setters are not shown
}
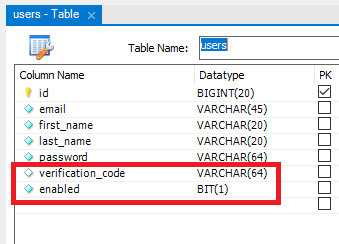
The field verificationCode stores a random, unique String which is generated in the registration process and will be used in the verification process. Once registered, the enabled status of a user is false (disabled) so the user can’t login if he has not activated account by checking email and click on the verification link embedded in the email.And make sure that the database table users having the corresponding fields verification_code and enabled, as shown below:
Instead of alter the users table manually, you can run the application with the property spring.jpa.hibernate.ddl-auto is set to update in the application.properties file. Also note the length of verification code is 64 characters.
2. Update UserDetails class
Next, you need to update your custom UserDetails class that wraps a User object, as shown below:
import org.springframework.security.core.userdetails.UserDetails;

public class CustomUserDetails implements UserDetails {

	private User user;

	public CustomUserDetails(User user) {
		this.user = user;
	}


	@Override
	public boolean isEnabled() {
		return user.isEnabled();
	}

	// other methods are not shown...

}
Here, we override the isEnabled() method that returns the user’s enabled status with value from database, so Spring Security will inject login if the user has not verified his account, i.e. the error message “User is disabled” in the login page.
3. Using JavaMail in Spring Boot
In order to send verification email, you need to declare the following dependency in the Maven project file (pom.xml), as follows:
Spring Boot Mail is a thin API wrapper around Jakarta Mail (the new name of JavaMail), which helps programming email functionality more easily.Then you need to configure some properties for a SMTP server in the Spring Boot application configuration file, as shown below:
Here I use GMail’s SMTP. If you also use GMail, you need to turn on SMTP in your Google Account settings. Of course you can use SMTP settings of your own email server.
4. Update User Registration for Sending Verification Email
Next, you need to update the code of the registration process for sending a verification link to the user’s email. Firstly, update the UserServices class to use a JavaMailSender and have register() and sendVerificationEmail() methods as shown below:
Here, you can see the verification code is generated using the RandomString class which is from the package net.bytebuddy.utility of the ByteBuddy library comes with Spring Boot (so you don’t have to import any external library for that).And code the sendVerificationEmail() method as follows:
This method will send an email to the user’s email (captured from the signup form), with the verification hyperlink includes the verification code. The value of siteURL is sent from the controller.Next, you need to update the Spring MVC controller class as follows:
The processRegister() method handles submission of the registration form (see: Spring Boot Registration and Login with MySQL Database Tutorial) and the getSiteURL() method returns the real context path of the web application, so the verification link will work when the user opens the email.Lastly, update the registration success page to display the appropriate message as shown below:
<div class="container text-center">
	<h3>You have signed up successfully!</h3>
	<p>Please check your email to verify your account.</p>
	<h4><a th:href="/@{/login}">Click here to Login</a></h4>
</div>
Now, you can test the user registration function to see the verification email. Once registered, the user would see the following page:Check email, and the content would look like this (in GMail):Click the VERIFY link in the email, and you can see the URL has the following format:http://siteURL/verify?code=verification_codeIn the next section, I’ll show you how to implement the verification process that takes place when the user clicks the verify link in the email.
5. Implement User Account Verification Functionality
Firstly, update the UserRepository interface to declare a new method for retrieving a User object based on verification code, as shown below:
import org.springframework.data.jpa.repository.JpaRepository;
import org.springframework.data.jpa.repository.Query;

public interface UserRepository extends JpaRepository<User, Long> {

	@Query("SELECT u FROM User u WHERE u.verificationCode = ?1")
	public User findByVerificationCode(String code);
}
Then add the following method in the UserServices class:
public boolean verify(String verificationCode) {
	User user = repo.findByVerificationCode(verificationCode);

	if (user == null || user.isEnabled()) {
		return false;
	} else {
		user.setVerificationCode(null);
		user.setEnabled(true);
		repo.save(user);

		return true;
	}

}
As you can see, if a user is found by the given verification code, the application will activate the user account by updating the verification code to null and enabled status to true (so Spring Security will allow login for that user).And implement the following handler method in the controller as follows:
@GetMapping("/verify")
public String verifyUser(@Param("code") String code) {
	if (service.verify(code)) {
		return "verify_success";
	} else {
		return "verify_fail";
	}
}
As you can see, it returns the view name based on verification result. Below is the main code of the verify success page:
<div class="container text-center">
	<h3>Congratulations, your account has been verified.</h3>
	<h4><a th:href="/@{/login}">Click here to Login</a></h4>
</div>
And the body code of the verify fail page:
<div class="container text-center">
	<h3>Sorry, we could not verify account. It maybe already verified,
		or verification code is incorrect.</h3>
</div>
That’s for the implementation of verification process.
6. Test User Registration Verification Email
Click the VERIFY link in the email, the user would see the following page:If somehow the verification code is incorrect, or the user was verified, the following page should be displayed:Also check the table users in the database to make sure that the values of verification code and enabled status were updated properly. Then try to login with the newly approved account.So far you have learned how to implement user verification email functionality in a Spring Boot application. To see the coding in action, I recommend you to watch the following video:You can also download the reference project under the Attachments section below.
Nam Ha Minh is certified Java programmer (SCJP and SCWCD). He began programming with Java back in the days of Java 1.4 and has been passionate about it ever since. You can connect with him on Facebook and watch his Java videos on YouTube.
Hi there, I get the error message: "Error creating bean with name 'userRepository' defined in net.codejava.UserRepository defined in @EnableJpaRepositories declared on JpaRepositoriesRegistrar.EnableJpaRepositoriesConfiguration: Cannot resolve reference to bean 'jpaMappingContext'..." when I run your program. Any suggestions as to where to start looking to solve this? I am attempting to run your program as it is in the zip file :)
 Instead of alter the users table manually, you can run the application with the property spring.jpa.hibernate.ddl-auto is set to update in the application.properties file. Also note the length of verification code is 64 characters.
 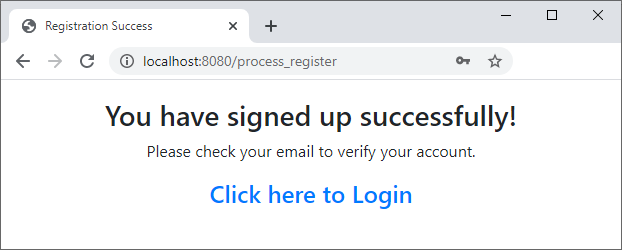 Check email, and the content would look like this (in GMail):
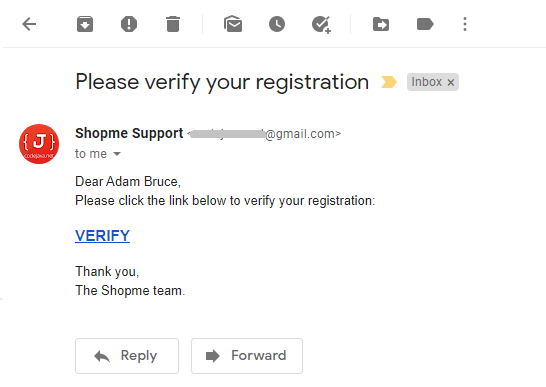 Click the VERIFY link in the email, and you can see the URL has the following format:http://siteURL/verify?code=verification_codeIn the next section, I’ll show you how to implement the verification process that takes place when the user clicks the verify link in the email.
 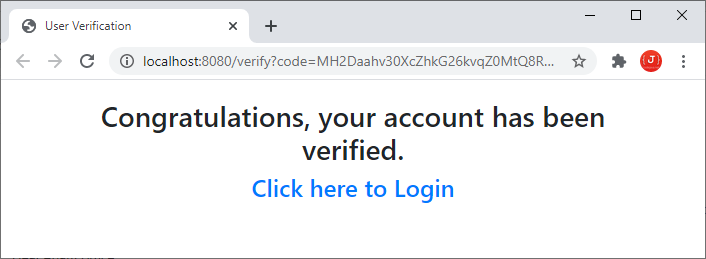 If somehow the verification code is incorrect, or the user was verified, the following page should be displayed:
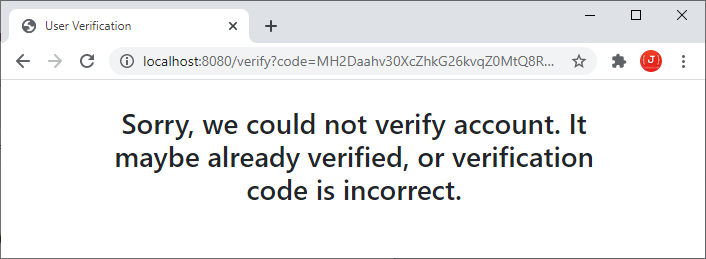 Also check the table users in the database to make sure that the values of verification code and enabled status were updated properly. Then try to login with the newly approved account.So far you have learned how to implement user verification email functionality in a Spring Boot application. To see the coding in action, I recommend you to watch the following video:You can also download the reference project under the Attachments section below.
  Nam Ha Minh is certified Java programmer (SCJP and SCWCD). He began programming with Java back in the days of Java 1.4 and has been passionate about it ever since. You can connect with him on Facebook and watch his Java videos on YouTube.
Comments
You can also download the reference project under the Attachments section below.