Spring Boot Registration and Login with MySQL Database Tutorial - Updated for Spring Boot 3 and Spring Security 6
- Details
- Written by Nam Ha Minh
- Last Updated on 25 January 2024 | Print Email
- Spring Web MVC for the web layer
- Spring Data JPA with Hibernate framework or the data access layer
- Spring Security for authentication, login and logout
- Thymeleaf as template engine
- HTML 5 and Bootstrap 4 for responsive user interface
- JUnit 5 and AssertJ for unit testing
- MySQL database
- Java Development Kit (JDK)
- Spring Tool Suite IDE (STS)
- MySQL Community server and MySQL Workbench
1. Create Spring Boot Project and Configure Dependencies
In Spring Tool Suite, create a new Spring Starter project with type Maven and language Java. And choose these dependencies: Spring Web, Thymeleaf, Spring Data JPA, MySQL Driver, Spring Security and Spring Boot DevTools – so the XML code for these dependencies in the pom.xml file is as follows:<dependency> <groupId>org.springframework.boot</groupId> <artifactId>spring-boot-starter-web</artifactId> </dependency> <dependency> <groupId>org.springframework.boot</groupId> <artifactId>spring-boot-starter-thymeleaf</artifactId> </dependency> <dependency> <groupId>org.springframework.boot</groupId> <artifactId>spring-boot-starter-data-jpa</artifactId> </dependency> <dependency> <groupId>mysql</groupId> <artifactId>mysql-connector-java</artifactId> <scope>runtime</scope> </dependency> <dependency> <groupId>org.springframework.boot</groupId> <artifactId>spring-boot-starter-security</artifactId> </dependency> <dependency> <groupId>org.springframework.boot</groupId> <artifactId>spring-boot-devtools</artifactId> <scope>runtime</scope> <optional>true</optional> </dependency>NOTES: For Spring Boot 3.x and Spring Security 6.x, you also need to add the following dependency:
<dependency>
	<groupId>org.thymeleaf.extras</groupId>
	<artifactId>thymeleaf-extras-springsecurity6</artifactId>
</dependency>
<dependency>
	<groupId>org.springframework.boot</groupId>
	<artifactId>spring-boot-starter-test</artifactId>
	<scope>test</scope>
	<exclusions>
		<exclusion>
			<groupId>org.junit.vintage</groupId>
			<artifactId>junit-vintage-engine</artifactId>
		</exclusion>
	</exclusions>
</dependency>
Spring Boot uses JUnit 5 (JUnit Jupiter) by default, and the exclusion means that no support for older versions of JUnit.
2. Create Database and Configure Data Source
Use MySQL Workbench or MySQL Command Line Client program to create a new database named codejavadb(you can choose any name you want):create database codejavadb;Then open the Spring Boot configuration file application.properties under /src/main/resources directory. Enter the following properties for configuring a data source that will be used by Spring Data JPA:
spring.jpa.hibernate.ddl-auto=create
spring.datasource.url=jdbc:mysql://localhost:3306/codejavadb
spring.datasource.username=root
spring.datasource.password=password
spring.jpa.properties.hibernate.format_sql=true
Note that we set the spring.jpa.hibernate.ddl-auto to create in order to let Hibernate create the tables when we run a unit test in the next section. Other properties are self-explanatory.
3. Code Entity Class and Repository Interface
Next, create a new Java class named User to map with the corresponding users table (not yet created) in the database, with the following code:package net.codejava;
import javax.persistence.*;
@Entity
@Table(name = "users")
public class User {
@Id
@GeneratedValue(strategy = GenerationType.IDENTITY)
private Long id;
@Column(nullable = false, unique = true, length = 45)
private String email;
@Column(nullable = false, length = 64)
private String password;
@Column(name = "first_name", nullable = false, length = 20)
private String firstName;
@Column(name = "last_name", nullable = false, length = 20)
private String lastName;
// getters and setters are not shown
}As you can see, the user information consists of ID, email, password, first name and last name. Here I use common annotations from JPA. The setters and getters are now shown for brevity, so be sure you generate those methods as well.NOTES: For Spring Boot 3.x that comes with newer version of Spring Data JPA, the import statement must be:import jakarta.persistence.*;Next, create a new interface named UserRepository to act as a Spring Data JPA repository with the following simple code:
package net.codejava;

import org.springframework.data.jpa.repository.JpaRepository;

public interface UserRepository extends JpaRepository<User, Long> {

}
This interface is a subtype of JpaRepository which defines common persistence operations (including CRUD) and the implementation will be generated at runtime by Spring Data JPA.To understand Spring Data JPA from scratch, I recommend you to read this tutorial. 4. Code and Run Unit Test
Next, code a test class named UserRepositoryTests under src/test/java directory with the following skeleton code:package net.codejava;
import static org.assertj.core.api.Assertions.assertThat;
import org.junit.jupiter.api.Test;
import org.springframework.beans.factory.annotation.Autowired;
import org.springframework.boot.test.autoconfigure.jdbc.AutoConfigureTestDatabase;
import org.springframework.boot.test.autoconfigure.jdbc.AutoConfigureTestDatabase.Replace;
import org.springframework.boot.test.autoconfigure.orm.jpa.DataJpaTest;
import org.springframework.boot.test.autoconfigure.orm.jpa.TestEntityManager;
import org.springframework.test.annotation.Rollback;
@DataJpaTest
@AutoConfigureTestDatabase(replace = Replace.NONE)
@Rollback(false)
public class UserRepositoryTests {
@Autowired
private TestEntityManager entityManager;
@Autowired
private UserRepository repo;
// test methods go below
}This is a basic test class for testing Spring Data JPA repositories. It is configured to work with the actual database (@AutoConfigureTestDatabase(replace = Replace.NONE)) and commit the changes (@Rollback(false)). TestEntityManager is a wrapper of JPA’s EntityManager so we can use it in test class like a standard EntityManager.And write the first test method that persists a User object into the database as follows:@Test
public void testCreateUser() {
User user = new User();
user.setEmail("ravikumar@gmail.com");
user.setPassword("ravi2020");
user.setFirstName("Ravi");
user.setLastName("Kumar");
User savedUser = repo.save(user);
User existUser = entityManager.find(User.class, savedUser.getId());
assertThat(user.getEmail()).isEqualTo(existUser.getEmail());
}Here, you can see I use AssertJ’s method assertThat() as the assertion statement. It is more readable and more fluent than using traditional JUnit’s assertion methods.Run this test method (right click on the method name in the code editor, then select Run As > JUnit Test), you will see it prints the following SQL statements in the console output:Hibernate:
create table users (
id bigint not null auto_increment,
email varchar(45) not null,
first_name varchar(20) not null,
last_name varchar(20) not null,
password varchar(64) not null,
primary key (id)
) engine=InnoDB
Hibernate:
alter table users
add constraint UK_6dotkott2kjsp8vw4d0m25fb7 unique (email)
Hibernate:
insert
into
users
(email, first_name, last_name, password)
values
(?, ?, ?, ?)That means Hibernate actually created the table users and insert a new row into it (you don’t have to create the table manually, right?).And Spring Data JPA prints the following statement:Committed transaction for test: [DefaultTestContext@311bf055 testClass = UserRepositoryTests…That means the data was stored in the database permanently (as opposed to the default behavior of Spring Data JPA Test is rollback the transaction after each test).You can use MySQL Workbench to verify that the table and data were really created. And update this property in the application.properties file:
spring.jpa.hibernate.ddl-auto=noneThis is to tell Hibernate won’t recreate the table in the next run of the application. Also notice that the user’s password is stored in plain text (for testing purpose). Later you will learn how to encode it.
5. Code Controller class and Home Page
Next, let’s create a Spring MVC controller class named AppController, with the first handler method to show the home page, as follows:package net.codejava;
import org.springframework.beans.factory.annotation.Autowired;
import org.springframework.stereotype.Controller;
import org.springframework.web.bind.annotation.GetMapping;
@Controller
public class AppController {
@Autowired
private UserRepository userRepo;
@GetMapping("")
public String viewHomePage() {
return "index";
}
}Under /src/main/resources/templates directory, create a new HTML file named index.html with the following code:<!DOCTYPE html>
<html xmlns:th="http://www.thymeleaf.org">
<head>
<meta charset="ISO-8859-1">
<title>Welcome to CodeJava Home</title>
<link rel="stylesheet" type="text/css" href="/webjars/bootstrap/css/bootstrap.min.css" />
<script type="text/javascript" src="/webjars/jquery/jquery.min.js"></script>
<script type="text/javascript" src="/webjars/bootstrap/js/bootstrap.min.js"></script>
</head>
<body>
<div class="container text-center">
<h1>Welcome to CodeJava.net</h1>
<h3><a th:href="/@{/users}">List of Users</a></h3>
<h3><a th:href="/@{/register}">Register</a></h3>
<h3><a th:href="/@{/login}">Login</a></h3>
</div>
</body>
</html>As you can see, in this webpage we use Bootstrap and JQuery from Webjars, so you must add the following dependencies for the project:<dependency> <groupId>org.webjars</groupId> <artifactId>jquery</artifactId> <version>3.4.1</version> </dependency> <dependency> <groupId>org.webjars</groupId> <artifactId>bootstrap</artifactId> <version>4.3.1</version> </dependency> <dependency> <groupId>org.webjars</groupId> <artifactId>webjars-locator-core</artifactId> </dependency>You can also notice Thymeleaf is used to generate the URLs properly.Now, you can run this Spring Boot Project (using Boot Dashboard of Spring Tool Suite), and access the web application at this URL http://localhost:8080, you should see the homepage appears as shown below:
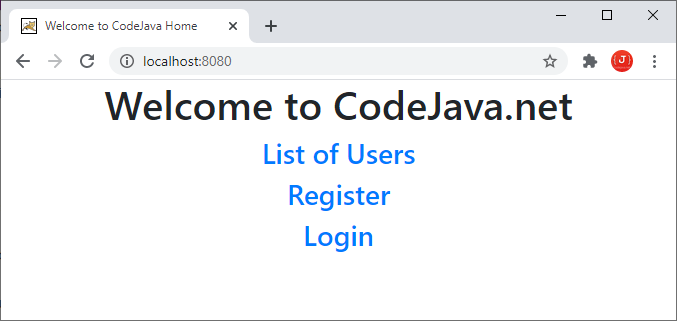 You see, the home page shows 3 links List of Users, Register and Login. You will learn how to implement each function in the next few minutes.
Spring Boot E-Commerce Ultimate Course
Code Real-life Shopping Website with Java and Spring Boot. Full-stack Development. Hands-on Practices. Job-ready Skills.
6. Implement User Registration feature
Add a new handler method in the controller class to show the user registration form (sign up), with the following code:@GetMapping("/register")
public String showRegistrationForm(Model model) {
model.addAttribute("user", new User());
return "signup_form";
}This handler method will be executed when a user clicks the Register hyperlink in the homepage.And write code for the user registration page as follows (create signup_form.html file):<!DOCTYPE html>
<html xmlns:th="http://www.thymeleaf.org">
<head>
<meta charset="ISO-8859-1">
<title>Sign Up - CodeJava</title>
<link rel="stylesheet" type="text/css" href="/webjars/bootstrap/css/bootstrap.min.css" />
<script type="text/javascript" src="/webjars/jquery/jquery.min.js"></script>
<script type="text/javascript" src="/webjars/bootstrap/js/bootstrap.min.js"></script>
</head>
<body>
<div class="container text-center">
<div>
<h1>User Registration - Sign Up</h1>
</div>
<form th:action="@{/process_register}" th:object="${user}"
method="post" style="max-width: 600px; margin: 0 auto;">
<div class="m-3">
<div class="form-group row">
<label class="col-4 col-form-label">E-mail: </label>
<div class="col-8">
<input type="email" th:field="*{email}" class="form-control" required />
</div>
</div>
<div class="form-group row">
<label class="col-4 col-form-label">Password: </label>
<div class="col-8">
<input type="password" th:field="*{password}" class="form-control"
required minlength="6" maxlength="10"/>
</div>
</div>
<div class="form-group row">
<label class="col-4 col-form-label">First Name: </label>
<div class="col-8">
<input type="text" th:field="*{firstName}" class="form-control"
required minlength="2" maxlength="20"/>
</div>
</div>
<div class="form-group row">
<label class="col-4 col-form-label">Last Name: </label>
<div class="col-8">
<input type="text" th:field="*{lastName}" class="form-control"
required minlength="2" maxlength="20" />
</div>
</div>
<div>
<button type="submit" class="btn btn-primary">Sign Up</button>
</div>
</div>
</form>
</div>
</body>
</html>Click Register link in the homepage, you should see the registration page appears like this: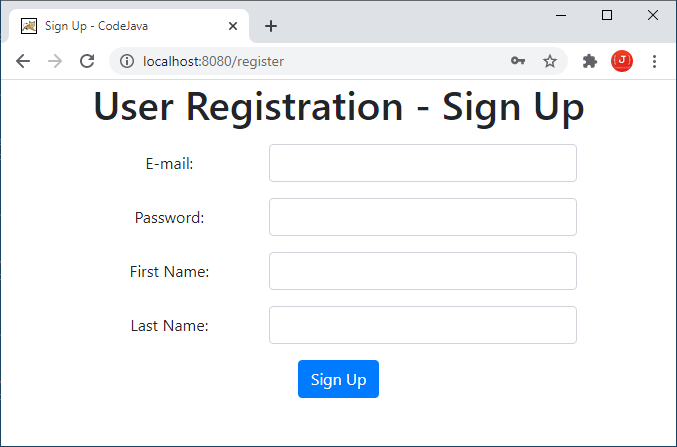 It looks very nice, isn’t it? Thanks to Bootstrap and HTML 5. You can also notice with HTML 5, the browser provides validation for input fields so you don’t have to use Javascript for that.Next, code a handler method in the controller class to process registration with the following code:
@PostMapping("/process_register")
public String processRegister(User user) {
	BCryptPasswordEncoder passwordEncoder = new BCryptPasswordEncoder();
	String encodedPassword = passwordEncoder.encode(user.getPassword());
	user.setPassword(encodedPassword);

	userRepo.save(user);

	return "register_success";
}
As you can see, here we use BCryptPasswordEncoder to encode the user’s password so the password itself it not stored in database (for better security) – only the hash value of the password is stored.After a User object is persisted into the database, it returns a logical view name register_success, so we need to create the corresponding HTML page with the following code:<!DOCTYPE html>
<html xmlns:th="http://www.thymeleaf.org">
<head>
<meta charset="ISO-8859-1">
<title>Registration Success</title>
<link rel="stylesheet" type="text/css" href="/webjars/bootstrap/css/bootstrap.min.css" />
</head>
<body>
<div class="container text-center">
<h3>You have signed up successfully!</h3>
<h4><a th:href="/@{/login}">Click here to Login</a></h4>
</div>
</body>
</html>This page simply displays the successful message after a user has registered, as shown below: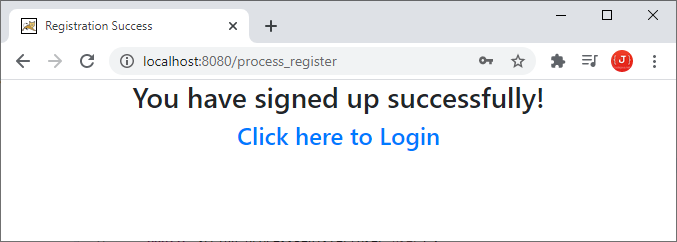 Now you can test the user registration feature and verify result in the database (note that the password should be encoded).
 7. Code Custom UserDetails and UserDetailsService Classes
Next, in order to implement authentication (login) feature, we need to create a class of subtype UserDetails (defined by Spring Security) to represent an authentication user, with the following code:package net.codejava;
import java.util.Collection;
import org.springframework.security.core.GrantedAuthority;
import org.springframework.security.core.userdetails.UserDetails;
public class CustomUserDetails implements UserDetails {
private User user;
public CustomUserDetails(User user) {
this.user = user;
}
@Override
public Collection<? extends GrantedAuthority> getAuthorities() {
return null;
}
@Override
public String getPassword() {
return user.getPassword();
}
@Override
public String getUsername() {
return user.getEmail();
}
@Override
public boolean isAccountNonExpired() {
return true;
}
@Override
public boolean isAccountNonLocked() {
return true;
}
@Override
public boolean isCredentialsNonExpired() {
return true;
}
@Override
public boolean isEnabled() {
return true;
}
public String getFullName() {
return user.getFirstName() + " " + user.getLastName();
}
}Spring Security will invoke methods in this class during the authentication process.And next, to tell Spring Security how to look up the user information, we need to code a class that implements the UserDetailsService interface, as shown below:package net.codejava;
import org.springframework.beans.factory.annotation.Autowired;
import org.springframework.security.core.userdetails.UserDetails;
import org.springframework.security.core.userdetails.UserDetailsService;
import org.springframework.security.core.userdetails.UsernameNotFoundException;
public class CustomUserDetailsService implements UserDetailsService {
@Autowired
private UserRepository userRepo;
@Override
public UserDetails loadUserByUsername(String username) throws UsernameNotFoundException {
User user = userRepo.findByEmail(username);
if (user == null) {
throw new UsernameNotFoundException("User not found");
}
return new CustomUserDetails(user);
}
}As you can see, Spring Security will invoke the loadUserByUsername() method to authenticate the user, and if successful, a new object of type CustomUserDetails object is created to represent the authenticated user.Also remember to update the UserRepository interface for adding this method:public interface UserRepository extends JpaRepository<User, Long> {
@Query("SELECT u FROM User u WHERE u.email = ?1")
public User findByEmail(String email);
}Suppose that the email column is unique in the users table, so we define the findByEmail() method that returns a single User object based on email (no two users having the same email). 8. Configure Spring Security for Authentication (Login)
Next, create a new Java class for configuring Spring Security with the following code:package net.codejava;
import javax.sql.DataSource;
import org.springframework.beans.factory.annotation.Autowired;
import org.springframework.context.annotation.Bean;
import org.springframework.context.annotation.Configuration;
import org.springframework.security.authentication.dao.DaoAuthenticationProvider;
import org.springframework.security.config.annotation.authentication.builders.AuthenticationManagerBuilder;
import org.springframework.security.config.annotation.web.builders.HttpSecurity;
import org.springframework.security.config.annotation.web.configuration.EnableWebSecurity;
import org.springframework.security.config.annotation.web.configuration.WebSecurityConfigurerAdapter;
import org.springframework.security.core.userdetails.UserDetailsService;
import org.springframework.security.crypto.bcrypt.BCryptPasswordEncoder;
@Configuration
@EnableWebSecurity
public class WebSecurityConfig extends WebSecurityConfigurerAdapter {
@Autowired
private DataSource dataSource;
@Bean
public UserDetailsService userDetailsService() {
return new CustomUserDetailsService();
}
@Bean
public BCryptPasswordEncoder passwordEncoder() {
return new BCryptPasswordEncoder();
}
@Bean
public DaoAuthenticationProvider authenticationProvider() {
DaoAuthenticationProvider authProvider = new DaoAuthenticationProvider();
authProvider.setUserDetailsService(userDetailsService());
authProvider.setPasswordEncoder(passwordEncoder());
return authProvider;
}
@Override
protected void configure(AuthenticationManagerBuilder auth) throws Exception {
auth.authenticationProvider(authenticationProvider());
}
@Override
protected void configure(HttpSecurity http) throws Exception {
http.authorizeRequests()
.antMatchers("/users").authenticated()
.anyRequest().permitAll()
.and()
.formLogin()
.usernameParameter("email")
.defaultSuccessUrl("/users")
.permitAll()
.and()
.logout().logoutSuccessUrl("/").permitAll();
}
}Here in the configure() method, a user must login to see the list users page (URL /users) and other pages do not require authentication. We also configure the default login page (generated by Spring Security) with the parameter name of the username field is email and the default success URL is /users – that means after successful login, the user will be redirected to the list users page. NOTES: For Spring Boot 3.x and Spring Security 6.x, the code of the WebSecurityConfig class should be like this:package net.codejava;
import org.springframework.context.annotation.Bean;
import org.springframework.context.annotation.Configuration;
import org.springframework.security.authentication.dao.DaoAuthenticationProvider;
import org.springframework.security.config.annotation.web.builders.HttpSecurity;
import org.springframework.security.core.userdetails.UserDetailsService;
import org.springframework.security.crypto.bcrypt.BCryptPasswordEncoder;
import org.springframework.security.crypto.password.PasswordEncoder;
import org.springframework.security.web.SecurityFilterChain;
@Configuration
public class WebSecurityConfig {
@Bean
UserDetailsService userDetailsService() {
return new CustomUserDetailsService();
}
@Bean
PasswordEncoder passwordEncoder() {
return new BCryptPasswordEncoder();
}
@Bean
public DaoAuthenticationProvider authenticationProvider() {
DaoAuthenticationProvider authProvider = new DaoAuthenticationProvider();
authProvider.setUserDetailsService(userDetailsService());
authProvider.setPasswordEncoder(passwordEncoder());
return authProvider;
}
@Bean
SecurityFilterChain configure(HttpSecurity http) throws Exception {
http.authenticationProvider(authenticationProvider());
http.authorizeHttpRequests(auth ->
auth.requestMatchers("/users").authenticated()
.anyRequest().permitAll()
)
.formLogin(login ->
login.usernameParameter("email")
.defaultSuccessUrl("/users")
.permitAll()
)
.logout(logout -> logout.logoutSuccessUrl("/").permitAll()
);
return http.build();
}
}Now you can test the login function. Go to the homepage and click Login link, you should see the default login page appears as follows: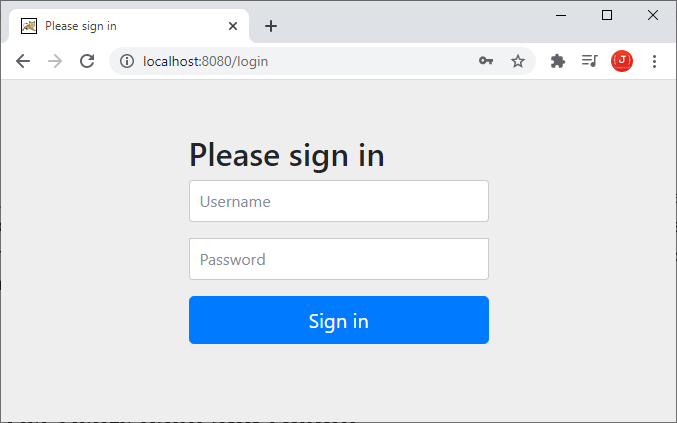 Enter the username (email) and password of the user you have registered previously and click Sign in. You should see an error page because the list users page has not been implemented.
 9. Code List Users Page and Logout
Next, we’re going to implement the list users and logout features. Update the controller class to have the following handler method:@GetMapping("/users")
public String listUsers(Model model) {
List<User> listUsers = userRepo.findAll();
model.addAttribute("listUsers", listUsers);
return "users";
}Here, you can see we call the findAll() method on the UserRepository but we didn’t write that method. It is defined by the Spring Data JPA’s JpaRepository interface.And create the users.html file with the following code:<!DOCTYPE html>
<html xmlns:th="http://www.thymeleaf.org">
<head>
<meta charset="ISO-8859-1">
<title>List Users</title>
<link rel="stylesheet" type="text/css" href="/webjars/bootstrap/css/bootstrap.min.css" />
<script type="text/javascript" src="/webjars/jquery/jquery.min.js"></script>
<script type="text/javascript" src="/webjars/bootstrap/js/bootstrap.min.js"></script>
</head>
<body>
<div class="container text-center">
<div>
<form th:action="@{/logout}" method="post">
<p>
Welcome <b>[[${#request.userPrincipal.principal.fullName}]]</b>
</p>
<input type="submit" value="Sign Out" />
</form>
</div>
<div>
<h1>List of Users</h1>
</div>
<div>
<table class="table table-striped table-bordered">
<thead class="thead-dark">
<tr>
<th>User ID</th>
<th>E-mail</th>
<th>First Name</th>
<th>Last Name</th>
</tr>
</thead>
<tbody>
<tr th:each="user: ${listUsers}">
<td th:text="${user.id}">User ID</td>
<td th:text="${user.email}">E-mail</td>
<td th:text="${user.firstName}">First Name</td>
<td th:text="${user.lastName}">Last Name</td>
</tr>
</tbody>
</table>
</div>
</div>
</body>
</html> NOTES: For Spring Boot 3.x and Spring Security 6.x, you need to declare the <html> tag as follows:<html xmlns:th="http://www.thymeleaf.org" xmlns:sec="https://www.thymeleaf.org/thymeleaf-extras-springsecurity6">And the line that shows full name of the signed in user should be updated as below:
Welcome <b><span sec:authentication="principal.fullName"></span></b>This page consists of two parts: the first part shows the user’s full name with Logout button; and the second one lists all users in the database. It should look something like this:
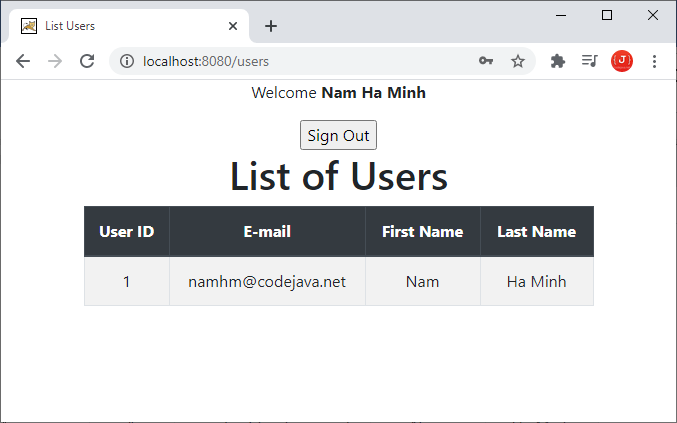 Let test adding more users and you will the list will contain more items. Click the Sign Out button, the application will log the user out and show the homepage.That’s the complete tutorial for implementing user registration and login features in a Spring Boot application with Spring Data JPA, Spring Security, MySQL database, Thymeleaf, Bootstrap and HTML 5. I hope you find this tutorial as good reference for your development need.What's next? You may find this tutorial helpful: Spring Boot Email Verification for User Registration TutorialThe see to coding in action, I recommend you to watch the following video:You can also download the sample project in the Attachments section below, or clone the sample project from GitHub via this repository link.
 Related Spring Security Tutorials:
- Spring Security Remember Me (Remember Login) Examples
- Spring Security Role-based Authorization Tutorial
- Spring Security Customize Login and Logout
- How to Get Logged-in User's Details with Spring Security
- Spring Security: Prevent User from Going Back to Login Page if Already logged in
Other Spring Boot Tutorials:
- How to create a Spring Boot Web Application (Spring MVC with JSP/ThymeLeaf)
- Spring Boot CRUD Example with Spring MVC – Spring Data JPA – ThymeLeaf - Hibernate - MySQL
- Spring Boot Hello World RESTful Web Services Tutorial
- Spring Boot Thymeleaf Form Handling Tutorial
- Spring Data JPA Paging and Sorting Examples
- Spring Boot Error Handling Guide
- Spring Boot Logging Basics
Recommended Course:
About the Author:
 Nam Ha Minh is certified Java programmer (SCJP and SCWCD). He began programming with Java back in the days of Java 1.4 and has been passionate about it ever since. You can connect with him on Facebook and watch his Java videos on YouTube.
| [Sample Spring Boot project] | 85 kB |
Comments