In this Spring Security tutorial, I’d like to share with you some code examples for implementing Remember Login (a.k.a. Remember Me) feature in a Java web application based on Spring framework. You know, it would be more convenient for the end users if your application offers an option “Remember Me” in the login page, so the user can choose to keep their login for a long period of time – instead of the default, short-lived session.The code examples in this article are based on the project in the Spring Boot Registration and Login Tutorial, which already implemented the register, login, logout, and listing users functions – We will just add remember login feature to it.Technologies: Spring Boot Web, Spring Security, Spring Data JPA, Hibernate, Thymeleaf and MySQL database.Software programs: Java Development Kit (OpenJDK/OracleJDK), a Java IDE (NetBeans, Eclipse or IntelliJ IDEA), and MySQL server.
1. Update Custom Login Page
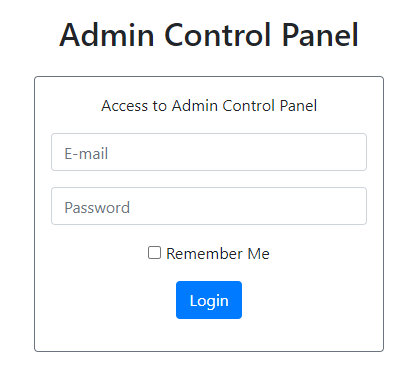
If you’re using a custom login page, you need to add the following HTML code to the login HTML file, for displaying the “Remember Me” option:
<input type="checkbox" name="remember-me" /> Remember Me
Note that the name of the checkbox must be remember-me which is required by Spring Security. The login page will look something like this:In case the default login page is used, you can skip this step, as Spring Security will generate code for the default login page, which looks like below:
2. Implement Remember Me function with Cookies only (Hash-based Token)
The simplest way to add Remember login function to an existing Spring Boot web application is putting a call rememberMe() in a security configuration class like this:
In this approach, an additional cookie will be created in the user’s web browser, for storing the user’s credentials – besides the session cookie named JSESSIONID:This new cookie named remember-me, which stores username, password and expiration time in base64 encoding. A private key is used to prevent modification of the remember-me token, and [username, password, private key] are hashed using MD5 algorithm.The default expiration time is 14 days. You can override this value in the configuration class like this:
Also note that, by default, the remember-me cookie won’t survive when the application restarted. That means when the application restarts, all previous cookies become invalid and the user must login manually. You can override this default behavior by supplying a fixed key like this:
.rememberMe()
	.tokenValiditySeconds(7 * 24 * 60 * 60) // expiration time: 7 days
	.key("AbcdefghiJklmNoPqRstUvXyz")	// cookies will survive if restarted
It’s because by default, Spring Security supplies a random key at application’s startup. So if you fix the key, remember-me cookies are still valid until expire.
3. Implement Remember Me function with Database (Persistent Token)
The second approach for implementing Remember Login function in a Spring Boot web application is using persistent token, which stores user’s credentials in database – besides a simpler remember-me cookie in the user’s web browser.To implement the Remember me feature with database, you need to create a new table named persistent_loginsusing the following SQL script (MySQL):
CREATE TABLE `persistent_logins` (
  `username` VARCHAR(64) NOT NULL,
  `series` VARCHAR(64) NOT NULL,
  `token` VARCHAR(64) NOT NULL,
  `last_used` TIMESTAMP NOT NULL,
  PRIMARY KEY (`series`));
Then update the Spring security configuration class as follows:
Now you can test login function with Remember Me option checked. You will see Spring Security stores the login information in the persistent_logins table.So far you have learned how to add Remember Login feature to a Spring Boot web application with Spring Security. You now, using hash-based token is simpler than using persistent token but less secure. And choosing which approach depends on your application’s need.To see the coding in action, I recommend you to watch the following video:
Nam Ha Minh is certified Java programmer (SCJP and SCWCD). He began programming with Java back in the days of Java 1.4 and has been passionate about it ever since. You can connect with him on Facebook and watch his Java videos on YouTube.
DB remember Me token doesnt work for me. It gets stored into DB but when I delete all Cookies I can't log into restricted resource without logging in again. This is my repository github.com/.../...
 In case the default login page is used, you can skip this step, as Spring Security will generate code for the default login page, which looks like below:
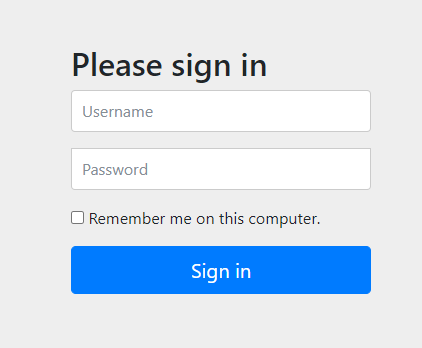
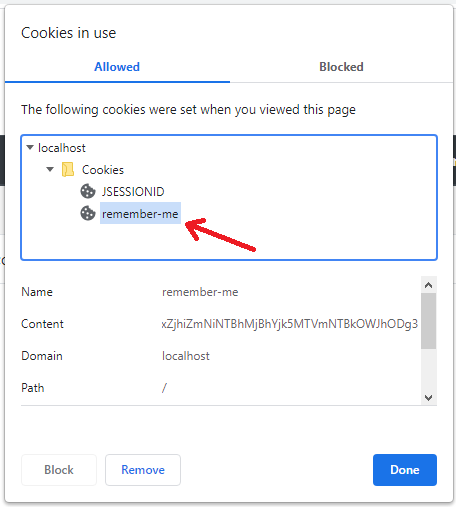 This new cookie named remember-me, which stores username, password and expiration time in base64 encoding. A private key is used to prevent modification of the remember-me token, and [username, password, private key] are hashed using MD5 algorithm.The default expiration time is 14 days. You can override this value in the configuration class like this:
 Nam Ha Minh is certified Java programmer (SCJP and SCWCD). He began programming with Java back in the days of Java 1.4 and has been passionate about it ever since. You can connect with him on Facebook and watch his Java videos on YouTube.
Comments
github.com/.../...