A standard web application should provide forgot password function for its users, so a user can reset his password legitimately if he doesn’t remember it. Through this Spring Security tutorial, I will guide you how to implement forgot password function for an existing Java web application based on Spring Boot, Spring Data JPA, Thymeleaf, Bootstrap and MySQL database.This tutorial supposes that you’re developing a Spring Boot application that already implements login function with user information stored in database. If not, you should follow this tutorial first.
1. Update Database table and Entity class
First, you need to update the database table that stores the user information (customers in my case) by adding a new column to store a random token key which is used to protect the reset password page:So add a new column named reset_password_token with data type is varchar(30) because we’ll use a random token string of 30 characters. Then update the corresponding entity class, by declaring a new field named resetPasswordToken:
@Entity
@Table(name = "customers")
public class Customer {

	// other fields...

	@Column(name = "reset_password_token")
	private String resetPasswordToken;

	// getters and setters...
}
When a customer submits a request to reset password, the application will generate a random reset password token, which will be used in the forgot password email and reset password form to make sure that only the user who got the email can change password.
2. Update Repository Interface and Service Class
Next, in the repository layer, declare two new methods in the repository interface as below:
public interface CustomerRepository extends CrudRepository<Customer, Integer> {

	@Query("SELECT c FROM Customer c WHERE c.email = ?1")
	public Customer findByEmail(String email);

	public Customer findByResetPasswordToken(String token);
}
The findByEmail() method will be used to check a user’s email when he starts to use the forgot password function. And the findByResetPasswordToken() method will be used to validate the token when the user clicks the change password link in email.And update the service class as follows:
@Service
@Transactional
public class CustomerServices {

	@Autowired
	private CustomerRepository customerRepo;


	public void updateResetPasswordToken(String token, String email) throws CustomerNotFoundException {
		Customer customer = customerRepo.findByEmail(email);
		if (customer != null) {
			customer.setResetPasswordToken(token);
			customerRepo.save(customer);
		} else {
			throw new CustomerNotFoundException("Could not find any customer with the email " + email);
		}
	}

	public Customer getByResetPasswordToken(String token) {
		return customerRepo.findByResetPasswordToken(token);
	}

	public void updatePassword(Customer customer, String newPassword) {
		BCryptPasswordEncoder passwordEncoder = new BCryptPasswordEncoder();
		String encodedPassword = passwordEncoder.encode(newPassword);
		customer.setPassword(encodedPassword);

		customer.setResetPasswordToken(null);
		customerRepo.save(customer);
	}
}
Here we implement 3 methods:
updateResetPasswordToken(): sets value for the field resetPasswordToken of a user found by the given email – and persist change to the database. Else throw CustomerNotFoundException (you may need to create this exception class).
getByResetPasswordToken(): finds a user by the given reset password token. Suppose that the random token is unique.
updatePassword(): sets new password for the user (using BCrypt password encoding) and nullifies the reset password token.
These methods will be used by a Spring MVC controller class, which you’ll see in the sections below.
3. Update Login Page
Next, update the login page by adding a hyperlink that allows the user to use the forgot password function:
<a th:href="/@{/forgot_password}">Forgot your password?</a>
When running, the login page would look like this:This allows users to click the link Forgot your password? to reset their passwords.
4. Add Spring Mail dependency and Configure JavaMail properties
To send the reset password link to the user’s email, we need to use Spring Boot Starter Mail dependency. So make sure the pom.xml file contains the following dependency:
I will be using Gmail’s SMTP server for sending emails, so specify the following properties in the Spring application configuration file (below is in yml format):
Remember to use your own username and password, and also check Gmail’s settings to make sure SMTP is enabled.
5. Create Forgot Password Controller class
Next, create a Spring MVC controller class with the following handler methods:
import org.springframework.mail.javamail.JavaMailSender;

@Controller
public class ForgotPasswordController {
	@Autowired
	private JavaMailSender mailSender;

	@Autowired
	private CustomerServices customerService;

	@GetMapping("/forgot_password")
	public String showForgotPasswordForm() {

	}

	@PostMapping("/forgot_password")
	public String processForgotPassword() {
	}

	public void sendEmail(){

	}


	@GetMapping("/reset_password")
	public String showResetPasswordForm() {

	}

	@PostMapping("/reset_password")
	public String processResetPassword() {

	}
}
As you can see, we tell Spring to autowire an instance of JavaMailSender into this controller in order to send email containing the reset password link to the user. You’ll see the detailed code for each handler method in the next sections.
6. Code Forgot Password Page
When a user clicks the Forgot your password link in the home page, the application will show the forgot password page that requires the user enters email in order to receive reset password link. So update code of the handler method as follows:
@GetMapping("/forgot_password")
public String showForgotPasswordForm() {
	return "forgot_password_form";
}
This handler method simply returns the view name forgot_password_form, so create a new HTML file with the same name, under src/main/resources/templates. Make sure that it contains the following code:
<div>
	<h2>Forgot Password</h2>
</div>

<div th:if="${error != null}">
	<p class="text-danger">[[${error}]]</p>
</div>
<div th:if="${message != null}">
	<p class="text-warning">[[${message}]]</p>
</div>

<form th:action="@{/forgot_password}" method="post" style="max-width: 420px; margin: 0 auto;">
<div class="border border-secondary rounded p-3">
	<div>
		<p>We will be sending a reset password link to your email.</p>
	</div>
	<div>
		<p>
			<input type="email" name="email" class="form-control" placeholder="Enter your e-mail" required autofocus/>
		</p>
		<p class="text-center">
			<input type="submit" value="Send" class="btn btn-primary" />
		</p>
	</div>
</div>
</form>
When running, this page would look like as follows:The user enters his email and click Send button in order to receive an email containing the reset password link.
7. Code to Send Reset Password Email
Next, code another handler method in the controller class to process the forgot password form as below:
@PostMapping("/forgot_password")
public String processForgotPassword(HttpServletRequest request, Model model) {
	String email = request.getParameter("email");
	String token = RandomString.make(30);

	try {
		customerService.updateResetPasswordToken(token, email);
		String resetPasswordLink = Utility.getSiteURL(request) + "/reset_password?token=" + token;
		sendEmail(email, resetPasswordLink);
		model.addAttribute("message", "We have sent a reset password link to your email. Please check.");

	} catch (CustomerNotFoundException ex) {
		model.addAttribute("error", ex.getMessage());
	} catch (UnsupportedEncodingException | MessagingException e) {
		model.addAttribute("error", "Error while sending email");
	}

	return "forgot_password_form";
}
As you can see, a random String is generated as reset password token using the RandomString class from the net.bytebuddy.utility package. ByteBuddy is a library comes with Spring Boot so you don’t have to declare any new dependency.The it updates the reset password token field of the user found with the given email, otherwise throws an exception whose message will be shown up in the forgot password form.Then it generates a reset password link containing the random token as a URL parameter in the following form:
For your reference, here’s code of the Utility class:
public class Utility {
	public static String getSiteURL(HttpServletRequest request) {
		String siteURL = request.getRequestURL().toString();
		return siteURL.replace(request.getServletPath(), "");
	}
}
The getSiteURL() method returns the application’s URL which can be used in production, so the user will be able to click the link in the email.And below is code of the sendEmail() method:
public void sendEmail(String recipientEmail, String link)
		throws MessagingException, UnsupportedEncodingException {
	MimeMessage message = mailSender.createMimeMessage();
	MimeMessageHelper helper = new MimeMessageHelper(message);

	helper.setFrom("contact@shopme.com", "Shopme Support");
	helper.setTo(recipientEmail);

	String subject = "Here's the link to reset your password";

	String content = "<p>Hello,</p>"
			+ "<p>You have requested to reset your password.</p>"
			+ "<p>Click the link below to change your password:</p>"
			+ "<p><a href=\"" + link + "\">Change my password</a></p>"
			+ "<br>"
			+ "<p>Ignore this email if you do remember your password, "
			+ "or you have not made the request.</p>";

	helper.setSubject(subject);

	helper.setText(content, true);

	mailSender.send(message);
}
When running, the application displays a successful message after the email has been sent:And the content of the email would look like this:As you can see, the user can click the Change my password link in the email to access the reset password function, which is described below.
8. Code to Show Reset Password page
Next, implement the following handler method in the controller class to display the reset password page when the user clicks the Change password link in the email:
Here, the application checks for the validity of the token in the URL, to make sure that only the user who got the real email can change password. In case the token not found in the database, it will display the message “Invalid Token”;And create the reset_password_form.html file containing the following code:
Use the following Javascript code to validate the match of two password fields:
function checkPasswordMatch(fieldConfirmPassword) {
	if (fieldConfirmPassword.value != $("#password").val()) {
		fieldConfirmPassword.setCustomValidity("Passwords do not match!");
	} else {
		fieldConfirmPassword.setCustomValidity("");
	}
}
When testing, the reset password page looks like this:Here, the user can enter new password and click the button Change Password to save the change.
9. Code to Handle Reset Password form
Next, implement the handler method to process password reset as follows:
@PostMapping("/reset_password")
public String processResetPassword(HttpServletRequest request, Model model) {
	String token = request.getParameter("token");
	String password = request.getParameter("password");

	Customer customer = customerService.getByResetPasswordToken(token);
	model.addAttribute("title", "Reset your password");

	if (customer == null) {
		model.addAttribute("message", "Invalid Token");
		return "message";
	} else {
		customerService.updatePassword(customer, password);

		model.addAttribute("message", "You have successfully changed your password.");
	}

	return "message";
}
As you can see, the token is checked to make sure the request is legitimate. Then the application will update user’s password with the new one and display a successful message, as shown below:That’s how to implement forgot password feature in a Spring Boot application. I hope you find this tutorial as a good reference to implement your own reset password function. To see the coding in action, I recommend you to watch the following video:
Nam Ha Minh is certified Java programmer (SCJP and SCWCD). He began programming with Java back in the days of Java 1.4 and has been passionate about it ever since. You can connect with him on Facebook and watch his Java videos on YouTube.
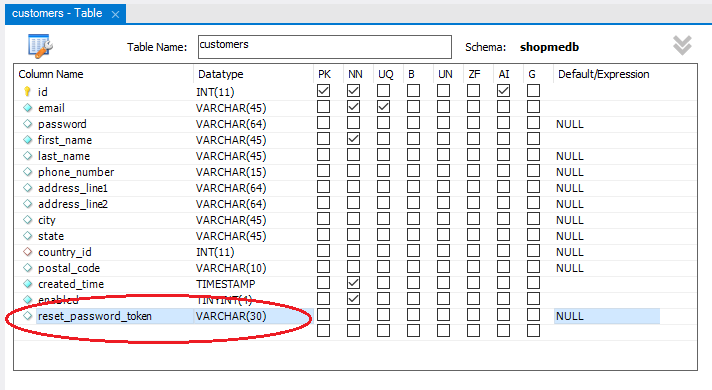 So add a new column named reset_password_token with data type is varchar(30) because we’ll use a random token string of 30 characters. Then update the corresponding entity class, by declaring a new field named resetPasswordToken:
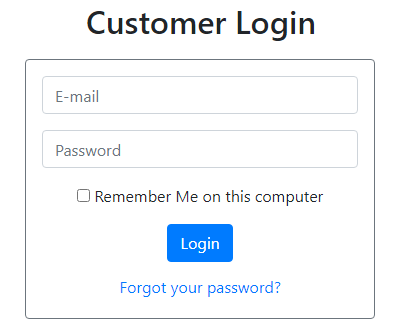 This allows users to click the link Forgot your password? to reset their passwords.
 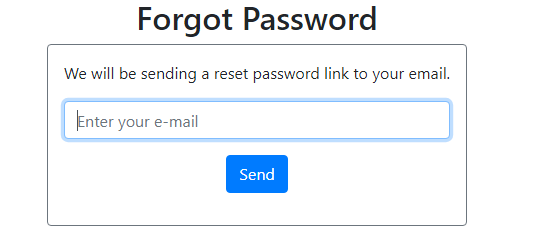 The user enters his email and click Send button in order to receive an email containing the reset password link.
 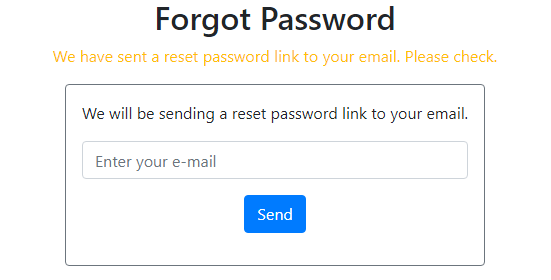 And the content of the email would look like this:
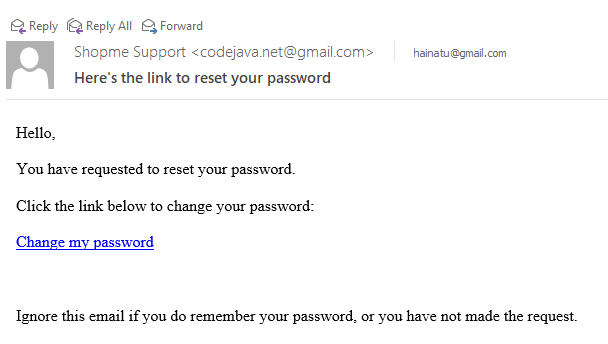 As you can see, the user can click the Change my password link in the email to access the reset password function, which is described below.
 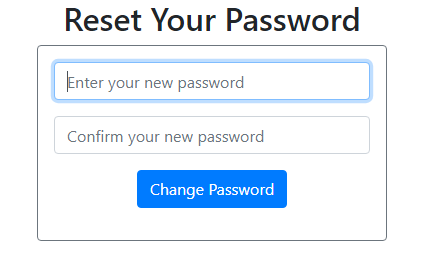 Here, the user can enter new password and click the button Change Password to save the change.
 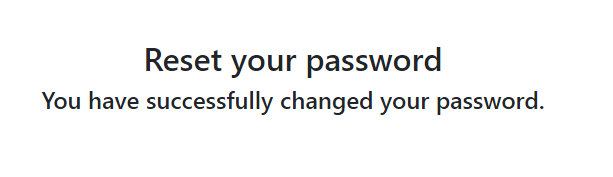 That’s how to implement forgot password feature in a Spring Boot application. I hope you find this tutorial as a good reference to implement your own reset password function. To see the coding in action, I recommend you to watch the following video:
  Nam Ha Minh is certified Java programmer (SCJP and SCWCD). He began programming with Java back in the days of Java 1.4 and has been passionate about it ever since. You can connect with him on Facebook and watch his Java videos on YouTube.
Comments
github.com/.../spring-authentication