In this article, I’d like to share with you guys, about how to implement social login functionality with both Google and Facebook in a web application based on Java Spring Boot. In other words, it lets end users sign in your application using their own Google or Facebook account, besides traditional username and password login.To follow this guide, first you should understand how to integrate social login only with Google or Facebook, by following these tutorials:
In this tutorial, I will also share some code examples that determine whether a user is authenticated via Google or Facebook, and run custom code upon successful authentication. The code below are used in real life projects such as E-commerce shopping website, which you can learn in the Spring Boot E-Commerce Ultimate Course.
1. Configure OAuth2 Google and Facebook Clients in application.yml
In the Spring Boot application configuration file (application.yml), declare the Spring Security OAuth2 client registration for Google and Facebook as follows:
Replace the actual values of Client ID and Secret Key of your Google and Facebook OAuth apps.
2. Update Login Page
Next, update the login page to show 2 hyperlinks: Login with Facebook and Login with Google, with the URLs as follows:
...
<a th:href="/@{/oauth2/authorization/facebook}">Login with Facebook</a>
...
<a th:href="/@{/oauth2/authorization/google}">Login with Google</a>
...
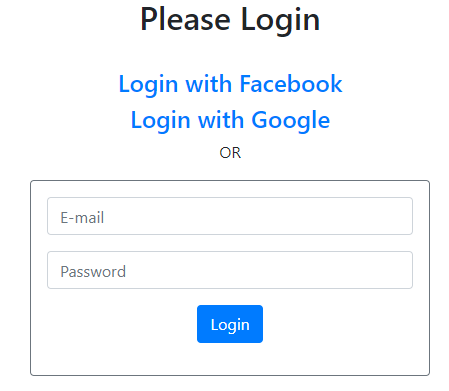
The login page would look something like this:
As you can see, the user can choose to sign in via Facebook, Google or username (email) and password.That’s it! Now you can test login with Google and Facebook. Pretty simple, right?Read on if you want to do more, e.g. determine whether a user is logged in via Facebook or Google; and run custom logics upon successful authentication.
3. Update OAuth2User and OAuth2UserService
Update the loadUser() method in your customer OAuth2UserService class as follows:
package net.codejava.security.oauth;

@Service
public class CustomOAuth2UserService extends DefaultOAuth2UserService  {

	@Override
	public OAuth2User loadUser(OAuth2UserRequest userRequest) throws OAuth2AuthenticationException {
		String clientName = userRequest.getClientRegistration().getClientName();
		OAuth2User user =  super.loadUser(userRequest);
		return new CustomOAuth2User(user, clientName);
	}

}
Here, the statement that helps identifying whether the user signed in via Google or Facebook is this:
The variable clientName could be either Google or Facebook.And also update your custom OAuth2User class as follows:
package net.codejava.security.oauth;

public class CustomOAuth2User implements OAuth2User {
	private String oauth2ClientName;
	private OAuth2User oauth2User;

	public CustomOAuth2User(OAuth2User oauth2User, String oauth2ClientName) {
		this.oauth2User = oauth2User;
		this.oauth2ClientName = oauth2ClientName;
	}

	@Override
	public Map<String, Object> getAttributes() {
		return oauth2User.getAttributes();
	}

	@Override
	public Collection<? extends GrantedAuthority> getAuthorities() {
		return oauth2User.getAuthorities();
	}

	@Override
	public String getName() {
		System.out.println(oauth2User.<String>getAttribute("email"));
		return oauth2User.getAttribute("name");
	}

	public String getEmail() {
		return oauth2User.<String>getAttribute("email");
	}

	public String getOauth2ClientName() {
		return this.oauth2ClientName;
	}
}
Here, we code the getOauth2ClientName() method that returns the name of OAuth2 client application, which could be Facebook or Google.
4. Code Authentication Success Handlers
Suppose that we want to update authentication type of the user who has signed in. So update the User entity class as follows:
package net.codejava.user;

@Entity
@Table(name = "users")
public class User {

	@Enumerated(EnumType.STRING)
	@Column(name = "auth_type")
	private AuthenticationType authType;

	public AuthenticationType getAuthType() {
		return authType;
	}

	public void setAuthType(AuthenticationType authType) {
		this.authType = authType;
	}

	// other fields, getters and setters are not shown
}
As you can see, we add a new field of a custom enum type AuthenticationType, that maps to the column auth_type in the users table. And the enum type would be declared like this:
package net.codejava.user;

public enum AuthenticationType {
	DATABASE, FACEBOOK, GOOGLE
}
Then code an authentication success handler as follows:
Here, upon successful authentication it calls the UserService to update user’s authentication type. Code of the UserService class:
package net.codejava.user;

@Service
@Transactional
public class UserService {
    @Autowired
    private UserRepository repo;

    public void updateAuthenticationType(String username, String oauth2ClientName) {
    	AuthenticationType authType = AuthenticationType.valueOf(oauth2ClientName.toUpperCase());
    	repo.updateAuthenticationType(username, authType);
    }
}
And code of the UserRepository interface:
package net.codejava.user;

public interface UserRepository extends CrudRepository<User, Long> {

	@Modifying
	@Query("UPDATE User u SET u.authType = ?2 WHERE u.username = ?1")
	public void updateAuthenticationType(String username, AuthenticationType authType);
}
For login using username (email) and password in database, code another authentication success handler as follows:
So that’s you have learned how to integrate social login function with Google and Facebook in a Spring Boot application via practical code examples. I hope you found this article helpful. To see the coding in action, I recommend you watch the following video:You can also download the reference project under the Attachment section below, or clone the sample project from this GitHub repo.
Nam Ha Minh is certified Java programmer (SCJP and SCWCD). He began programming with Java back in the days of Java 1.4 and has been passionate about it ever since. You can connect with him on Facebook and watch his Java videos on YouTube.
 Nam Ha Minh is certified Java programmer (SCJP and SCWCD). He began programming with Java back in the days of Java 1.4 and has been passionate about it ever since. You can connect with him on Facebook and watch his Java videos on YouTube.
Comments
i will be very helpful for me